
Container Gardens
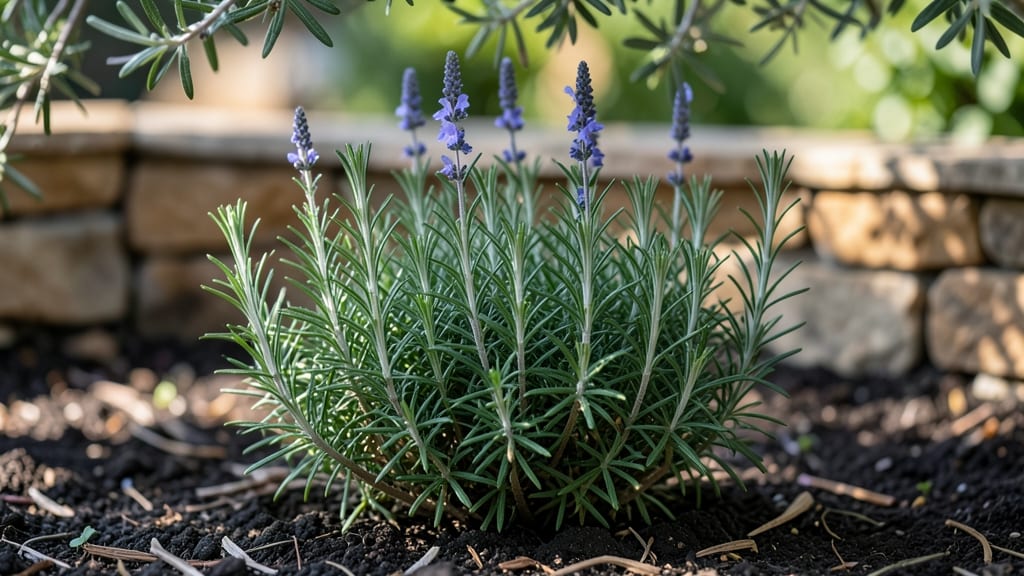
Master these rosemary growing instructions and you’ll have a fragrant, drought-tolerant herb that thrives with almost no effort once established—after my first attempt where I nearly drowned the plant (yes, rosemary hates soggy soil), I learned the simple tricks. rules that make it impossible to kill—whether you're growing it in pots or the ground.
The secret lies in three things: bright light (at least 6 hours of direct sun daily), well-draining soil (mix in perlite or sand), and watering only when the top inch feels dry.
Most people overwater, thinking rosemary needs constant moisture, but it’s actually a Mediterranean shrub that prefers dry spells. Start with a 4-6 inch pot for cuttings or a sunny windowsill indoors.
Within 6 weeks, you’ll see sturdy new growth and that signature piney aroma when you brush the leaves. Prune lightly after flowering to keep it bushy, and harvest sprigs whenever you need them for cooking or garnishes.
The first harvest will taste like nothing store-bought can match—bold, fresh, and intensely flavorful.
Works equally well in containers, raised beds, or as a border plant. The key is patience: rosemary grows slowly but rewards you with years of harvests. Here’s how to get started without the common mistakes I made first time around.
📚 In This Guide
- What you need
- Instructions
- Tips and common mistakes
- Wrapping up and next steps
What you need
- ● Rosemary plants: 1-3 healthy nursery-grown rosemary plants (choose Rosmarinus officinalis for culinary use). Opt for 4-6 inch pots with well-drained soil.
- ● Containers: 1-2 containers per plant (5+ gallon size for mature plants). Ensure they have drainage holes and are made of terracotta, ceramic, or fabric grow bags.
- ● Potting mix: 2-3 bags of well-draining cactus/succulent mix (or amend regular potting soil with perlite or coarse sand—1 part perlite/sand to 3 parts soil).
- ● Fertilizer: A balanced, slow-release fertilizer (e.g., 10-10-10 or organic options like fish emulsion). Use sparingly—rosemary dislikes excess nitrogen!
- ● Watering can: A narrow-spout can to avoid disturbing the soil.
- ● Pruning shears: Sharp, clean bypass pruners for trimming.
- ○ Gloves (optional): Garden gloves to protect your hands from prickly stems.
- ● Sunlight: A location with 6+ hours of full sun daily (rosemary thrives in south-facing windows or outdoor spots).
- ● Temperature: Ideal range: 60–90°F (15–32°C). Avoid frost (below 20°F/-7°C can kill it).
- ○ Water access: A drip irrigation system or self-watering container (optional but helpful for consistency).
Step-by-Step instructions for growing rosemary from start to harvest
Here's how to cultivate fragrant, thriving rosemary—whether you're starting from seed or propagating cuttings.
🌱 Step 1: Select and Prepare Your Rosemary Source
Rosemary grows best from cuttings rather than seeds, as it produces more robust plants faster. Choose a healthy, mature rosemary branch—look for wooden stems (not green) that are about 3-4 inches long with several leaf nodes. Snip just below a leaf node with clean, sharp pruners to encourage rooting.
Remove the lower leaves, leaving only the top 2-3 sets of foliage. This reduces moisture loss and directs energy toward root development. Dip the cut end in rooting hormone (optional but recommended) to speed up the process. If starting from seed, plant them ¼ inch deep in well-draining soil, but expect slower growth.
🪴 Step 2: Choose the Right Container and Soil Mix
Rosemary thrives in containers with excellent drainage. Use a pot with drainage holes that’s at least 6 inches deep—larger pots accommodate more established plants. Fill the container with a well-draining potting mix, ideally one formulated for Mediterranean herbs or cacti/succulents. Avoid garden soil, which compacts and retains too much moisture.
Add a handful of perlite or coarse sand to the mix to improve aeration. Rosemary hates soggy roots, so the soil should dry out between waterings. Fill the pot to within 1 inch of the rim, leaving room for the cutting or seedling. Gently press the soil down to create a stable base for planting.
☀️ Step 3: Plant and Provide Ideal Growing Conditions
Insert the rosemary cutting into the soil, burying it to a depth of 1-2 inches, ensuring the leaf nodes are covered. If planting seeds, space them 6-8 inches apart to allow for growth. Water lightly until the soil is evenly moist but not waterlogged. Place the container in a location with full sun exposure (6-8 hours daily)—rosemary is a sun lover and won’t thrive in shade.
The ideal temperature range for rosemary is 65-75°F. If your climate dips below 20°F, protect the plant from frost, as rosemary is not cold-hardy. Keep the soil lightly moist for the first 2-3 weeks, then reduce watering to allow the top 1-2 inches of soil to dry out before watering again. Overwatering is the fastest way to kill rosemary.
💧 Step 4: Monitor Growth and Maintain Proper Care
Within 3-4 weeks, you should see new growth emerging from the top of the cutting or seedling. This is your signal that the plant is establishing roots. Prune any leggy or overly long stems to encourage bushier growth. Rosemary responds well to pruning, so don’t hesitate to trim back one-third of the plant in early spring to promote new, fragrant foliage.
Fertilize lightly once a month during the growing season with a balanced, water-soluble fertilizer diluted to half strength. Rosemary doesn’t need much fertilizer—too much can harm the plant. Watch for signs of stress, such as yellowing leaves or wilting, which may indicate overwatering or insufficient light. Adjust your care routine accordingly to keep the plant healthy and vibrant.
✂️ Step 5: Harvest and Enjoy Your Fragrant Rosemary
You can begin harvesting rosemary once the plant is well-established, typically after 6-8 weeks of growth. Snip stems just above a leaf node to encourage new growth. Harvest in the morning after the dew has dried but before the heat of the day to preserve the plant’s essential oils and flavor. Use one-third of the plant’s growth as a guideline—never harvest more than that in a single session.
To dry rosemary, bundle the stems and hang them upside down in a dry, well-ventilated area away from direct sunlight. Once fully dried (usually 1-2 weeks), strip the leaves from the stems and store them in an airtight container. Fresh rosemary can be stored in the refrigerator for up to 2 weeks or frozen for longer-term use. Enjoy your homegrown herb in cooking, teas, or as a fragrant addition to your garden.
Tips & tricks for growing fragrant rosemary
A few simple strategies will help you avoid common pitfalls and maximize your rosemary's potential from start to harvest.
Cutting Selection: When choosing your rosemary source in Step 1, look for stems that are slightly woody but not completely hardened. These semi-woody stems root most reliably. Avoid using green, flexible stems—they're too immature and won't establish roots as effectively. The ideal cutting should bend slightly but not snap easily. I've found that morning-harvested cuttings often root better, possibly because the plant's natural moisture levels are higher at that time.
Soil Preparation: In Step 2, don't just rely on the potting mix alone—create a custom blend that mimics rosemary's natural Mediterranean environment. Mix equal parts of your well-draining potting mix with coarse sand or perlite. This 50/50 blend improves drainage while retaining just enough moisture. I've had the most success with a blend that feels almost gritty to the touch when dry. This texture prevents compaction and allows air to circulate around the roots, which is crucial for rosemary's health.
Watering Strategy: The watering schedule in Step 3 is critical but often misunderstood. After planting, keep the soil lightly moist for the first 2-3 weeks, but that doesn't mean constantly wet. The key is to water just enough to keep the top 1-2 inches of soil damp—like a wrung-out sponge. I've learned to check moisture by sticking my finger about an inch into the soil. If it feels dry, water; if it's still moist, wait. Overwatering is the number one reason rosemary cuttings fail, so err on the side of underwatering rather than overdoing it.
Sunlight Optimization: While rosemary requires full sun (6-8 hours daily), not all sunlight is equal. In Step 3, position your container where it gets morning sun and afternoon shade if you're in a particularly hot climate. The intense midday sun can scorch tender new growth. I've noticed that rosemary plants in southern exposures often need more frequent watering because they dry out faster. If you're growing indoors near a window, supplement with a grow light for 12-14 hours daily to compensate for lower light levels.
Pro Tips for Rosemary Growing Instructions
- A few simple strategies will help you avoid common pitfalls and maximize your rosemary's potential from start to harvest.
- Cutting Selection: When choosing your rosemary source in Step 1, look for stems that are slightly woody but not completely hardened.
- Soil Preparation: In Step 2, don't just rely on the potting mix alone—create a custom blend that mimics rosemary's natural Mediterranean environment.
Frequently asked questions
Can rosemary grow in containers year-round?
Yes! Rosemary thrives in containers, making it perfect for patios or balconies. Just ensure the pot has drainage holes and use well-draining soil. In zones 7-10, it’s hardy outdoors year-round. In colder climates, move pots indoors near a sunny window or bring them back outside in spring. Pro tip: Trim lightly in winter to encourage bushier growth!
How long does it take for rosemary to grow from seed?
Germination takes 2-4 weeks in warm soil (70°F+). Seedlings grow slowly at first—expect 6-8 weeks to harvest sprigs for cooking. For faster results, buy start plants (ready in 4-6 weeks). Patience pays off: mature plants yield abundant fragrant stems!
Why are my rosemary leaves turning yellow or brown?
Yellow leaves often signal overwatering (rosemary hates soggy roots!). Brown edges? It’s likely underwatering or low humidity. Check soil moisture—it should dry out between waterings. Fix it: Adjust watering (every 1-2 weeks) and place pots in bright, indirect light.
Can I use rosemary from my container garden for cooking?
Fresh rosemary adds bold flavor to roasts, soups, and marinades. Harvest tips: Snip stems just before cooking (they release more aroma when warm). Avoid woody stems—use the tender tips. Store pruned sprigs in the fridge (wrapped in a damp paper towel) for up to a week.
What’s a good alternative if rosemary doesn’t grow well in my climate?
Try thyme (drought-tolerant, similar flavor) or oregano (hardy and versatile). For a rosemary-like aroma, lavender works in teas or desserts. If you love the piney taste, sage is another great container-friendly herb!
Wrapping up and next steps
Growing rosemary is a rewarding journey that brings fragrant beauty to your space with minimal effort! With just a few weeks, you’ll enjoy fresh herbs perfect for cooking or gifting. Start small, stay consistent, and soon you’ll be harvesting aromatic sprigs like a pro.
Ready to dive in? Grab your supplies, pick a sunny spot, and watch your rosemary thrive! 🌱✨