
Pruning
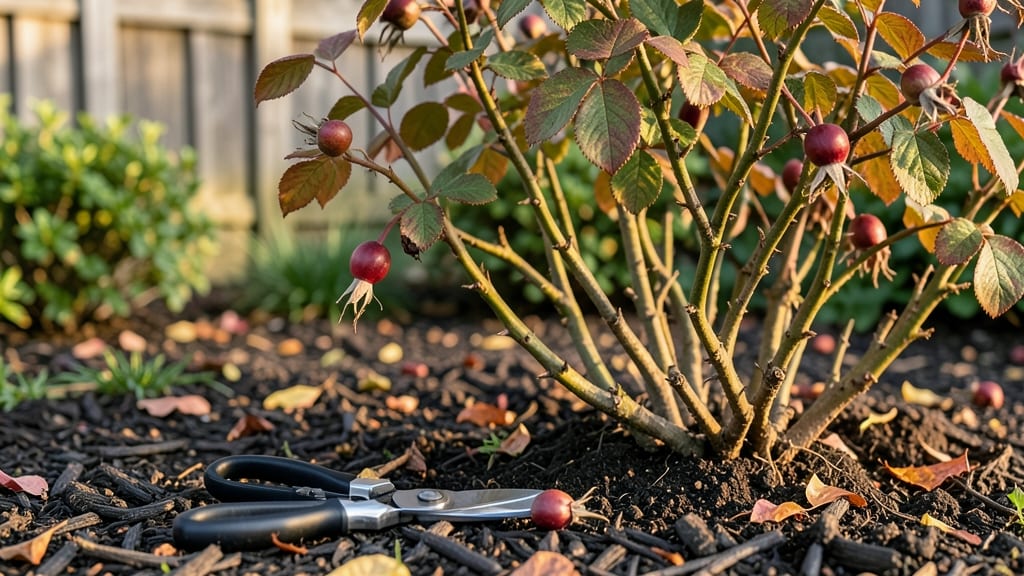
Trimming back rose bushes in fall isn’t just about looks—it’s the secret to helping them survive winter like a champ. ✂️ After years of watching roses struggle through cold snaps, I learned the right cuts make all the difference: stronger canes, fewer diseases. and blooms that explode in spring.
The key is timing and technique, not aggressive pruning.
Start when half the leaves have fallen but before hard frost hits—usually late October to November in most zones. You’ll need sharp pruners, rubbing alcohol (to sterilize cuts), and a bucket for trimmings.
The goal isn’t to strip them bare but to shape them like a natural vase, opening the center for airflow and sunlight.
You’ll end up with healthier plants that bounce back faster in spring, with fewer dead branches and fewer pests hiding in thick growth. The first flush of blooms arrives weeks earlier, and the bushes look neater and more structured all winter long.
Just avoid cutting into old wood—look for green or brown stems with buds.
Works for hybrid teas, floribundas, and shrub roses alike, though climbers need a gentler touch. Here’s how to do it right—no guesswork, just results. Let’s get those bushes ready for winter!
📚 In This Guide
- What you need
- Instructions
- Tips and common mistakes
- Wrapping up and next steps
What you need
- ● Pruning shears: Sharp, bypass-style shears (4–6" blades) for clean cuts. (1 pair required)
- ● Loppers: For thicker stems (1.5–2" cutting capacity). (1 pair recommended)
- ○ Pruning saw: Heavy-duty, curved blade for stubborn branches. (1 optional)
- ● Disinfectant: 70% rubbing alcohol or bleach solution (1:9 ratio) to sterilize tools between cuts.
- ● Garden gloves: Heavy-duty, cut-resistant (e.g., leather or Kevlar). (1 pair)
- ● Rake or broom: For clearing debris afterward. (1)
- ● Hand pruners: Smaller shears for delicate trimming (if you prefer ergonomic comfort).
- ● Pruning sealant: (e.g., tree wound paint) for large cuts (controversial—skip unless dealing with disease).
- ● Marking spray: Temporary paint to tag branches for removal.
- ● Compost bin: For repurposing pruned material.
- ● Weather check: Wait for a dry, mild day (50–65°F) to avoid stressing the plant.
- ● Tool sharpening: Hone shears/loppers for clean cuts (use a file or professional sharpening service).
- ● Safety first: Remove dead/diseased branches in a sealed bag before pruning healthy growth.
Instructions for trimming back rose bushes in fall
Here's how I prepare my roses for winter—stronger stems, fewer pests, and next year's blooms start now.
✂️ Step 1: Remove Dead, Diseased, and Weak Growth
Start by grabbing your bypass pruners and inspect each stem from base to tip. Snip off any blackened, mushy, or hollow canes—these are dead or diseased and won’t recover. You’ll notice healthy wood feels firm and has a smooth bark texture, while weak stems snap easily or ooze when cut.
Next, look for crossing branches or stems growing inward toward the center. These rub against each other, creating wounds where pests hide. Cut these out at the base, making your cuts at a 45-degree angle just above an outward-facing bud. This ensures water runs off and new growth heads outward, not inward.
I always work in sunny, dry conditions—never trim after rain or when the plants are wet. The goal here is to open up the center of the bush for airflow, which prevents winter rot. You’ll see the bush transform from a tangled mess into an open, airy structure by the time you’re done.
✂️ Step 2: Thin Out Overcrowded Canes
Roses bloom best when they have room to breathe. Count the canes—you want 3-5 strong, healthy stems per bush for hybrid teas and floribundas, and 5-7 for shrub roses. Remove the thinnest, oldest canes first; these are past their prime and won’t produce strong blooms.
Cut these canes flush with the ground using your pruners or loppers. For thicker stems, I use my loppers to avoid straining my hands. As you work, step back occasionally to check the bush’s shape. You’re aiming for a vase-like form, wider at the top than the base, with no gaps larger than your hand.
Here’s the thing—don’t overthink it. If you’re unsure, leave a cane. You can always trim more next spring. The key is to never leave stubs—always cut just above a bud or at the base. I mark my cuts with a white spray paint dot to spot any missed areas before winter.
☀️ Step 3: Lightly Prune for Winter Hardiness
For most rose varieties, wait until after the first hard frost to do your final light pruning. This helps the plant harden off naturally. Once frost hits, give the bush a final once-over, removing any remaining dead foliage or weak growth. Use your sterilized pruners to make clean cuts at a 45-degree angle, about ¼ inch above a bud facing outward.
Now’s the time to shape the bush for winter. I like to leave the stems about 18-24 inches tall for hybrid teas and floribundas, and 24-36 inches for shrub roses. This height protects the canes from winter winds while still allowing snow to slide off easily. Avoid heavy pruning now—you’re not trying to encourage new growth, just tidying up.
After trimming, clean up all debris from the base of the bush. Rake up leaves, spent blooms, and clippings—these harbor pests and diseases that could overwinter. I toss everything in the trash (not the compost) to prevent reinfesting my garden. Finish by applying a 2-3 inch layer of mulch around the base, keeping it 6 inches away from the stems to prevent rot.
Tips & tricks for perfect fall rose pruning
Took me years to figure out these little tricks—now my roses bounce back stronger every spring. Here's what nobody tells you about fall pruning.
Tool Prep: Sterilize your bypass pruners before you start by wiping them with rubbing alcohol. I keep a small spray bottle of 70% isopropyl alcohol in my gardening toolbox—it kills bacteria and fungal spores that can spread from plant to plant. Sharp tools matter too: dull blades crush stems instead of making clean cuts, which invites disease. Test your pruners on a scrap piece of wood before you begin.
Bud Identification: In Step 1 and Step 3, you'll see me mention making cuts just above an outward-facing bud. Here's how to spot them: look for small, plump bumps along the stem that point away from the center of the bush. These buds are where new growth will emerge. If you're unsure, gently squeeze the stem—healthy buds will feel firm, while dead ones will be soft or hollow. I always make my cuts about ¼ inch above the bud, which gives new shoots room to grow without competition.
Winter Shape Strategy: When shaping your roses in Step 3, think of them like an umbrella. You want the widest part of the bush (the "canopy") to be at the top, gradually tapering down to the base. This shape helps snow slide off easily and protects the plant from strong winter winds. For hybrid teas and floribundas, I leave them around 18-24 inches tall—tall enough to withstand snow load but not so tall they flop over in storms. Shrub roses get a bit more height at 24-36 inches since they're more sturdy.
Debris Disposal: After you've finished pruning, don't just pile those clippings in the compost bin. Rose debris is a magnet for pests and diseases that can overwinter and reinfect your plants next spring. I toss all prunings in the trash, especially if you noticed any signs of disease like black spots or powdery mildew. This one simple step makes a huge difference in how healthy your roses will be next season.
Pro Tips for Trimming Back Rose Bushes In Fall
- Took me years to figure out these little tricks—now my roses bounce back stronger every spring.
- Tool Prep: Sterilize your bypass pruners before you start by wiping them with rubbing alcohol.
- Bud Identification: In Step 1 and Step 3, you'll see me mention making cuts just above an outward-facing bud.
Frequently asked questions
Got questions about trimming your roses before winter? You’re not alone! Here are some of the most common concerns—and their answers—to help you prune with confidence.
When is the absolute latest I can trim my roses before winter?
In most climates, aim to finish pruning by mid-to-late November—before hard frosts hit. If you miss this window, wait until early spring (just before buds swell) to avoid exposing tender canes to freezing temps. Pro tip: Check your USDA hardiness zone for local deadlines!
Do I need to sterilize my pruners after trimming?
Yes!
Sterilizing tools (with rubbing alcohol or a 10% bleach solution) prevents spreading fungal diseases like black spot. Wipe blades before and after each bush, especially if you’ve pruned diseased foliage. Bonus: Sharpen blades too—dull tools tear stems, inviting infections.
What if I live in a cold climate with heavy snow? Should I prune differently?
In zones 5-7, prune lighter in fall (remove only dead/diseased wood) and do a heavier cut in early spring. For zones 3-4, delay pruning until late winter (after snowmelt) to protect canes from freeze-thaw damage. Key: Mulch heavily (3–4 inches) after trimming to insulate roots.
Can I skip fall pruning if I prune in spring instead?
While spring pruning works, fall trimming has big benefits: improved airflow (reducing disease), easier cleanup, and stronger growth next season. If you skip fall, at least remove dead/diseased wood to prevent winter pests. Trade-off: Spring pruning requires more aggressive cuts to shape bushes.
My roses are bleeding sap after pruning—is this normal?
Yes! Sap (or “rose bleed”) is harmless and happens when pruning too early (before dormancy). To minimize it, wait until temps drop below 50°F (10°C) at night. Fix: Prune on a dry day and avoid trimming wet canes—both worsen sap flow.
Wrapping up and next steps
Trimming back your rose bushes in fall isn’t just about tidying up—it’s a powerful way to ensure vibrant blooms next spring! 🌹 By following these three simple steps, you’ll protect your plants from harsh winters, encourage healthier growth, and set the stage for a stunning garden season ahead.
Now that you’re equipped with the right tools and techniques, there’s only one thing left to do:
- Grab your pruners and get started! A little effort now will reward you with show-stopping roses come spring.
Happy pruning—and here’s to a garden that steals the show! 🌿