
Tools
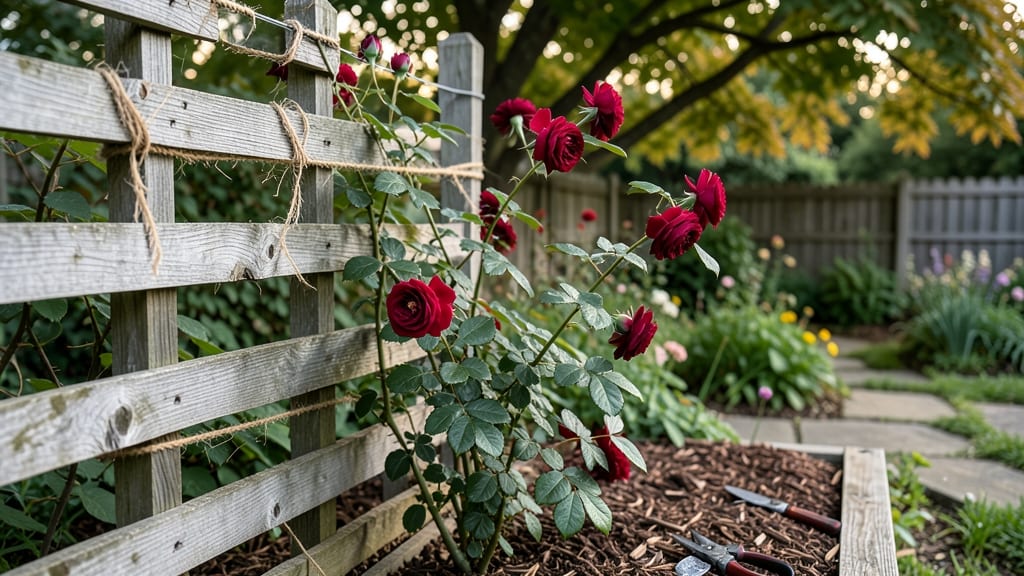
Training climbing roses on a trellis transforms bare walls into fragrant, velvety canopies that last for decades. ✨ I spent years wrestling with tangled vines until I learned the simple tying and pruning tricks that make this process foolproof—no green thumb required.
The key is guiding growth early: use soft ties (never wire) to gently bend canes along the trellis, and prune back overcrowded stems in late winter. Most beginners over-tighten the ties or prune too late, which stunts blooms.
My roses now produce 100+ blooms per season because I follow this exact routine. By summer, you'll have a structured framework where every stem finds support, and the fragrance fills your yard. The trellis becomes a living sculpture that improves with each passing year.
Works for any trellis height or style—whether you're covering a fence, arbor, or simple post. Here's how to get started without the guesswork.
📚 In This Guide
- What you need
- Instructions
- Tips and common mistakes
- Wrapping up and next steps
What you need
- ● Climbing Rose Plants: 1-3 bare-root or potted climbing roses (choose disease-resistant varieties like Blaze, New Dawn, or Zephirine Drouhin).
- ● Trellis: Wooden arbor (4-6 ft tall, 3-4 ft wide)
- ● OR metal/pvc trellis (galvanized for durability)
- ● OR obelisk (for vertical training)
- ● Stakes & Twine: 4-6 wooden/bamboo stakes (4-5 ft tall)
- ● Jute or plastic garden twine (50 ft roll)
- ● Pruning Tools: Bypass pruners (sharp, sterilized)
- ● Loppers (for thicker stems)
- ● Soil Amendments: Compost (1-2 bags)
- ● Rose-specific fertilizer (balanced NPK, 10-10-10)
- ● Mulch: Wood chips or straw (2-3 bags) to retain moisture.
- ● Rose Food: Slow-release granules for seasonal blooms.
- ● Plant Ties: Soft fabric ties (to avoid stem damage).
- ● Support Clips: Plastic or metal clips for securing canes.
- ● Watering System: Drip irrigation or soaker hose (for consistent moisture).
Step-by-step instructions for training climbing roses on a trellis
Here's how I turn wild, sprawling canes into a structured, fragrant canopy—no pruning drama, just elegant growth.
🪴 Step 1: Install the Trellis at the Right Height and Angle
Position your trellis where the climbing rose will receive 6+ hours of direct sun daily. I like to install mine with the base 2-3 feet from the fence or wall—this gives the plant room to establish roots before climbing. The trellis itself should be 6-8 feet tall—taller varieties need extra height for their full potential.
Angle the trellis slightly away from prevailing winds to prevent stem damage. If your trellis is freestanding, bury the base 12 inches deep—this anchors it against summer storms. Use the galvanized metal stakes> included with most trellis kits to secure it firmly before planting. The goal is a stable structure that won't sway when you tie in those heavy blooms later.
🌱 Step 2: Plant the Rose with Proper Spacing and Support
Dig a hole twice as wide> as the root ball but no deeper—climbing roses hate having their graft union buried. Gently loosen the roots if they're circling, then place the plant so the graft union (the swollen bump near the base) sits 2-3 inches above soil level—this prevents disease and encourages strong growth above ground.
Backfill with native soil mixed with 2 cups of compost, tamping lightly as you go. Water deeply until the soil settles. Here's the thing—I always install a small wooden stake> right next to the plant immediately. Tie the main cane to it with a soft jute twine> before the first bloom appears. This prevents the plant from flopping over while it establishes.
✂️ Step 3: Prune for Structure During the First Growing Season
Wait until spring's last frost before pruning new growth. Cut back any canes that grew last year to 5 eyes (buds) from the base—this encourages vigorous new shoots. For this year's growth, remove all but the 3-4 strongest canes, cutting just above a outward-facing bud. You'll see these buds as small bumps along the stem.
As new shoots emerge, watch for basal breaks>—these are side shoots growing from the base. These are gold for climbing roses. Let them grow until they reach 18-24 inches tall, then tie them to the trellis using the twine. I like to make a gentle figure-eight loop around the cane and trellis wire—this holds without cutting into the stem as it thickens.
🌿 Step 4: Guide Growth and Train Canes Weekly
Every 2-3 weeks> during growing season, inspect your rose and gently guide new growth toward the trellis. The key is to train 3-5 main canes> along the trellis wires. When canes reach the top, cut the tips back by one-third> to encourage branching—this creates that lush, layered look.
Here's where it gets fun—watch for lateral shoots growing from the main canes. These are your future blooms. When they reach 12-18 inches, tie them horizontally along the trellis wires. This creates a natural, cascading effect. Never let more than 2-3 canes> grow from any single point—crowding leads to weak stems and fewer flowers.
💧 Step 5: Maintain Through Bloom Season
Water deeply once weekly> during dry spells, aiming for 1-2 inches of water> per week. You'll know you're doing it right when the soil feels damp 6 inches down. Mulch with 2-3 inches of organic mulch> around the base to retain moisture and regulate soil temperature.
After each flush of blooms, deadhead spent flowers by cutting back to the first 5-leaflet leaf> below the bloom. This redirects the plant's energy into producing more flowers instead of seed pods. In late summer, fertilize with a balanced rose fertilizer> to encourage one final flush of fall blooms before dormancy.
Tips & tricks for training climbing roses on a trellis
A few simple tricks can transform your climbing rose from a tangled mess into a stunning vertical garden. Here's what nobody tells you—
Trellis Placement is Everything: That 6+ hours of direct sun isn't just about blooms—it's about survival. If your trellis gets afternoon shade, you'll notice weaker canes and fewer flowers. I always check sunlight patterns for at least 3 days before installing. Morning sun with afternoon shade works too, but east-facing trellises produce the most consistent blooms. The 2-3 feet spacing from walls isn't arbitrary—it gives roots room to spread without competing with the trellis for stability.
Root Ball Secrets: The graft union (that swollen bump) should sit 2-3 inches above soil level—this isn't optional. I've seen people bury it, and those roses always struggle with disease. When loosening circling roots, be gentle—you're not trying to destroy them, just encourage outward growth. That 2 cups of compost isn't just filler; it's the difference between a struggling plant and one that thrives. Mix it thoroughly with native soil to avoid pockets of rich compost that can burn roots.
Pruning Precision: Those 5 eyes you cut back to in Step 3 aren't random—they're the plant's growth engines. Each eye represents a potential new cane, and cutting to exactly 5 ensures you get strong, vertical growth without overcrowding. For the 18-24 inch basal breaks, I wait until they're sturdy enough to handle the twine. Too early, and you risk snapping them when you tie them to the trellis. The figure-eight loop is my favorite trick—it holds without cutting into the stem as it thickens, and you can adjust it as the cane grows.
Watering Wisdom: The 1-2 inches of water per week isn't about quantity—it's about consistency. I check soil moisture at 6 inches down with my finger, and that's the real test. If it's dry, it's time to water. The organic mulch does more than retain moisture—it regulates temperature and prevents soil-borne diseases from splashing onto the canes. I always pull mulch back slightly from the stem to prevent rot, but keep it thick around the base.
Pro Tips for Train Climbing Roses On A Trellis
- A few simple tricks can transform your climbing rose from a tangled mess into a stunning vertical garden.
- Trellis Placement is Everything: That 6+ hours of direct sun isn't just about blooms—it's about survival.
- Root Ball Secrets: The graft union (that swollen bump) should sit 2-3 inches above soil level—this isn't optional.
Frequently asked questions
Got questions about training climbing roses on a trellis?
You’re not alone! Here are answers to the most common ones—so you can grow a stunning, fragrant display with confidence.
When is the best time to start training climbing roses on a trellis?
The ideal time is late winter or early spring, just before new growth begins. This gives your roses a full growing season to establish strong canes and fill out the trellis. Avoid training in summer or fall, as the plant may be dormant or stressed.
How often should I prune climbing roses while training them?
Prune lightly every 4–6 weeks during the growing season to encourage upward growth and airflow. Remove any weak, crossing, or dead canes. After the first year, focus on shaping in late winter—cut back about 1/3 of the previous year’s growth to promote new blooms.
What if my climbing rose won’t climb or stays too bushy?
If your rose refuses to climb, check for overcrowding or lack of sunlight. Gently tie new canes to the trellis with soft plant ties, and prune side shoots to redirect energy upward. If it’s still stubborn, try a stronger trellis or a fan-trained approach for wider coverage.
Do I need to protect my trellis-trained roses in winter?
Yes! Mulch the base with straw or bark to insulate roots, and wrap canes loosely with burlap or fleece if temps drop below 20°F (-6°C). Avoid heavy mulch against the trellis—it can trap moisture and rot canes. Prune back dead wood in late winter for a fresh start.
Can I use a trellis for other climbing plants besides roses?
Trellises work great for clematis, jasmine, wisteria, or even grapes. Just adjust training methods—some vines (like wisteria) need heavier support, while roses benefit from regular pruning. Choose a trellis with spacious gaps for airflow, no matter the plant!
Wrapping up and next steps
Training climbing roses on a trellis is a rewarding way to create a stunning, fragrant garden feature—and you’ve got all the tools to succeed! 🌸 With patience, proper pruning, and a little creativity, your roses will flourish into a lush, vertical masterpiece.
Now that you’re equipped with the know-how, why not take the next step?
- Start small: Pick a single rosebush and practice your training techniques before expanding.
- Experiment: Try different trellis designs or rose varieties to see what thrives best in your space.
- Enjoy the process: Watching your roses climb and bloom is half the fun—soak in the satisfaction!
Grab your pruners and get growing—your future floral canopy awaits! 🌿