
Propagation
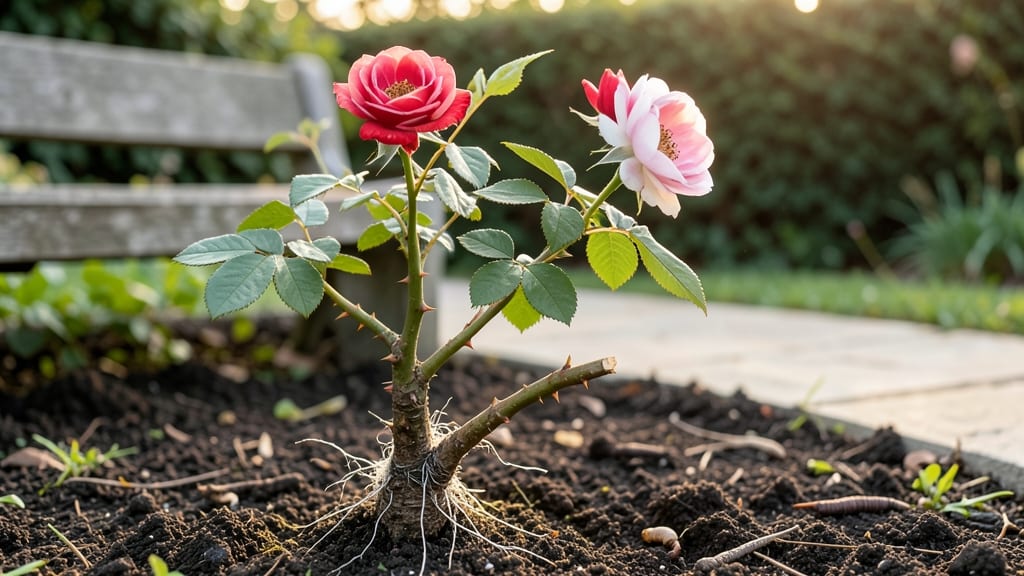
Root cut roses from mature plants in late fall when the garden winds down—this simple technique lets you multiply prized roses without spending a dime. ✂️ I’ve propagated dozens of roses this way, and the key is timing: wait until after the first hard frost when the plant’s energy retreats underground, but before the ground freezes solid.
The process starts with sharp pruners and a clear day—cut 4-6 inch sections of healthy roots with at least one bud. Dip the cut end in rooting hormone, then plant them in a protected spot until spring.
By June, you’ll see new shoots pushing through the soil, and within a year, those cuttings will bloom just like their parent plant.
📚 In This Guide
- What you need
- Instructions
- Tips and common mistakes
- Wrapping up and next steps
What you need
- ● Root cuttings: Healthy, disease-free rose roots (3–5 inches long, pencil-thick). Pro tip: Collect them in early spring or after the first frost for best results! 🌡️
- ● Rooting hormone: A powder or gel (e.g., Clonex or Rootone) to boost success rates.
- ● Well-draining potting mix: A blend of perlite, vermiculite, and peat moss (or a 50/50 mix of perlite and coconut coir).
- ● Small pots or trays: 4–6 inch pots (or a seedling tray with drainage holes).
- ● Plastic bags or domes: To create a humid microenvironment (clear plastic works great!).
- ● Spray bottle: For misting cuttings to keep them hydrated.
- ● Pruning shears: Sharp, clean shears (sterilize with rubbing alcohol!).
- ○ Labeling tags: To track rose varieties (optional but helpful!).
- ● Heating mat: Speeds up rooting (70–75°F ideal).
- ● Fungicide: Like Mycorrhizal inoculant to prevent rot.
- ● Grow lights: If natural light is limited (12–16 hours/day).
- ● Hydrogen peroxide (3%): For sterilizing cuttings (10-minute soak).
Step-by-Step instructions for propagating roses from root cuts
Here's my foolproof method for turning scraps into thriving roses—no fancy tools needed.
🪴 Step 1: Collect and Prepare Healthy Root Cuts
Choose a mature rose bush with strong, pencil-thick roots—these are your goldmine. The best time is late winter or early spring when the plant is dormant. Using clean, sharp pruners, cut 4-6 inch sections of healthy roots, ensuring each piece has at least one bud (that little bump where leaves grow). I always look for roots that are ½ inch thick or larger—they’ll root best.
Trim off any attached leaves or stems, then cut the bottom of each section at a 45-degree angle to increase surface area for root growth. This angled cut is key—it prevents the cutting from sitting flat in the soil and encourages new roots to form. Store your cuts in a plastic bag with a damp paper towel until ready to plant.
🌱 Step 2: Soak Cuts to Boost Root Growth
Fill a container with room-temperature water and add a rooting hormone (optional but helpful). Submerge the angled ends of your cuts for 4-6 hours—this hydrates the cells and kickstarts root development. I like to swirl the water occasionally to oxygenate it, which keeps the cuts from rotting.
After soaking, let the cuts drain for 10-15 minutes before planting. This prevents waterlogging, which can suffocate the roots before they even start. You’ll notice the cut ends look slightly plump—this is your sign they’re ready for the next step.
☀️ Step 3: Plant Cuts in Moist, Well-Draining Soil
Fill small pots (3-4 inches deep) with a mix of 50% potting soil and 50% perlite—this ensures drainage while holding moisture. Make a hole with your finger, then insert each cut 2-3 inches deep, angling the bottom cut upward. Gently firm the soil around the base to eliminate air pockets.
Water lightly until the soil feels evenly moist but not soggy. Place the pots in a bright, indirect light spot—think morning sun with afternoon shade. Too much direct light now can stress the cuts before roots form. I cover the pots with a plastic bag secured with a rubber band to create a mini greenhouse, trapping humidity and warmth.
💧 Step 4: Maintain Humidity and Monitor Growth
Keep the soil consistently moist—not wet, not dry. Mist the cuts every 2-3 days and remove the plastic bag for 10 minutes daily to prevent mold. In 4-8 weeks, you’ll see new shoots emerging from the buds. This is your reward—root growth is happening below the soil!
Once shoots reach 2-3 inches tall, it’s time to transplant. Gently remove the cut from the pot and check for roots—you’ll see white, fuzzy root tips if it’s ready. If roots are sparse, give it another 2 weeks before transplanting into larger pots or the garden.
✂️ Step 5: Harden Off and Plant Outdoors
Move the rooted cuts outside for 1-2 hours daily, gradually increasing time over 2 weeks. This hardening-off process prepares them for full sun. Choose a partly sunny spot in your garden—roses love 6+ hours of morning sun but appreciate afternoon shade in hot climates.
Plant at the same depth they were in pots, water deeply, and mulch around the base to retain moisture. Your new roses will bloom in 1-2 seasons, but the best part? You’ve doubled your garden for free. Real talk: Patience pays off—skip the hardening step, and you’ll risk shock and wilting.
Tips & tricks for perfect root cut roses
Here's what nobody tells you about turning scraps into stunning new roses—these tricks make all the difference.
The Cutting Edge: When making your 4-6 inch root cuts in Step 1, look for roots that snap cleanly when bent—this indicates they're healthy and ready to propagate. Avoid cuts that feel mushy or have dark spots, as these won't root well. I've found that roots with a slight sheen (from moisture) tend to root faster than dry ones.
Soaking Secrets: During the 4-6 hour soak in Step 2, change the water after 3 hours if it starts looking cloudy. This keeps the water fresh and prevents bacteria buildup that can rot your cuts. The angled ends should look slightly swollen by the end—this is your sign they're absorbing water properly. Don't skip the 10-15 minute drain time after soaking, even if it seems like a hassle.
Lighting Strategy: For Step 3's bright, indirect light, I recommend placing your pots near an east-facing window where they'll get gentle morning sun. If you don't have windows that work, a grow light on a timer for 12 hours daily is a great alternative. The key is avoiding direct midday sun, which can scorch tender new growth before roots even form.
Hardening Off Hack: In Step 5, I like to start the hardening process by placing pots in a sheltered outdoor spot during the coolest part of the day—early morning or late afternoon. Gradually move them to sunnier spots as they acclimate. This slow transition prevents sunburn shock that can kill new plants before they even get established.
Pro Tips for Root Cut Roses
- Here's what nobody tells you about turning scraps into stunning new roses—these tricks make all the difference.
- The Cutting Edge: When making your 4-6 inch root cuts in Step 1, look for roots that snap cleanly when bent—this indicates they're healthy and ready to propagate.
- Soaking Secrets: During the 4-6 hour soak in Step 2, change the water after 3 hours if it starts looking cloudy.
Frequently asked questions
Got questions about root cut roses? You’re not alone—propagation can feel tricky at first! Here are some of the most common queries (and answers) to help you grow confidently.
What’s the best time of year to take root cuttings from roses?
The ideal window is late spring or early summer (May–June in most climates). This gives roots time to establish before winter. Avoid cutting in extreme heat or frost—roots need warmth (60–70°F) and moisture to thrive. Pro tip: Morning cuts prevent wilting!
Do I need to use rooting hormone for root cuttings?
Not mandatory, but it dramatically boosts success rates (especially for stubborn varieties like hybrid teas). Dip the cut end in hormone powder or gel before planting. If skipping it, ensure high humidity (use a plastic bag or propagator) to mimic natural conditions. Pro tip: Focus on the basal (bottom) nodes—they’re the powerhouses for new roots!
How often should I water root cuttings, and how do I know they’re rooted?
Keep soil consistently moist (not soggy) by watering lightly every 2–3 days. Check for roots in 4–6 weeks: gently tug the cutting—resistance = success!. Healthy roots also mean new leaves (though some varieties take longer). Troubleshoot: Yellowing leaves? Too much light or overwatering!
Can I propagate roses from store-bought flowers?
Yes! Even cut flowers can root if you act fast. Strip leaves from the stem, dip in hormone, and plant in moist soil. Place in bright, indirect light (no direct sun). Success rates vary—some varieties (like Knock Out roses) root easier than others. Warning: Avoid treated blooms (sprayed with preservatives).
What if my root cuttings rot or mold?
Rotting or mold (fuzzy white/green growth) usually means too much moisture or poor airflow. Fix it by:
- Repotting in fresh, sterile soil.
- Trimming blackened/mushy stems with clean scissors.
- Moving to a shady, well-ventilated spot.
Wrapping up and next steps
Growing root cut roses is a rewarding way to multiply your favorite blooms with minimal effort—and now, you’ve got all the propagation secrets to succeed! 🌱 Whether you’re a beginner or a seasoned gardener, these techniques ensure healthy new plants with vibrant roots.
The key is patience, precision, and a little love for your roses.
Ready to transform your garden? Start by selecting the healthiest roots this season and put your newfound knowledge into action. Before you know it, you’ll be sharing (or gifting!) lush, thriving roses that keep on giving year after year. Happy propagating! 🌸