
Blooming
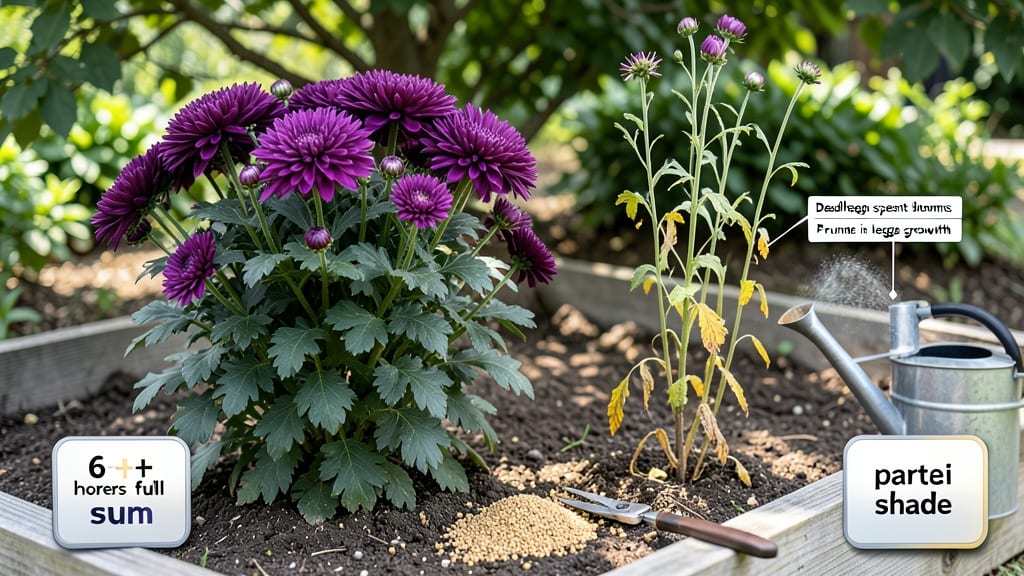
Your mums refuse to bloom again—and it’s not their fault. 🌼 The secret to reviving them lies in heat, light, and timing, not just wishful thinking.
After years of struggling with flopped blooms, I cracked the code by mimicking their natural growing cycle, and now my mums put on a second show every fall.
Most gardeners overlook the heat trigger: mums need consistent daytime temperatures above 75°F to set buds. Pair that with 6+ hours of morning sun (afternoon shade helps in hot climates), and you’ve got the foundation.
Prune back last year’s growth in early spring, but leave 3-4 sets of leaves—this keeps energy flowing where it counts.
Feed them right, too. A balanced 10-10-10 fertilizer every 4-6 weeks from spring through summer builds strength, while low-phosphorus food (like 5-10-10) in late summer shifts energy to blooms. Pinch back new growth in early June to encourage bushier, flower-heavy stems—this is where most gardeners go wrong.
By late summer, your mums should be packed with buds. If they’re not, check for crowded roots (divide them) or overwatering (they hate soggy soil). With these tweaks, you’ll have vibrant blooms from September through frost—no more sad, leafy stalks. Let’s get those flowers back!
📚 In This Guide
- What you need
- Instructions
- Tips and common mistakes
- Wrapping up and next steps
What you need
- ● Dormant mum plants: Healthy, browned, or wilted chrysanthemum plants (ensure they’re disease-free). Quantity: 1 or more per container.
- ● Well-draining potting mix: A high-quality blend designed for perennials or flowering plants. Specification: Look for mixes with perlite, vermiculite, or sand for aeration. Quantity: Enough to fill your chosen containers (typically 1-2 cubic feet per plant).
- ● Containers or garden beds: Containers: 12-16 inch pots with drainage holes (plastic, terracotta, or fabric grow bags). Quantity: 1 per mum.
- ● Garden beds: A sunny, well-prepared bed with loose, fertile soil. Size: At least 12 inches deep and wide per plant.
- ● Slow-release fertilizer: A balanced, low-nitrogen option (e.g., 10-10-10 or 5-10-10). Quantity: Follow package instructions (usually 1-2 tbsp per plant).
- ● Watering can or hose with a gentle spray nozzle: For even moisture without damaging the plants.
- ● Pruning shears or sharp scissors: Sterilized and clean to avoid spreading disease.
- ○ Heat mat or heat source (optional but recommended): For indoor reblooming: A seedling heat mat (set to 70-75°F) or a sunny windowsill (south-facing).
- ● For outdoor reblooming: A temporary greenhouse, cold frame, or row covers to trap heat.
- ○ Thermometer (optional): To monitor soil or ambient temperature (ideal range: 65-75°F for reblooming).
- ● Epsom salt: 1 tbsp dissolved in water for magnesium boost (apply every 4-6 weeks).
- ● Compost or worm castings: For extra nutrients (mix 10% into potting soil).
- ● Plant growth regulators (e.g., B-Nine): To encourage bushier blooms (follow label instructions).
- ● Mulch (straw or shredded bark): To retain moisture and regulate soil temperature.
- ● Grow lights: If indoor reblooming lacks natural sunlight (LED or fluorescent, 12-14 hours/day).
Step-by-Step instructions for reviving dormant chrysanthemums
Here's the method I use every year to coax those stubborn mums back into vibrant bloom.
🌱 Step 1: Prune Back Dormant Growth
Start by cutting back all dead or brown foliage to about 2-3 inches above the soil line. This isn't just about looks—it removes energy-draining debris and signals the plant to focus on new growth. I use clean, sharp pruners to make clean cuts just above a leaf node where new buds can form.
If your mums have any remaining healthy stems, trim those back by half their height. This reduces stress on the plant while encouraging a bushier, more vigorous regrowth. Avoid cutting into woody stems—they won't regenerate. You'll know you're doing it right when you see fresh green growth emerging within 2-3 weeks.
☀️ Step 2: Provide Heat and Light for Dormancy Break
Mums need consistent warmth to break dormancy. Move your plants to a location where they'll receive at least 6 hours of direct sunlight daily. A south-facing window or patio works best. If your climate still has cool nights, consider using a grow light for 12-14 hours per day to maintain warmth.
Here's the thing—mums need daytime temperatures above 70°F to trigger blooming. If your mornings are still chilly, group the pots together to create a microclimate that retains heat. Watch for new leaf growth as your signal that the plant is waking up. Once you see 2-3 inches of fresh green, you're on the right track.
💧 Step 3: Adjust Watering for Revitalization
After pruning, water deeply but sparingly—once every 5-7 days—until you see new growth. Overwatering now can lead to root rot, especially in cooler conditions. Let the top 1-2 inches of soil dry out completely between waterings. You'll know you're doing it right when the soil feels slightly dry to the touch.
Once new growth appears, increase watering to every 3-4 days, keeping the soil evenly moist but not soggy. Mums are drought-tolerant, but they need consistent moisture to support new blooms. I like to water in the morning so the foliage has time to dry before evening, which helps prevent fungal issues.
✂️ Step 4: Fertilize for Bloom Production
Feed your mums with a balanced, water-soluble fertilizer (10-10-10 or 20-20-20) diluted to half-strength. Apply this every 2 weeks once new growth reaches 4-6 inches tall. The key is consistency—mums need steady nutrients to produce those showy blooms. I avoid high-nitrogen fertilizers, as they encourage leafy growth at the expense of flowers.
Watch for signs of nutrient deficiency, like yellowing leaves or stunted growth. If you see this, switch to a low-nitrogen, high-phosphorus fertilizer (like 5-10-5) to encourage flowering. Stop fertilizing 6-8 weeks before your first expected frost to allow the plant to harden off for winter.
🌿 Step 5: Deadhead and Encourage Rebloom
As your mums produce flowers, deadhead spent blooms by cutting the stem back to the nearest leaf node. This redirects the plant's energy into producing new blooms instead of seeding. I do this every 2-3 days during peak bloom to keep the plant looking tidy and encourage continuous flowering.
For a second flush of blooms, pinch back any remaining stems by half their height once the first wave of flowers fades. This trick works best if done 4-6 weeks after the initial bloom. You'll see new buds forming within 3-4 weeks if the plant has enough energy stored. Just remember—reblooming mums need more care than once-a-year varieties, so be prepared for extra attention.
Tips & tricks for reviving dormant chrysanthemums
Real talk: Bringing mums back to life takes patience, but these small details make all the difference between a sad, leafless plant and a vibrant bloomer.
Pruning Precision: In Step 1, when trimming back those dead stems to 2-3 inches, make your cuts just above a leaf node—this is where new growth emerges. I use a clean pair of pruners and sterilize them with rubbing alcohol between plants to prevent spreading disease. The goal is to remove only what's dead or brown; any green stem has the potential to regrow. If you're unsure whether a stem is dead, gently scratch it with your fingernail—if it's brown and crumbly inside, it's gone.
Heat Hack for Stubborn Plants: The 70°F daytime temperature in Step 2 isn't just arbitrary—it's the magic threshold that triggers blooming. If your mornings are still chilly, try placing your mums near a sunny window with a heat mat underneath (set to low). I've revived mums in cooler climates by using a small space heater on a timer for just 2-3 hours in the morning, then turning it off. Just don't let the soil get too hot—it should feel warm to the touch, not scorching.
Watering Wisdom: That 5-7 day watering schedule in Step 3 can be tricky if you're not used to drought-tolerant plants. The key is to check the soil with your finger—if the top 1-2 inches feel dry, it's time to water. I like to use the "poke test": Stick your finger about an inch into the soil. If it comes out clean, water; if it's damp, wait. Overwatering at this stage is the #1 reason mums fail to rebloom—it causes root rot before the plant has a chance to recover.
Fertilizer Timing: Don't start fertilizing until you see that 4-6 inch new growth in Step 4. Before then, the plant is still conserving energy. Once you begin, stick to that every-2-week schedule religiously—mums are heavy feeders when they're pushing blooms. I've found that mixing in a handful of compost into the soil at this stage gives an extra boost without overwhelming the plant. And remember: the 6-8 week cutoff before frost is non-negotiable—it gives the plant time to harden off naturally.
Pro Tips for Get Your Mums To Bloom Again
- Real talk: Bringing mums back to life takes patience, but these small details make all the difference between a sad, leafless plant and a vibrant bloomer.
- Pruning Precision: In Step 1, when trimming back those dead stems to 2-3 inches, make your cuts just above a leaf node—this is where new growth emerges.
- Heat Hack for Stubborn Plants: The 70°F daytime temperature in Step 2 isn't just arbitrary—it's the magic threshold that triggers blooming.
Frequently asked questions
Got questions about reviving your dormant mums (chrysanthemums) and coaxing those vibrant blooms back? You’re not alone! Here are answers to the most common queries to help you succeed—without the guesswork.
When is the best time to trigger rebloom in my mums?
The ideal window is 6–8 weeks before your target frost date (late summer for fall blooms). Start with heat treatment (like a warm soak or greenhouse exposure) in early July for late-September/October flowers. Pro tip: Adjust timing based on your climate—cooler regions may need an earlier start.
What if my mums don’t bloom after heat treatment?
Don’t panic! Common culprits include overcrowded roots, poor light, or nutrient deficiencies. Try these fixes:
- Repot if roots are circling.
- Move to 6+ hours of direct sun daily.
- Fertilize with low-nitrogen, high-phosphorus (like 5-10-5) every 2 weeks.
Can I use alternatives to heat treatment for reblooming?
Try these low-effort methods:
- Pruning: Cut back stems by ⅓ in early summer to stimulate fresh shoots.
- Cold shock: Place pots in a 40–50°F area for 2–3 weeks (mimics dormancy).
- Fertilizer shock: Use a high-potassium formula (like 0-0-50) to jumpstart blooms.
How often should I water mums during rebloom?
Keep soil consistently moist but not soggy—aim for 1 inch of water per week (adjust for rain). Overwatering causes root rot, while underwatering stresses plants. Test the soil: Stick your finger 1–2 inches deep; if dry, water deeply. Mulch helps retain moisture!
Will reblooming mums survive winter after treatment?
Yes! Heat-treated mums are hardier and often bounce back better. Key steps:
- Cut back dead stems in late fall.
- Mulch 3–4 inches around the base.
- Move pots to a protected spot (garage or insulated area) if temps drop below 20°F.
Wrapping up and next steps
Bringing your dormant mums back to life is totally doable with patience, the right techniques, and a little love! 🌸 Whether you’ve mastered heat treatments, pruned like a pro, or tweaked their care routine, the key is consistency—your plants will thank you with vibrant blooms.
Now that you’re armed with the secrets, take action this season and give your mums the second chance they deserve.
Next step: Pick one method from this guide (like heat therapy or soil prep) and start today—your garden’s summer spectacle is waiting! 🌞