
Shrubs
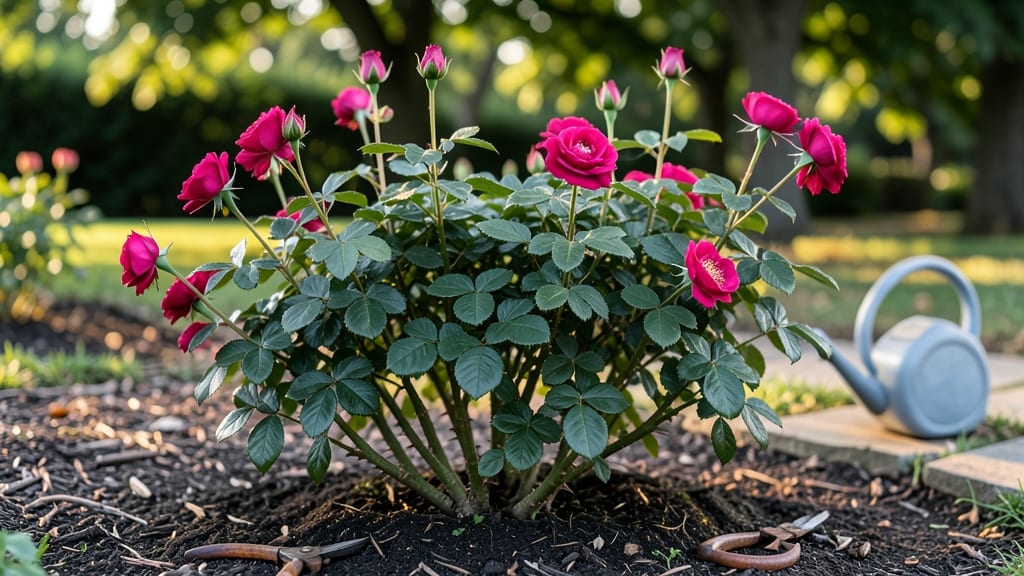
The growth habit of a rose determines everything—from how you prune it to where you plant it. 🌹 My first climbing rose, 'New Dawn,' scaled a trellis like a living tapestry, its velvety petals brushing my fingertips as I walked by.
That experience taught me how much the growth habit shapes the romance of a rose garden.
Roses grow in five main habits: climbers (like 'Blaze' or 'Zephirine Drouhin'), shrubs (such as 'Knock Out' or 'David Austin'), standards (tree-like roses), ground covers (like 'Dr. Huey'), and miniature roses.
Each habit needs different support—climbers need sturdy trellises or arbors, while shrubs thrive with open space. The key? Matching the plant's natural growth to your garden's structure.
With the right framework, a climbing rose can reach 15-20 feet, while shrubs stay compact at 3-5 feet. Pruning climbers early directs their energy upward, while shrubs benefit from open-center cuts. The result? A garden that feels like a living sculpture—each rose playing its part in the design.
Whether you have a small balcony or a sprawling yard, understanding these habits helps you place roses where they'll thrive. Next, we'll dive into how to train each type for maximum beauty and fragrance—without the guesswork.
📚 In This Guide
- What you need
- Instructions
- Tips and common mistakes
- Wrapping up and next steps
What you need
- ● Climbing Roses: Choose disease-resistant varieties like Blaze, New Dawn, or Zephirine Drouhin (3-5 plants, depending on desired coverage).
- ● Support Structure: Trellis (6-8 ft tall, 4-6 ft wide)
- ● OR Arbors, pergolas, or obelisks (ensure sturdy construction)
- ● PVC pipes or wooden stakes (for DIY setups, 4-6 ft long)
- ● Potting Soil: 50 lbs of well-draining, organic-rich soil (mix garden soil with compost or coconut coir).
- ● Fertilizer: Balanced granular fertilizer (10-10-10, 1 lb per plant)
- ● OR Slow-release rose-specific fertilizer (follow package instructions)
- ● Mulch: 2-3 inches of wood chips or straw to retain moisture.
- ● Pruning Tools: Bypass pruners (sharp, clean)
- ● Loppers (for thicker stems)
- ● Tying Materials: Soft plant ties or garden twine (avoid wire—it can damage bark!)
- ● Gloves: Heavy-duty gardening gloves (to protect from thorns).
- ● Watering Can or Hose: With a gentle spray nozzle (roses hate soggy roots!).
- ● Sunlight Spot: Full sun (6+ hours daily) and partial shade (morning sun + afternoon shade in hot climates).
- ○ Drip Irrigation (Optional): For consistent moisture (especially in dry climates).
- ● Pest Control: Neem oil or insecticidal soap (for aphids/mites)
- ● Copper fungicide (to prevent black spot)
Understanding the growth habit of a rose: how to train vines for maximum beauty
Here's how I've learned to work with rose vines—because their natural growth patterns make all the difference in creating a stunning, fragrant display.
🌱 Step 1: Identify Your Rose's Natural Growth Pattern
Roses fall into three primary growth habits: climbing, shrub, or rambling. Climbing roses grow long, flexible canes that need support to reach their full potential, while shrub roses grow bushy with multiple stems. Rambling roses send out long, arching canes that can sprawl or climb but require more aggressive pruning.
Look at the plant's structure: if you see long, flexible stems that naturally wrap or twist around objects, you're dealing with a climbing rose. These vines can grow 15-25 feet if given the right support. I always check the plant tag or research the variety—some roses, like 'New Dawn,' are known for their climbing habit and produce stunning blooms along the entire length of the cane.
🪴 Step 2: Choose the Right Support Structure
Climbing roses need a strong, sturdy framework to guide their growth. I prefer obelisks, trellises, or arbors because they provide vertical support while allowing airflow to prevent fungal diseases. For a single rose, a 6-foot obelisk works perfectly, while a 10-foot arbor can support multiple vines.
Install the support structure at planting time—bury the base 12-18 inches deep and secure it with stakes or a heavy base. Avoid flimsy structures like wire fencing; they bend under the weight of heavy blooms. If you're working with an existing rose, you may need to temporarily support the canes with soft ties while you reinforce the permanent structure.
☀️ Step 3: Train Vines Along the Support
Once your rose is established, select 3-5 of the strongest, healthiest canes to train along the support. These will become your main framework. Use soft plant ties or rubber bands to gently guide the canes upward—never wrap them tightly, as this can restrict growth and damage the bark.
Here's the trick: tie the canes at a 45-degree angle to the support. This encourages them to grow upward while also allowing them to spread slightly, creating a fuller, more lush appearance. As the canes grow, loosen the ties every few weeks to prevent them from cutting into the stems. You'll see the vines naturally twist and curl around the support as they mature, creating that classic climbing rose look.
✂️ Step 4: Prune for Optimal Growth and Bloom
Pruning climbing roses is all about encouraging strong, upward growth while maintaining airflow. In late winter or early spring, cut back any dead, weak, or crossing canes. For healthy canes, prune back by about one-third to stimulate new growth. This is also the time to remove any suckers—those low-growing shoots that appear at the base of the plant.
During the growing season, pinch back new growth to encourage branching. Look for buds that form at a 45-degree angle—these will produce the strongest canes. Avoid heavy pruning in summer, as this can reduce flowering. Instead, focus on removing spent blooms (deadheading) to encourage more flowers. You'll notice a surge in new growth and blooms within 4-6 weeks of proper pruning.
💧 Step 5: Monitor and Adjust for Seasonal Changes
Climbing roses are heavy feeders, so they need regular watering and fertilization to support their vigorous growth. Water deeply once a week during dry spells, ensuring the soil stays moist but not waterlogged. Mulch around the base of the plant to retain moisture and regulate soil temperature.
In late fall, reduce watering slightly and apply a balanced fertilizer to prepare the plant for dormancy. As winter approaches, loosely wrap the base of the plant with burlap or straw to protect it from freezing temperatures. In early spring, remove the winter wrap and check the ties—adjust them as the new growth begins to push through. You'll see fresh, vibrant leaves and buds within 2-3 weeks, signaling that your rose is ready for another season of lush, fragrant blooms.
Tips & tricks for training climbing roses
Working with climbing roses reveals their true potential—here's what I've learned to transform sprawling vines into stunning vertical displays.
The Support Structure Secret: When installing your 6-foot obelisk or 10-foot arbor, use concrete blocks or heavy stakes to anchor it—this prevents wobbling that can stress the plant. I've seen many gardeners skip this step, only to watch their support topple under summer storms. For existing roses, temporarily use soft garden twine tied to sturdy posts while you install permanent supports.
Angle Matters: The 45-degree angle mentioned in Step 3 isn't just arbitrary—it creates the perfect balance between upward growth and outward spread. Think of it like training a dancer: too vertical and they'll be stiff, too horizontal and they'll sprawl. I've found that adjusting ties to this angle in early summer gives the most dramatic results by fall. Use a small carpenter's square to check your angles if you're perfectionist like me.
Pruning Precision: That one-third pruning back in late winter might seem drastic, but it's what triggers the most vigorous new growth. Look for canes that are pencil-thick or slightly thicker—these are your powerhouses. I always make my cuts just above an outward-facing bud at a 45-degree angle. This simple technique ensures your new growth will spread beautifully rather than growing inward toward the center of the plant.
Seasonal Transition Tip: When wrapping your rose for winter, leave the top 12-18 inches of the plant uncovered. This prevents snow buildup that can break tender canes. In early spring, I check the ties immediately after removing winter protection—you'll often find they've loosened over winter, and need retightening before new growth begins. This small attention to detail makes all the difference in spring blooming.
Pro Tips for Growth Habit Of A Rose
- Working with climbing roses reveals their true potential—here's what I've learned to transform sprawling vines into stunning vertical displays.
- The Support Structure Secret: When installing your 6-foot obelisk or 10-foot arbor, use concrete blocks or heavy stakes to anchor it—this prevents wobbling that can stress the plant.
- Angle Matters: The 45-degree angle mentioned in Step 3 isn't just arbitrary—it creates the perfect balance between upward growth and outward spread.
Frequently asked questions
Got questions about coaxing the perfect growth habit from your climbing roses? Here are some of the most common queries—and their answers—to help you nurture those fragrant vines into a stunning vertical display!
How do I encourage my rose to climb faster?
Patience and consistency are key! Prune back long canes in early spring to stimulate new growth, and tie the strongest shoots to the trellis or arbour gently with soft plant ties. Feed with a balanced rose fertilizer every 4–6 weeks, and ensure it gets at least 6 hours of sunlight daily. Avoid overwatering—soil should stay moist but not soggy.
When is the best time to train a rose to climb?
The ideal window is late spring or early summer, once the plant has established 3–4 healthy canes (about 12–18 inches long). This gives the rose energy to grow upward while still being flexible. Avoid training in fall or winter, as dormancy slows growth. Pro tip: Start training young roses immediately after planting to avoid struggling with thick, woody stems later!
Can I use any climbing structure for roses?
Not all frameworks work equally well! Roses need sturdy, breathable support—think arbors, trellises, or obelisks made of metal, wood, or plastic. Avoid flimsy materials like bamboo or wire alone, as they can’t handle the weight of blooms. For heavy climbers (like Rosa ‘New Dawn’), opt for a thick wooden lattice or a metal cage. DIY tip: Wrap trellis posts in coconut coir for a natural, rustic look!
Why isn’t my rose climbing, even though I’ve tied it up?
Several factors could be at play: lack of sunlight, poor soil nutrition, or overcrowded roots. Check for yellowing leaves (a sign of nitrogen deficiency) and amend soil with compost. If the plant is producing lots of basal shoots but no vertical growth, prune back these horizontal stems to redirect energy upward. Also, ensure ties aren’t too tight—they should allow the cane to thicken naturally over time.
How often should I prune a climbing rose for the best habit?
Prune twice a year: lightly in summer (after flowering) to remove dead or crossing branches, and heavily in late winter/early spring (before new growth starts). Aim to cut back about ⅓ of the plant’s height to encourage bushier, upward growth. Always use clean, sharp shears and make cuts at a 45° angle just above an outward-facing bud. Never prune in fall—it stimulates tender growth that won’t survive frost!
Wrapping up and next steps
Understanding the growth habit of a rose is your first step toward cultivating a stunning, fragrant garden!
Whether you’re training vines to climb trellises or shaping bushes, the key lies in patience, proper pruning, and a supportive framework. 🌹 With the right techniques, your roses will thrive, rewarding you with vibrant blooms and lush foliage year after year.
Ready to transform your space? Start by selecting the perfect climbing rose variety and gathering your tools. Then, roll up your sleeves—your garden’s masterpiece is waiting!