
Pruning
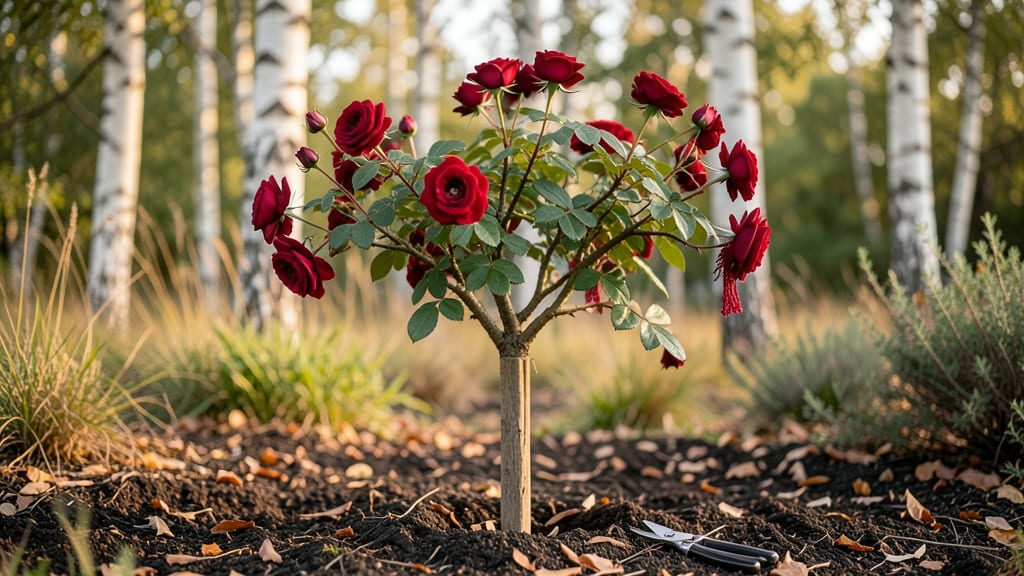
A graft rose tree transforms your garden into a living sculpture that blooms year-round. 🌹 I’ve spent years perfecting this technique—once you master the precision cuts, you’ll create roses that outperform store-bought bushes by seasons.
The key lies in timing (late summer for budding, early spring for whip-and-tongue) and choosing strong rootstock that anchors your prized variety.
You’ll need sharp tools (a grafting knife, rubber bands, and grafting tape), a healthy rootstock (like Dr. Huey or Multiflora), and scion wood from your favorite rose. The process takes patience—budding requires careful alignment, while whip-and-tongue needs clean, slanted cuts.
But once the graft takes (usually within 2-3 weeks), you’ll have a plant that combines hardiness with showstopping blooms.
What you’ll end up with is a compact, disease-resistant rose tree that produces more flowers than traditional bushes. Imagine climbing roses that bloom from spring until frost, with varieties you’d never find in nurseries.
The best part? You control the shape—prune aggressively in late winter to encourage new growth and keep it lush.
Works for any climate (zones 5-9), though timing shifts slightly north vs. south. Start with one graft to build confidence—once you see that first bud swell, you’ll be hooked. Here’s how to do it right the first time.
📚 In This Guide
- What you need
- Instructions
- Tips and common mistakes
- Wrapping up and next steps
What you need
- ● Rootstock: A healthy, disease-resistant rose rootstock (e.g., Rosa multiflora or Rosa canina). Choose 1-2 sturdy, 1-year-old shoots (about ¼-inch thick).
- ● Scion Wood: 4-6 young, disease-free shoots from your favorite rose variety (4-5 eyes per shoot, ¼-inch thick). Harvest in late winter/early spring.
- ● Grafting Tools: Sharp grafting knife (clean, sterilized with rubbing alcohol).
- ● Small hand saw (for trimming rootstock).
- ● Grafting Tape or Rubber Bands: 1 roll (for securing the graft).
- ○ Pruning Sealant: Optional but recommended (e.g., tree wound paint) to prevent infection.
- ● Well-draining Potting Mix: 1 bag (for rooting rootstock) or garden soil (for outdoor planting).
- ● 5-Gallon Pot or Garden Space: 1 pot (4-6 inches deep) or a sunny, sheltered outdoor spot (full sun, 6+ hours/day).
- ● Mulch: Organic mulch (e.g., straw or wood chips) to retain moisture.
- ● Fertilizer: Balanced rose fertilizer (10-10-10 or similar) for post-grafting care.
- ● Greenhouse or Cold Frame: For rootstock hardening-off before grafting.
- ● Humidity Dome: Clear plastic bag or cloche to maintain moisture around grafts.
- ● Grafting Clamp: For extra stability during the healing phase.
- ● Label Tags: To track rose varieties post-grafting.
Step-by-Step instructions for creating a graft rose tree
Here's how to transform a sturdy rootstock into a showstopping graft rose tree with blooms all season.
🌱 Step 1: Select and Prepare Rootstock and Scion
Choose a healthy 4-5 year old rose rootstock with a pencil-thick stem and multiple strong canes. The scion—your flowering rose variety—should have 3-5 buds and be about the same diameter as the rootstock. I like to take scions in late winter when the plant is dormant but still plump with stored energy.
Using sterilized pruning shears, cut both rootstock and scion at a 45-degree angle about 2-3 inches above the graft union on the rootstock. The cut surfaces should be smooth and clean—no jagged edges. This precision ensures the cambium layers (the growth tissue) align perfectly when grafted.
🌿 Step 2: Make the Graft Cut and Insert Scion
On the rootstock, make a vertical slit about 1-1.5 inches long down the center of the cut surface. The slit should go halfway through the stem—deep enough to hold the scion but not so deep you damage the center. This creates a snug pocket for the scion.
Insert the scion into the slit at a slight downward angle so the top bud sits 1-2 inches above the graft union. The cambium layers (the green ring just under the bark) should align perfectly. Wrap the graft tightly with rafting tape or plastic grafting tape, leaving the top bud exposed. This seal prevents drying and encourages fusion.
✂️ Step 3: Protect the Graft and Encourage Fusion
Cover the entire graft with moist sphagnum moss and secure it with plastic wrap to maintain humidity. Place the grafted rootstock in a shaded, humid environment—like a propagator or a plastic bag over a pot—where temperatures stay between 65-75°F. Check daily to ensure the moss stays damp but not soggy.
In 4-6 weeks, you'll see the scion begin to sprout new growth from the top bud. This is your signal that the graft has taken. Once new shoots emerge, carefully remove the moss and plastic wrap. The graft union should look smooth and healed, not cracked or oozing sap.
☀️ Step 4: Transplant and Train the New Tree
After the graft has fully fused, transplant the rose into a well-draining, nutrient-rich soil mix in a large container or directly into the ground. Choose a location with full sun (6+ hours daily) and shelter from strong winds. Water deeply at transplanting to settle the roots and reduce shock.
Prune the rootstock canes back to 4-6 inches above the graft union to redirect the plant’s energy into the scion. As the scion grows, select 2-3 strong canes to train into the main structure of your tree. Use soft ties to guide them into your desired shape—whether that’s a standard tree, a fan shape, or a cascading form.
⏰ Step 5: Maintain and Harvest Blooms Year-Round
Feed the graft rose with a balanced rose fertilizer every 4-6 weeks during the growing season to encourage lush, continuous blooms. Prune lightly after each flush of flowers to maintain shape and promote new growth. I always cut back 1/3 of the oldest stems annually to keep the tree vigorous and prevent overcrowding.
Watch for new growth emerging from the graft union—this means the scion is thriving. Once established, your graft rose tree will reward you with season-long blooms, provided you keep it well-watered and protected from extreme temperatures. The key to year-round beauty? Consistent care and strategic pruning to balance growth and flowering.
Tips & tricks for perfect graft rose trees
Mastering this technique takes patience, but these insights will help you avoid common pitfalls and create a thriving rose tree.
Precision in Step 1: When selecting your rootstock, look for canes that are uniform in thickness—this ensures clean cuts and better fusion. I’ve found that a slight taper (thicker at the base) works best for stability. For the scion, count those buds carefully: 3-5 buds is ideal, but never more than 5 or you risk overcrowding. The cambium layer alignment is everything—hold the scion up to natural light to see that green ring clearly before making your cuts. A magnifying glass helps if your eyes aren’t what they used to be.
Grafting Technique: The vertical slit in Step 2 should be just deep enough to cradle the scion without splitting the rootstock. I’ve ruined more grafts than I’d admit by going too deep—aim for that sweet spot where the slit reaches halfway through. When inserting the scion, the downward angle creates a natural water channel that helps the graft heal. Wrap tightly with grafting tape, but not so tight it restricts growth. Think of it like a snug cast on a broken bone—supportive but not constricting.
Environmental Control: Maintaining that 65-75°F range in Step 3 is critical, but don’t stress if your home fluctuates. A simple heat mat under the propagator can help stabilize temperatures on cooler days. The moss should stay moist like a wrung-out sponge—never soggy, as that invites rot. I’ve had the most success using a clear plastic dome to create a mini greenhouse effect. Check daily, especially in dry climates, and mist lightly if needed.
Post-Graft Care: Once you see those first shoots in 4-6 weeks, resist the urge to remove the moss immediately. Let the graft union harden for another week before exposing it fully. When transplanting in Step 4, water deeply before planting to settle the soil and reduce shock. For container growing, use a pot at least 18 inches deep—roses have surprisingly deep root systems. And here’s a pro tip: mix in a handful of mycorrhizal fungi with the soil to boost root development.
Pro Tips for Graft Rose Tree
- Mastering this technique takes patience, but these insights will help you avoid common pitfalls and create a thriving rose tree.
- Precision in Step 1: When selecting your rootstock, look for canes that are uniform in thickness—this ensures clean cuts and better fusion.
- Grafting Technique: The vertical slit in Step 2 should be just deep enough to cradle the scion without splitting the rootstock.
Frequently asked questions
Got questions about graft rose trees? You’re not alone! Here are some of the most common queries from gardeners—plus clear, actionable answers to keep your blooms thriving.
What’s the best time to prune a graft rose tree for maximum blooms?
Prune your graft rose tree after the first big flush of blooms in early spring (March–April) and again lightly after summer blooms (July–August). Avoid heavy pruning in fall—it can stimulate tender new growth that won’t survive winter. Pro tip: Use sharp, sterilized shears to make clean cuts at a 45° angle just above an outward-facing bud!
How do I know if my graft rose tree is grafted successfully?
Check for a visible graft union (the swollen bump where the rose was attached to the rootstock). If the top (rose variety) grows vigorously while the rootstock below stays thin, it’s a success! If the rootstock grows thicker than the rose top, the graft may have failed—time to replace it. Watch for: weak stems or no blooms after 2 years.
Do graft rose trees need winter protection, and how?
Yes! Mound soil or mulch (6–8 inches) around the base to insulate roots. Wrap the canes loosely with burlap or frost cloth, securing with twine. Avoid plastic—it traps moisture and can rot branches. In extreme cold zones (below Zone 5), consider digging up potted graft roses and storing them in a cool, dark garage until spring.
Can I propagate a graft rose tree from cuttings?
Not easily! Grafted roses are hybridized for specific traits, and cuttings often revert to the rootstock’s wild characteristics. Instead, layering (bending a low branch to root) or buying new grafted plants ensures you keep the desired variety. If you’re patient, try softwood cuttings in summer with rooting hormone—but expect mixed results!
Why are my graft rose tree’s leaves yellowing or dropping?
Yellow leaves often signal overwatering, nutrient deficiency, or fungal issues (like black spot). Check soil moisture—graft roses prefer well-draining soil. Feed with a balanced rose fertilizer in spring, and prune for airflow. If spots appear, treat with neem oil or fungicide. Act fast: Remove affected leaves immediately to prevent spread!
Bonus Tip: Troubleshooting Graft Failures
| Symptom | Likely Cause | Fix It! |
|---|---|---|
| Weak, spindly growth | Rootstock dominating | Prune back rootstock suckers immediately; stake the rose top for support. |
| No blooms after 2+ years | Poor grafting or lack of sunlight | Test soil pH (6.0–6.5 ideal); move to full sun (6+ hours/day). |
| Cracked graft union | Temperature shock or injury | Smooth the area with pruning sealant; avoid heavy pruning near the union. |
Wrapping up and next steps
Grafting a rose tree is a rewarding way to enjoy year-round blooms while mastering the art of precision pruning. With the right tools, techniques, and timing, you’ll transform your garden into a vibrant, low-maintenance masterpiece.
Whether you’re a beginner or a seasoned gardener, the key is patience and practice—your roses will thank you with stunning, healthy growth!
Ready to take the next step? Start small—graft a single rose variety this season, refine your skills, and expand your collection as you gain confidence. Happy gardening! 🌸✂️