
Transplanting
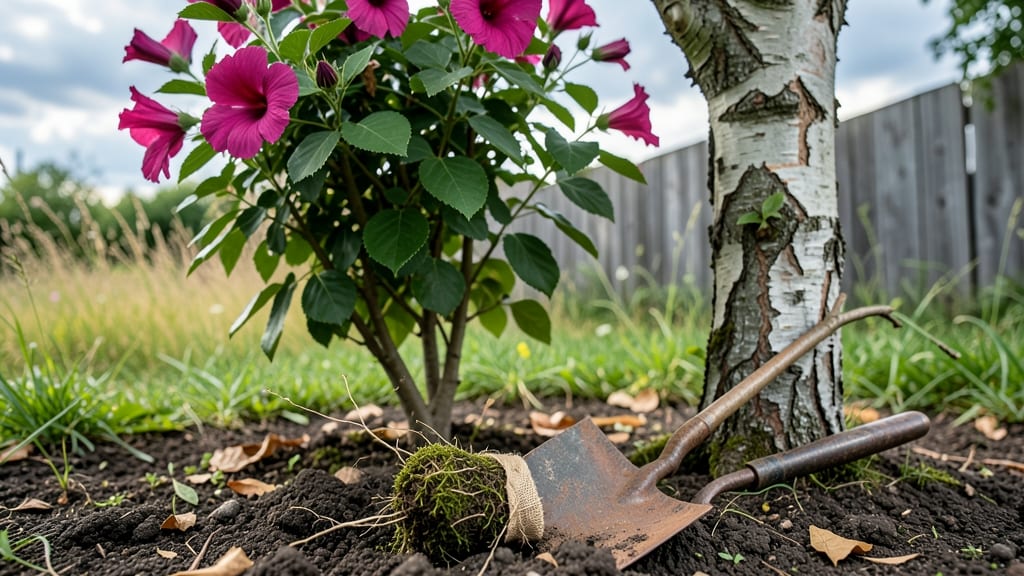
The best time to transplant a Rose of Sharon 🌸 is late spring, when soil warms and roots wake from dormancy.
Struggling to transplant your Rose of Sharon without stunting its growth? Timing is everything—move too early, and you risk shock; too late, and roots suffer. The secret lies in late spring’s perfect balance of warmth and moisture, when the plant is primed for growth but hasn’t yet committed to blooming.
For most of the U.S., that window falls between May and June, after the last frost but before summer’s peak heat. In USDA Zone 6a, aim for early May when soil temperatures hit 60°F—the sweet spot for root recovery.
This timing ensures your shrub establishes strong roots before summer’s demands.
Below, I’ll walk you through how to spot the perfect moment (new growth, soil temp, and more), the step-by-step transplant process, and pro tips to keep your Rose of Sharon thriving for years to come.


Why late spring is the optimal time to transplant Rose of Sharon
Transplanting your Rose of Sharon (Hibiscus syriacus) at the right time can mean the difference between a thriving shrub and one struggling to recover. Late spring—specifically May through early June—offers the perfect balance of soil warmth and active root growth to minimize transplant shock.
This window aligns with nature’s cues, ensuring your plant adapts smoothly to its new home.
One of the biggest mistakes gardeners make is transplanting too early in spring when soil temperatures are still cool. Below 60°F (15°C), roots grow sluggishly, and the plant struggles to establish itself.
Late spring, however, provides consistent warmth—typically between 65°F to 75°F (18°C to 24°C)—which kickstarts root development and reduces stress.
Root activity is another critical factor. By late spring, your Rose of Sharon’s roots have already begun their spring flush of growth, making them resilient enough to handle the disruption of transplanting. This contrasts sharply with early spring, when roots are still dormant, or fall, when they’re preparing for winter dormancy.
The timing also aligns with bloom cycles. Transplanting in late spring avoids interrupting the plant’s natural flowering rhythm. If you move it too late—say, July or August—you risk shocking the plant just as it’s preparing for its summer flowering peak, leading to fewer blooms the following year.
Here’s why late spring stands out as the best window for transplanting your Rose of Sharon:
Late spring also minimizes pest and disease risks. During this time, fungal pathogens like powdery mildew are less aggressive compared to the humid conditions of summer or the dampness of early spring.
Your Rose of Sharon will have a stronger defense system to fend off potential threats while it recovers from transplanting.
Another advantage of late spring is the availability of moisture. After the dry spells of early spring, late spring often brings consistent rainfall or predictable irrigation schedules. This ensures your newly transplanted shrub gets the deep watering it needs to re-establish its root system without drying out.
For gardeners in USDA Zones 6-9, late spring typically falls between May 15 and June 15, depending on your location. Use your last frost date as a guide: Aim to transplant 4-6 weeks after the final frost when nighttime temperatures stay above 50°F (10°C).
This gives your Rose of Sharon enough time to adjust before summer heat sets in.
Watch for visual cues like new leaf growth and softened buds—these indicate your plant is ready for transplanting. Avoid moving it if you see wilting or yellowing leaves, as these signs suggest stress or disease, not readiness.
By choosing late spring, you’re giving your Rose of Sharon the best chance to thrive in its new location. The combination of warm soil, active roots, and minimal stress sets the stage for years of vibrant blooms and lush foliage.
Step-by-Step late spring transplanting guide for Rose of Sharon
Late spring is the ideal window to transplant your Rose of Sharon because the soil warms while the plant hasn’t yet entered peak bloom. This balance reduces stress on roots while promoting vigorous regrowth.
Look for new growth on stems and leaf color shifting from dark green to lighter shades—signs your plant is ready to move.
Timing is critical: aim for late May to early June in most USDA zones. If you’re in cooler climates (zones 4-5), wait until after the last frost date, typically around mid-May. Warmer zones (6-9) can transplant as early as April, but avoid extreme heat to prevent dehydration.
Step-by-Step Transplanting Process
- 🌱 Step 1: Choose a Cool Day
Select an overcast day or transplant in the early morning to minimize sun stress. Avoid midday heat or windy conditions. - 🪴 Step 2: Dig the New Hole
Make the hole twice as wide and just as deep as the root ball. Loosen the soil at the bottom to encourage root spread. - 💧 Step 3: Water the Root Ball
Soak the current plant thoroughly 24 hours before transplanting. This keeps roots hydrated and reduces shock. - ✂️ Step 4: Prune Damaged Roots
Gently loosen the root ball and trim any broken or circling roots with clean shears. Avoid over-pruning healthy roots. - 🌿 Step 5: Transplant Carefully
Place the Rose of Sharon in the hole, ensuring the top of the root ball sits 1 inch above soil level. Backfill with native soil mixed with compost. - 🌳 Step 6: Water Deeply
Apply 1-2 gallons of water immediately after planting to settle the soil. Water again in 3-5 days to encourage root growth. - 🪴 Step 7: Mulch and Monitor
Spread 2-3 inches of mulch around the base (avoid touching the stem). Water weekly for the first month, then taper to every 10-14 days.
After transplanting, your Rose of Sharon may show signs of stress, like drooping leaves or slowed growth. This is normal! Focus on consistent watering and avoid fertilizing for 6-8 weeks to let roots establish. Prune any dead branches in early summer to redirect energy to root development.
For container-grown plants, choose a pot 1-2 sizes larger than the current container. Ensure it has drainage holes to prevent root rot. Place containers in a protected spot for the first week to shield from direct sun and wind.
By following these steps, your Rose of Sharon will establish strong roots and bloom beautifully next season. The key is patience—avoid rushing the process, and your shrub will reward you with vibrant flowers and lush foliage for years to come. 🌸