
Shrubs
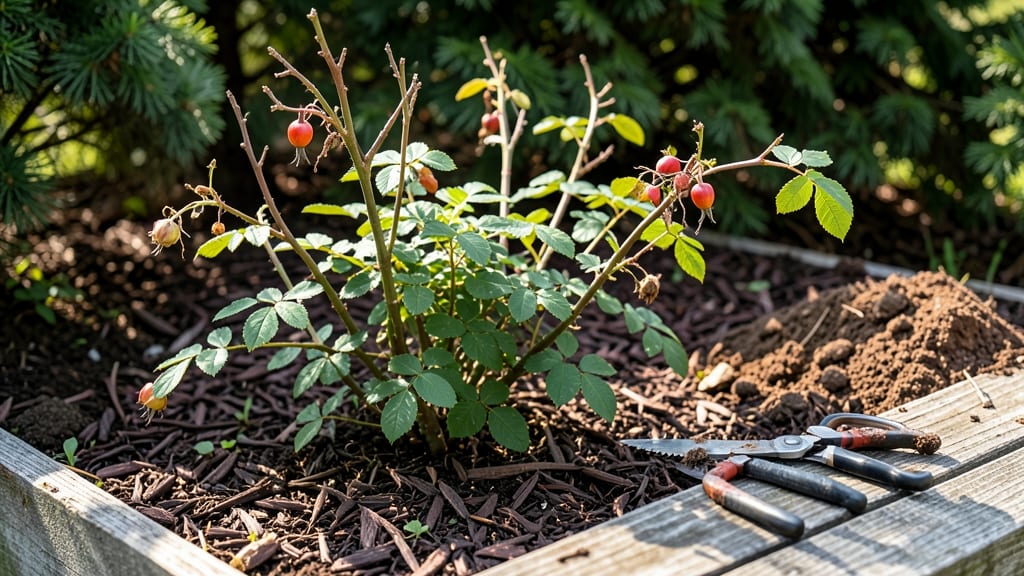
Your roses will thank you next June—preparing rose bushes for winter starts with a sharp pair of pruners and a clear plan. ✂️ I’ve seen roses survive brutal winters and sizzling summers by following a few key steps, and the difference in spring blooms is night-and-day.
The secret isn’t complicated: it’s timing, protection, and a little extra care before the ground freezes.
First, prune back dead or weak canes to just above an outward-facing bud, shaping the bush like a vase. Then, wrap the center with burlap or rose cones to shield it from wind and frost.
For extra insulation, mound 4-6 inches of mulch around the base—this keeps roots from heaving out of the soil when temperatures drop. The goal is to mimic the natural protection roses get in their native habitats.
You’ll wake up to buds ready to burst in spring, not shriveled canes begging for mercy. The right prep means fewer diseases, stronger growth, and blooms that arrive earlier and last longer. Even in mild winters, this routine sets roses up for their best performance.
Works for hybrid teas, climbers, and shrub roses alike—just adjust timing based on your first frost date. Here’s how to do it right, step by step.
📚 In This Guide
- What you need
- Instructions
- Tips and common mistakes
- Wrapping up and next steps
What you need
- ● Pruners or shears: Sharp, clean, and sterilized (bypass pruners work best). Quantity: 1 pair.
- ● Garden gloves: Heavy-duty, cut-resistant gloves to protect your hands. Quantity: 1 pair.
- ● Mulch: Organic mulch like straw, shredded leaves, or pine needles (avoid fresh wood chips). Quantity: 4–6 inches per bush.
- ● Rose ties or twine: Soft, flexible ties to secure canes (avoid wire or anything that can cut into the stems). Quantity: Enough for 2–3 ties per bush.
- ● Watering can or hose: For a final watering before winter. Quantity: 1.
- ○ Fertilizer (optional but helpful): A balanced, slow-release fertilizer (e.g., 10-10-10) or compost. Quantity: 1–2 cups per bush.
- ● Rose cones or frost cloth: For extra protection in harsh climates. Quantity: 1–2 per bush if needed.
- ● Copper tape or spray: To deter pests like rose slugs or sawfly larvae. Quantity: As needed.
- ● Garden fork or spade: For fluffing mulch or adjusting soil. Quantity: 1.
- ● Label markers: To tag bushes if you’re experimenting with different winterizing methods. Quantity: A few.
Step-by-Step instructions for preparing rose bushes for winter
Here’s how I’ve kept my roses thriving through harsh winters—no fancy tools, just smart prep.
🌿 Step 1: Prune Back to Encourage Healthy Growth
Start by removing all dead, diseased, or weak canes with clean, sharp pruners. I cut back to about 45 degrees where the cane meets the main stem—this prevents water from pooling and rotting the wound. Never leave stubs; always make cuts just above an outward-facing bud.
For hybrid teas and floribundas, I trim back to 18-24 inches tall, leaving 3-5 strong canes per bush. Knock off any remaining leaves—they’re just food for pests and fungus hiding out for spring. If your roses are heavily infested with black spot, spray with a copper fungicide after pruning.
💧 Step 2: Mulch Heavily to Insulate Roots
Spread 4-6 inches of organic mulch (like shredded bark or straw) around the base of the bush, keeping it 6 inches away from the stem to avoid rot. I use pine straw because it’s lightweight and drains well, but composted leaves work too. This thick layer acts like a blanket, protecting roots from freezing and thawing cycles.
Don’t skimp—thin mulch won’t cut it. If you’re in a Zone 5 or colder, add an extra 2-3 inches of mulch after the ground freezes. Check the soil first: if it’s still damp, wait a week before mulching to avoid suffocating roots.
☀️ Step 3: Wrap Canes for Extra Protection
For tender roses (like Knock Outs or climbers), I wrap the canes with burlap or rose cones after pruning. Start at the base and spiral upward, securing with twine or staples. This keeps wind and cold off the stems. If you’re in a Zone 6 or below, add a 12-inch layer of straw around the wrapped canes for extra insulation.
Don’t wrap too tightly—you want airflow to prevent moisture buildup. I leave the top 6 inches of the bush uncovered so sunlight can warm the center during mild winter days. This trick has saved my roses from split canes during freeze-thaw cycles.
⏰ Step 4: Water Deeply Before the Ground Freezes
Give your roses a deep watering 1-2 weeks before the first hard frost. The goal is to saturate the soil down to 12 inches deep—this ensures roots have enough moisture to survive winter. I water in the late afternoon so the soil has time to absorb before evening.
After the ground freezes, stop watering entirely. Wet soil that freezes expands and can damage roots. If you’re in a Zone 4 or colder, add a 3-inch layer of extra mulch after the first hard freeze to lock in moisture and warmth.
✂️ Step 5: Check and Adjust Through Winter
Once snow falls, I brush it off the canes to prevent them from breaking under the weight. If you’re in a windy area, tie the canes together with twine to keep them upright. In late winter (around February), I do a quick check for mold or rot—if you see anything, remove it immediately.
Here’s the thing—don’t remove the mulch or wrapping until mid-April, when nighttime temps stay above 40°F consistently. Rushing to uncover roses too soon can shock them back into growth before the last frost, leading to frost damage.
Tips & tricks for preparing rose bushes for winter
These are the hard-won lessons that'll help your roses bounce back stronger next spring.
Pruning Precision: When you're cutting back in Step 1, look for the 45-degree angle where the cane meets the main stem—this isn't just about looks. The slanted cut helps water run off instead of pooling, which is crucial for preventing rot during winter's damp spells. I've seen too many roses suffer from neglected pruning wounds that become perfect breeding grounds for disease.
Mulch Timing Matters: The instructions mention adding extra mulch after the ground freezes in Zone 5 and colder, but here's the real secret: check your soil first. If it's still damp when you're ready to mulch, wait a week. Wet soil that freezes expands and can actually damage roots—this is why I always do a quick soil check before adding that extra 2-3 inches of protection.
Winter Wrapping Wisdom: For those tender roses in Step 3, don't forget about airflow when you're wrapping canes. Too-tight wrapping creates a greenhouse effect that can lead to mold. I leave the top 6 inches uncovered so sunlight can warm the center during mild winter days—this small detail has saved my Knock Out roses from split canes during freeze-thaw cycles.
Zone-Specific Strategy: If you're in Zone 4 or colder, here's what nobody tells you: that 3-inch extra mulch layer after the first hard freeze isn't just about insulation—it's about moisture retention too. Cold air holds less moisture, and that extra layer helps prevent your roots from drying out during winter's dry spells. Think of it as your rose's winter water bottle.
Pro Tips for Preparing Rose Bushes For Winter
- These are the hard-won lessons that'll help your roses bounce back stronger next spring.
- Pruning Precision: When you're cutting back in Step 1, look for the 45-degree angle where the cane meets the main stem—this isn't just about looks.
- Mulch Timing Matters: The instructions mention adding extra mulch after the ground freezes in Zone 5 and colder, but here's the real secret: check your soil first.
Frequently asked questions
Got questions about winterizing your roses? You’re not alone! Here are answers to the most common concerns—so you can tackle winter prep with confidence and keep your roses thriving for next season’s blooms.
When is the best time to prepare rose bushes for winter?
Start preparing roses for winter about 4–6 weeks before the first hard frost in your area. This timing allows roots to harden off gradually while giving you enough time to mulch, prune, and protect tender varieties. Check your local frost date—typically late fall—for precise scheduling!
Do I need to cover my roses if they’re cold-hardy?
Even cold-hardy roses (like Rosa rugosa or Knock Out® roses) benefit from extra protection in harsh winters. Use lightweight covers (like frost cloth) to shield against windburn and temperature swings. Skip heavy mulch if your region has freeze-thaw cycles—it can suffocate roots.
Should I prune roses before or after winterizing?
Prune after winterizing but before new growth starts in early spring. Late fall pruning can stimulate fresh growth that’s vulnerable to cold. If you must prune now, focus on dead or diseased wood and leave the rest until spring for a cleaner cut.
How do I protect roses from rodents and pests during winter?
Rodents love chewing rose canes! Wrap trunks with hardware cloth or plastic tree guards to deter nibbling. Avoid mulching too close to the base—leave a 3-inch gap to reduce hiding spots. For slugs/snails, apply diatomaceous earth around the base before covering.
Can I use regular garden soil instead of special rose soil for winter prep?
Yes! While amended soil (with compost or aged manure) is ideal, regular garden soil works for mulching. Just avoid fresh manure—it can burn roots. Focus on 3–4 inches of organic mulch (straw, leaves, or wood chips) to insulate roots without compacting the soil.
Wrapping up and next steps
Preparing your rose bushes for winter is the secret sauce for stunning blooms next spring! 🌹 By following these steps—pruning, mulching, protecting from frost, and monitoring—you’re giving your roses the best chance to thrive. Think of it as a cozy blanket and a health check before the cold sets in.
Now that you’re armed with the know-how, take action this weekend. Grab your gloves, gather your supplies, and give your roses the tender loving care they deserve. Your future garden’s beauty starts with today’s prep—so roll up those sleeves and enjoy the process! 🌿