
Transplanting
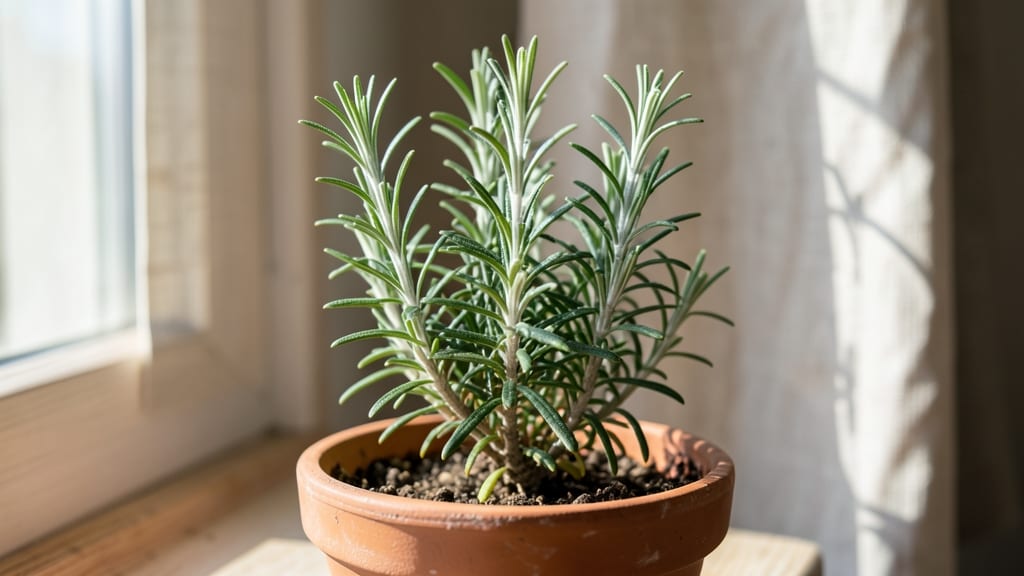
Rosemary seedlings stages reveal a surprising transformation—from fragile sprouts to aromatic bushes in just 8 weeks. 🌱 The first true leaves appear around day 14, and by week 6, you'll see needle-like foliage that smells faintly like pine (yes, really).
I learned this the hard way after mistaking rosemary seedlings for weeds in my first attempt.
At stage 1 (0-7 days), germination happens best in 70-75°F soil with consistent moisture. Tiny white roots emerge first, followed by a single stem. Overwatering here is the #1 killer—keep soil damp but never soggy.
By stage 2 (7-21 days), those first true leaves unfurl, signaling it's time to introduce bright light (no shade now!).
By stage 3 (3-6 weeks), seedlings should be 3-4 inches tall with woody stems—this is when you can gently transplant them into individual pots. Prune leggy growth here to encourage bushier plants.
The real magic happens in stage 4 (6-8 weeks) when you'll smell that classic rosemary aroma and see those signature needle clusters.
Common pitfalls? Blackened leaves mean too much water; yellowing means not enough. Rosemary hates wet feet but thrives in well-draining soil and 6+ hours of sun daily. With proper care, your seedlings will be ready for the garden by late spring—just in time for summer cooking!
📚 In This Guide
- What you need
- Instructions
- Tips and common mistakes
- Wrapping up and next steps
What you need
- ● Rosemary seeds: 10–20 seeds (choose organic, non-GMO if possible).
- ● Seed trays or small pots: 2–4 (4-inch diameter or larger) with drainage holes.
- ● Seed-starting mix: 2–3 cups of lightweight, sterile potting soil (avoid garden soil—it’s too dense!).
- ● Grow lights or sunny windowsill: Access to 6+ hours of indirect sunlight daily (or a LED grow light for 12–14 hours).
- ● Spray bottle: For gentle watering (avoid over-saturating seeds!).
- ● Plastic wrap or humidity dome: To retain moisture during germination.
- ○ Fertilizer (optional but helpful): A balanced, water-soluble fertilizer (5-5-5 or 10-10-10) for seedlings.
- ● Heating mat: Speeds up germination (70–75°F is ideal).
- ● Fungicide: Prevents damping-off disease in humid conditions.
- ● Transplant containers: 6–8 inch pots for hardening off seedlings.
- ● pH test kit: Ensures soil pH is 6.0–7.0 (rosemary prefers slightly alkaline soil).
- ● Pruning shears: For trimming leggy seedlings later.
How to identify and care for each rosemary seedling stage
Watch your rosemary seedlings transform through distinct growth phases—each with specific care needs.
🌱 Step 1: Germination (Days 7-14)
The first true sign of life appears when tiny green sprouts push through the soil surface—this is your germination stage. You'll notice them emerge within 7-14 days if kept in 70-75°F soil with consistent moisture. The sprouts look delicate, with just a single pair of small leaves called cotyledons.
Here's the thing—don't disturb them. The moment you see these first leaves, stop watering from above. Use a spray bottle instead to keep the soil damp but not soggy. Overwatering now can cause damping-off, where seedlings collapse overnight. I like to place a humidity dome over the tray during this phase to maintain even moisture.
🌿 Step 2: Cotyledon Stage (Days 15-21)
Once the initial cotyledons unfurl, your seedlings enter the cotyledon stage. These first leaves are simple in shape and serve as the plant's first energy source. You'll see them grow slightly larger over 5-7 days, but they won't resemble mature rosemary leaves yet.
This is when light becomes critical. If your seedlings are stretching toward the light source (a sign of legginess), move them within 2-3 inches of a grow light or bright window. Leggy seedlings develop weak stems that can't support future growth. I've found that keeping the light on for 14-16 hours daily prevents this issue entirely.
🌿 Step 3: True Leaf Development (Days 22-35)
The true leaf stage begins when the first set of needle-like leaves appear—these are the signature rosemary foliage. You'll recognize them by their narrow, elongated shape and gray-green color, distinct from the broader cotyledons. This stage typically occurs 3-4 weeks after germination.
At this point, your seedlings need more space and nutrients. Thin weaker seedlings to leave the strongest 2-3 plants per cell (if using a seedling tray). I also recommend fertilizing lightly with a half-strength balanced liquid fertilizer (10-10-10) to encourage robust root and shoot growth. Watch for deep green color—this indicates healthy photosynthesis.
☀️ Step 4: Juvenile Growth (Days 36-56)
By 6 weeks, your rosemary seedlings enter the juvenile growth stage, where they develop a bushier form. You'll notice multiple sets of true leaves and the beginnings of woody stems. This is when they start resembling mature rosemary plants, though smaller.
Increase sunlight exposure gradually to 6+ hours of direct light daily. If growing indoors, move seedlings to a south-facing window or under a full-spectrum grow light. Harden off seedlings by placing them outside for 1-2 hours daily during this phase to prepare for transplanting. Real talk: Skipping this step can lead to transplant shock when moving to the garden.
🌿 Step 5: Mature Seedling (Days 57-84)
The final stage is the mature seedling phase, where your plants are ready for transplanting. You'll see woody stems, dense foliage, and aromatic leaves when crushed. These seedlings are 4-6 inches tall and have a sturdy root system.
Transplant outdoors after the last frost when nighttime temperatures stay above 50°F. Choose a location with full sun and well-draining soil. Space seedlings 18-24 inches apart to allow for airflow and prevent disease. Water deeply at the base to encourage root establishment. You'll know they're thriving when new growth appears within 2-3 weeks of transplanting.
Tips & tricks for perfect rosemary seedling growth
These insider secrets will help you nurture robust rosemary plants through every delicate stage.
Germination Support: The 70-75°F soil temperature range is non-negotiable for germination success. I've found that placing the seed tray on a seedling heat mat (set to 75°F) creates ideal conditions without requiring constant temperature monitoring. For extra insurance, cover the tray with clear plastic wrap to trap moisture—just remember to remove it once sprouts appear to prevent mold. The tiny sprouts will emerge within 7-14 days, but consistency is key: maintain that moisture level like you're walking a tightrope.
Light Strategy: During the 14-16 hour daily light requirement in the cotyledon stage, position your seedlings within 2-3 inches of the light source to prevent legginess. I use a simple DIY solution: a clamp lamp with a full-spectrum bulb placed just above the tray. Rotate the tray 180 degrees daily so all seedlings get equal light exposure—this prevents them from leaning toward one side. Leggy seedlings are a red flag; if you see them stretching, it's already too late to fix the damage, so act fast when you notice the first signs of reaching.
Nutrient Timing: When you reach the true leaf development stage (weeks 3-4), that half-strength 10-10-10 fertilizer becomes your secret weapon. I've learned the hard way that over-fertilizing now can burn delicate roots—always dilute it properly and apply it to damp soil. The deep green color you're watching for isn't just about looks; it's your plant's way of signaling healthy photosynthesis. If you notice yellowing between the veins, that's a classic nitrogen deficiency sign, and it's time to adjust your fertilizer ratio or frequency.
Transplant Readiness: For the mature seedling stage, the 4-6 inch height guideline is your best indicator of transplant readiness. I recommend testing root strength by gently tugging on the plant—if it resists slightly but comes out easily with minimal soil clinging, it's ready. The 2-3 week new growth window after transplanting is your reward for proper hardening off. Don't rush this process; gradually increase outdoor exposure from those initial 1-2 hours to full sun conditions over 7-10 days. This slow acclimation prevents transplant shock that can set your plants back weeks.
Pro Tips for Rosemary Seedlings Stages
- These insider secrets will help you nurture robust rosemary plants through every delicate stage.
- Germination Support: The 70-75°F soil temperature range is non-negotiable for germination success.
- Light Strategy: During the 14-16 hour daily light requirement in the cotyledon stage, position your seedlings within 2-3 inches of the light source to prevent legginess.
Frequently asked questions
Got questions about growing rosemary seedlings?
You’re not alone! Here are answers to the most common concerns—whether you’re a first-time gardener or just looking to troubleshoot.
How long does it take for rosemary seedlings to germinate?
Rosemary seeds can take 2–4 weeks to germinate, depending on temperature and moisture. Keep soil consistently moist (not soggy) and maintain warmth (70–75°F). Patience is key—some seeds may take longer, especially if stored improperly. Pro tip: Soak seeds overnight before planting to speed up germination!
When should I transplant rosemary seedlings outdoors?
Wait until seedlings have 3–4 true leaves (not just cotyledons) and nighttime temps stay above 50°F. Harden them off for 7–10 days by gradually exposing them to outdoor conditions. Transplant in spring or early fall to avoid frost damage. Warning: Rosemary hates cold—never plant in winter!
Why are my rosemary seedlings turning yellow or wilting?
Yellowing leaves often signal overwatering (rosemary prefers dry soil) or nutrient deficiency. Wilting can mean underwatering or root rot. Check soil moisture—it should dry out between waterings. If roots look mushy, repot in fresh, well-draining soil. Quick fix: Trim affected leaves and adjust watering habits.
Can I grow rosemary from cuttings instead of seeds?
Cuttings are easier and faster—just snip 3–4 inch stems, remove lower leaves, and dip in rooting hormone. Plant in moist soil and cover with a plastic bag to retain humidity. Roots form in 2–4 weeks. This method mimics mature rosemary’s growth better than seeds!
What’s the best temperature for rosemary seedlings?
Ideal temps are 65–80°F during the day and 50°F+ at night. Seedlings struggle below 50°F or above 90°F. Use a heat mat for cooler climates or provide shade in scorching weather. Remember: Rosemary is Mediterranean—it thrives in warmth!
How often should I fertilize rosemary seedlings?
Skip fertilizer for the first 4–6 weeks—seedlings need time to establish roots. After that, use a balanced, low-nitrogen fertilizer (like 10-10-10) every 6–8 weeks in spring/summer. Over-fertilizing causes weak growth. Bonus: Compost tea is a gentle, organic alternative!
Wrapping up and next steps
Growing rosemary from seedlings is a rewarding journey that transforms tiny sprouts into fragrant, thriving herbs with just a little patience and care! 🌱 By understanding each of the 8 key stages—from germination to harvest—you’ll unlock the secrets to a lush, healthy plant.
Whether you’re a beginner or a seasoned gardener, every stage offers a chance to refine your green thumb and savor the satisfaction of homegrown rosemary.
Now that you’re armed with knowledge, take the next step: grab those seedlings, follow the stages, and watch your garden flourish! Share your progress with fellow plant lovers or experiment with new growing techniques—your rosemary adventure is just beginning. Happy gardening! 🌿✨