
Aphids
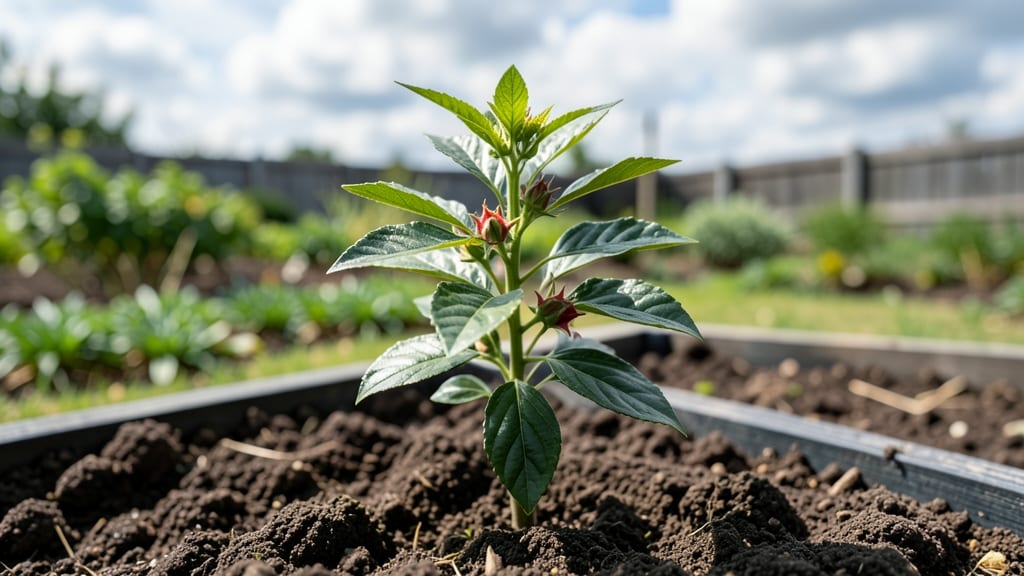
Growing roselle hibiscus from seed means bold red calyces and fragrant flowers by summer—if you nail the first three weeks. 🌱 I’ve watched these tropical seedlings go from wobbly sprouts to sturdy plants in just 3 months, and the secret starts with the right soil warmth and humidity.
Roselle thrives where other hibiscus struggle—hot, humid conditions mimic its native tropical home. You’ll need a seed-starting mix that stays moist but never soggy, and a heat mat if your home runs cool.
Most seedlings bolt or stretch if they don’t get enough light early, so a grow light is worth the investment. By the time you transplant, your seedlings will be stocky and dark green, ready to handle full sun.
The key is patience: roselle grows fast once established, but those first leaves set the tone for everything that follows. This method works for any climate—just adjust watering in dry heat or add shade in scorching afternoons. Let’s get those seeds sprouting!
📚 In This Guide
- What you need
- Instructions
- Tips and common mistakes
- Wrapping up and next steps
What you need
- ● Roselle hibiscus seeds: 10–20 seeds (organic, non-GMO preferred for best results).
- ● Seed-starting mix: 2–3 gallons of well-draining, peat-based or coco coir blend (sterilized to prevent pests).
- ● Containers: 2–4 biodegradable pots (3–4 inches deep) or seed trays with drainage holes.
- ● Grow lights or sunny windowsill: 12–16 hours of light daily (LED grow lights work great for indoor setups).
- ● Watering can or spray bottle: With a fine mist nozzle for gentle hydration.
- ● Plant labels: Waterproof markers to track seedling progress.
- ● Fertilizer: Balanced liquid fertilizer (5-5-5 or 10-10-10, diluted to half-strength).
- ● Humidity dome or plastic wrap: To retain moisture during germination.
- ● Heating mat (70–75°F) to speed up germination.
- ● pH testing kit (ideal soil pH: 6.0–6.5).
- ● Organic mulch (e.g., straw) to retain soil moisture.
- ● Pest control spray (neem oil or insecticidal soap for aphids).
- ● Transplanting tray (larger pots, 6–8 inches deep, for seedlings after 4–6 weeks).
Step-by-step instructions for growing roselle hibiscus seedlings
Here's the method I've used to grow vigorous roselle hibiscus seedlings that thrive from seed to harvest.
🌱 Step 1: Prepare Containers and Sow Seeds Properly
Start with 4-inch diameter pots filled with a well-draining mix of 50% peat moss and 50% perlite. Roselle seeds need excellent drainage to prevent rot—pack the mix firmly but don't compact it. Moisten the soil until it's damp but not soggy, then make small ½-inch deep holes spaced 2 inches apart.
Place 1-2 seeds per hole—germination rates vary, so extra seeds ensure you have strong starts. Cover them with a thin layer of fine vermiculite (not soil) to protect the seeds while allowing light penetration. A humidity dome or plastic wrap helps maintain moisture during germination, which typically occurs in 10-20 days at 75-80°F.
💧 Step 2: Maintain Ideal Moisture and Light Conditions
Once seeds sprout, remove the humidity dome immediately to prevent fungal growth. Water gently from the bottom of the pot—never let seedlings sit in standing water, as roselle roots are sensitive to overwatering. You'll know moisture is right when the top ½ inch of soil feels dry to the touch.
Provide bright, indirect light for the first week, then gradually introduce 4-6 hours of morning sun daily. Roselle seedlings grow best under 60-70% humidity. If leaves begin yellowing or wilting, reduce watering slightly—roselle prefers slightly drier conditions over soggy soil.
✂️ Step 3: Thin Seedlings and Harden Off for Transplanting
When seedlings reach 2-3 inches tall, thin to the strongest plant per pot by snipping the weaker stems at the base with clean scissors. This prevents competition and ensures the remaining plant develops a sturdy root system. Fertilize lightly with a ½-strength balanced liquid fertilizer after thinning to encourage leafy growth.
Begin hardening off 2 weeks before transplanting by placing seedlings outside in a sheltered spot for 1 hour daily, gradually increasing exposure. Watch for deep green leaves and thick stems—these are signs your seedlings are ready for the garden. Transplant after the last frost when soil temperatures reach 65°F.
☀️ Step 4: Transplant and Provide Ongoing Care
Dig holes twice as wide as the root ball and space plants 3-4 feet apart in full sun. Roselle thrives in well-draining soil with a pH of 6.0-7.0. Mix 2 inches of compost into the planting hole to enrich the soil and improve moisture retention. Water deeply after transplanting to settle the roots.
Mulch around the base with 2-3 inches of straw or wood chips to retain moisture and suppress weeds. Roselle is drought-tolerant once established, but young plants need consistent watering—keep soil evenly moist during the first 4-6 weeks. You'll know your seedlings are thriving when they develop large, glossy leaves and begin branching.
Tips & tricks for growing roselle hibiscus seedlings
Here's what I've learned after nurturing dozens of roselle seedlings to maturity—these little details make all the difference between thriving plants and struggling starts.
Germination Strategy: The 10-20 day germination window at 75-80°F is your best chance for success, but don't be discouraged if it takes longer. I've found that pre-soaking seeds in warm water for 12 hours before planting can shave 2-3 days off germination time. Just be sure to plant them immediately after soaking—waiting too long causes them to dry out.
Light Transition: That first week of bright, indirect light is crucial—direct sun at this stage can scorch delicate seedlings. I use a sheer curtain over my grow lights to diffuse intensity. After the first week, I gradually increase morning sun exposure by moving pots closer to the window each day. Watch for leaves that look slightly cupped upward; this means they're getting just enough light.
Thinning Technique: When you're thinning those 2-3 inch seedlings in Step 3, don't just yank them out—use clean scissors to snip at the base. This prevents disturbing the roots of your remaining plant. I've also found that thinning in the morning gives plants more time to recover before evening temperatures drop, which helps them bounce back faster.
Transplant Timing: The 2-week hardening off period is non-negotiable for roselle. I start with just 1 hour outside on day one, then increase by 30 minutes each subsequent day. The key visual cue is when new growth appears after each session—this tells me the plant is adapting. Never transplant when soil temps are below 65°F, even if your seedlings look ready; cold soil shocks their roots.
Pro Tips for Roselle Hibiscus Seedling
- Here's what I've learned after nurturing dozens of roselle seedlings to maturity—these little details make all the difference between thriving plants and struggling starts.
- Germination Strategy: The 10-20 day germination window at 75-80°F is your best chance for success, but don't be discouraged if it takes longer.
- Light Transition: That first week of bright, indirect light is crucial—direct sun at this stage can scorch delicate seedlings.
Frequently asked questions
Got questions about growing roselle hibiscus seedlings? You’re not alone! Here are answers to the most common concerns—from timing to troubleshooting—to help your plants thrive effortlessly.
How long does it take for roselle hibiscus seedlings to sprout?
Roselle hibiscus seeds typically sprout within 7–14 days if kept in warm (70–80°F), moist soil. For faster germination, soak seeds overnight in warm water or use a seedling heat mat. Patience is key—some stubborn seeds may take up to 3 weeks!
When is the best time to plant roselle hibiscus seedlings outdoors?
Wait until after the last frost and soil temps reach at least 60°F (late spring/early summer in most climates). Harden off seedlings (acclimate to outdoor conditions) for 7–10 days before transplanting. Morning sunlight is ideal to avoid heat stress.
Why are my roselle hibiscus seedlings wilting or turning yellow?
Wilting often signals overwatering or poor drainage, while yellow leaves (chlorosis) may mean nutrient deficiency (iron/magnesium) or aphids. Check soil moisture—roselle prefers well-draining soil. For pests, spray with neem oil or introduce ladybugs. Pro tip: Mulch to retain moisture without soggy roots!
Can I grow roselle hibiscus from cuttings instead of seeds?
Yes! Take 4–6 inch cuttings from healthy stems, strip lower leaves, and dip in rooting hormone. Plant in moist perlite/sand mix and cover with a plastic bag to retain humidity. Roots form in 2–4 weeks. This method is faster but requires more care than seeds.
How do I prevent aphids on roselle hibiscus seedlings?
Aphids love tender seedlings! Inspect leaves daily for sticky residue or tiny green/black bugs. Blast them off with water or use insecticidal soap. Encourage natural predators like ladybugs or lacewings. For severe infestations, neem oil (applied at dusk) works wonders. Prevention tip: Keep plants healthy with balanced fertilizer!
Wrapping up and next steps
Growing a roselle hibiscus seedling into a thriving harvest is a rewarding journey filled with vibrant blooms and endless possibilities! 🌱 With the right care—from selecting quality seeds to mastering soil, sunlight, and pest control—you’ll soon enjoy the tangy, health-boosting benefits of this tropical gem.
Whether you’re nurturing it for tea, medicine, or beauty, your patience and effort will pay off in spades.
Ready to take the next step? Start small—plant your first seedling today and watch it grow! Need more guidance? Explore our FAQs or share your progress with fellow gardeners for extra tips. Happy growing! 🌿