
Planting
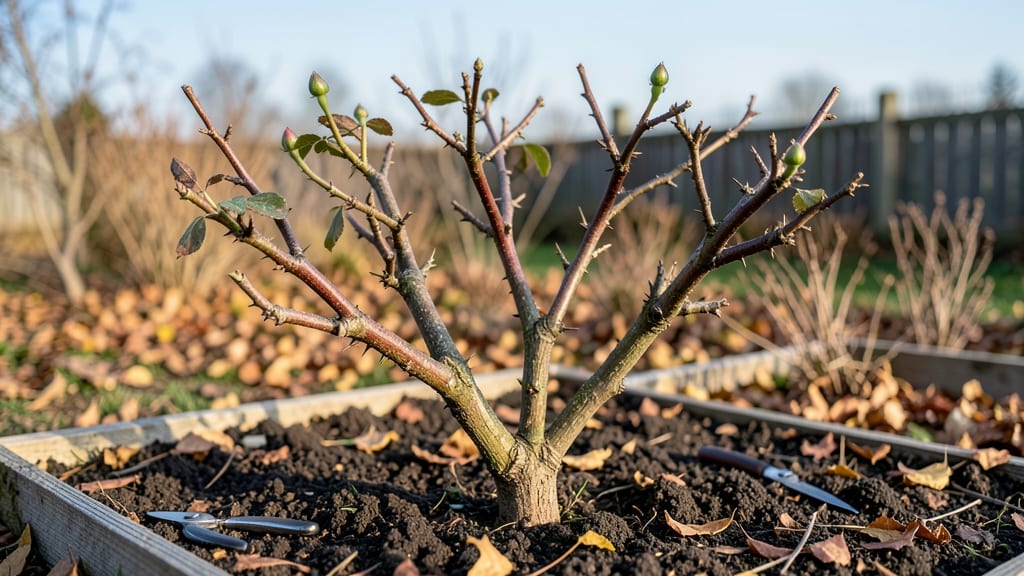
The secret to thriving rose plants in winter isn’t just survival—it’s preparing them to burst into vibrant blooms by spring, and I’ve perfected the steps that turned my once-fragile bushes into the neighborhood’s showstopper. 🌹 neighborhood every June.
The secret starts with pruning before the first hard freeze, not after. Cut back to an outward-facing bud on strong canes, and you'll see fresh green shoots pushing through the soil by April.
Add a thick layer of 4-6 inches of mulch (straw or shredded leaves work best) to insulate roots from temperature swings. By spring, your roses will reward you with healthier canes, more buds, and fewer pests than store-bought plants.
The key is consistency—check mulch levels monthly and avoid overwatering when the ground freezes. Works for hybrid teas, floribundas, and even old garden roses. Here's exactly how to do it without guesswork."
📚 In This Guide
- What you need
- Instructions
- Tips and common mistakes
- Wrapping up and next steps
What you need
- ● Pruning shears or loppers – Sharp, clean, and sterilized (alcohol or bleach wipe). Quantity: 1 pair
- ● Organic mulch – Straw, shredded leaves, or wood chips (avoid fresh grass clippings). Quantity: 4–6 inches per plant
- ● Garden twine or burlap – For wrapping and supporting canes. Quantity: Enough to wrap 2–3 plants
- ● Rose cones or frost cloth – Breathable fabric rated for your zone (e.g., Zone 5–7: 30–40g/m²). Quantity: 1 per plant or shared for clusters
- ○ Stakes or wire mesh – To create a protective cage around roses (optional but helpful for windy areas). Quantity: 1–2 per plant
- ● Garden gloves – Heavy-duty to protect hands during pruning and mulching. Quantity: 1 pair
- ● Watering can or hose with nozzle – For deep watering before frost. Quantity: 1
- ● Anti-desiccant spray – Like Wilt-Pruf to prevent moisture loss in canes.
- ● Slow-release fertilizer – Low-nitrogen (e.g., 5-10-10) to nourish roots before dormancy.
- ● Reflective mulch – Aluminum foil or bubble wrap to insulate soil (place under mulch).
- ● Thermometer – Soil or air thermometer to monitor frost risk.
- ● Knee pads – For comfort during mulching and pruning.
Step-by-Step guide to winterizing your roses
Here's how I protect my roses from winter's worst—keeping them healthy and ready to bloom again next spring.
🪴 Step 1: Prune for Winter Hardiness
Start in late fall, after your first hard frost but before the ground freezes. I cut back canes to about 18-24 inches tall, removing any dead, diseased, or crossing branches first. This encourages new growth in spring and prevents snow buildup that can break branches.
Make clean cuts at a 45-degree angle, about ¼ inch above an outward-facing bud. Avoid leaving stubs—those rot in winter. If you're unsure which buds face outward, look for the small bump on the side of the cane that points away from the center of the plant.
☀️ Step 2: Mulch and Insulate the Base
Spread a 4-6 inch layer of organic mulch around the base of the rose, keeping it 6 inches away from the stem to prevent rot. I use a mix of straw, shredded leaves, and pine needles—it insulates roots while allowing airflow to prevent mold.
For extra protection in colder climates, mound soil or mulch up the sides of the plant in a cone shape, leaving only the top bud visible. This creates a thermal blanket that keeps roots at a steady 35-40°F even during freezes.
🌿 Step 3: Wrap Canes for Frost Protection
After the ground freezes, wrap rose canes with burlap or rose-specific fabric wraps to shield them from wind and frost. Start at the base and spiral upward, securing with twine or plant ties. Leave the top 6-8 inches uncovered so the plant can breathe.
If you're in a zone with below 0°F temperatures, add a layer of Christmas lights around the base for gentle heat. The lights should stay on 12-14 hours daily—just enough to keep the area slightly warmer without overheating.
⏰ Step 4: Monitor and Adjust Through Winter
Check your roses monthly for signs of stress—look for cracked mulch or exposed roots, which mean you need to add more insulation. If snow accumulates on the wraps, gently brush it off to prevent weight damage. Too much snow can bend canes permanently.
In early spring, before new growth appears, remove the wraps and mulch cone. Wait until daytime temperatures stay above 40°F consistently—this prevents shock from sudden warmth. Prune again lightly if any dead wood appears, but hold off on heavy pruning until you see fresh growth.
✂️ Step 5: Prepare for Spring Revival
Once you see pink buds swelling (usually in late winter), it's time to fertilize lightly with a balanced rose food (10-10-10 ratio). Water deeply to wake up the roots, then mulch again with 2-3 inches of fresh compost to feed the soil as it warms.
Here's the thing—don't rush to prune heavily yet. Wait until you see at least 3-4 inches of new green growth before shaping the plant. This ensures you're cutting back old wood, not new shoots that could die if pruned too soon.
Tips & tricks for perfect rose plant winter care
These little details make all the difference between roses that survive winter and ones that thrive come spring.
Timing is Everything: The window for Step 1 pruning is narrow—aim for the days between your first hard frost and when the ground freezes solid. I've missed this timing twice and ended up with canes that either grew too much before winter or were too brittle to handle. Look for frost on the lawn at night but no ice in the soil yet—that's your signal.
Pruning Precision: When making those 45-degree cuts in Step 1, imagine you're making a tiny roof over the bud. The outward-facing bud is your target because it grows away from the center, creating a more open plant shape. I learned this the hard way when my roses grew inward and became tangled messes. Also, use sharp pruners—dull blades crush stems, which invites disease.
Mulch Layering: For Step 2, don't just dump mulch around your rose—build that 4-6 inch layer gradually. Start with 2 inches, wait a week, then add another 2 inches. This prevents compaction and allows air to circulate. I've seen gardeners smother their roses with too much mulch at once, creating anaerobic conditions that rot roots. And remember, keep that mulch 6 inches away from the stem to prevent crown rot.
Wrapping Wisdom: When wrapping canes in Step 3, leave that top 6-8 inches uncovered—this prevents moisture buildup that leads to mold. I've seen beautiful roses ruined by damp wraps that turned into moldy blankets. Also, if you're using Christmas lights for extra warmth, use the lowest wattage possible (like 5-watt LED lights) to avoid overheating. I once fried a rose bush with 100-watt bulbs—don't make my mistake!
Pro Tips for Rose Plant In Winter
- These little details make all the difference between roses that survive winter and ones that thrive come spring.
- Timing is Everything: The window for Step 1 pruning is narrow—aim for the days between your first hard frost and when the ground freezes solid.
- Pruning Precision: When making those 45-degree cuts in Step 1, imagine you're making a tiny roof over the bud.
Frequently asked questions
Got questions about keeping your roses thriving through winter’s chill? You’re not alone! Here are some of the most common concerns—plus expert-backed answers to help your roses stay strong until spring.
Can roses survive winter without any protection?
Most roses can survive mild winters with minimal protection, but heavy frost, snow, or freezing winds can damage or even kill them. Hardy varieties (like Rugosa or David Austin roses) tolerate cold better, but even they benefit from mulch or burlap wraps. For tender roses, always provide shelter—think of it as winter pajamas for your plants!
When should I prune roses in winter?
Prune after the first hard frost but before new growth starts in early spring (typically late winter or early February, depending on your climate). This timing helps prevent disease spread and gives the plant time to heal before warmer weather. Avoid pruning in late fall—you’ll expose fresh cuts to winter’s moisture, inviting fungal infections.
How do I know if my roses are too cold?
Watch for these signs: blackened or mushy stems, wilted leaves, or brown, crispy foliage. If you see these, act fast! Gently brush off snow (to prevent ice buildup) and add extra mulch or a frost blanket. Pro tip: Touch-test stems—if they feel soft or squishy, they’re likely frost-damaged.
Can I use cardboard or plastic to protect roses in winter?
Yes! Cardboard (unbleached) or burlap are great for wrapping canes, while plastic (like frost cloth) works for temporary cover—but avoid leaving it on too long, or humidity can cause rot. For heavy snow, use a lightweight frame (like a wire hoop) to keep branches from breaking. Just remember: Ventilation is key!
My rose bushes look dead—are they really gone?
Not necessarily! Many roses go dormant in winter, looking leafless or lifeless. Wait until late winter or early spring to judge—new growth should appear when temps rise above freezing. If stems are still firm (not mushy) and roots are intact, they’ll likely bounce back. Patience is key—spring surprises are common!
Bonus Tip: Quick Winter Checklist
- Mulch: Add 4–6 inches of organic mulch (straw, leaves, or wood chips) around the base.
- Water: Water deeply before the ground freezes to keep roots hydrated.
- Frost Watch: Move potted roses to a sheltered spot or indoor garage.
- Prune: Wait until after the last frost for a clean cut.
Wrapping up and next steps
Caring for your roses in winter doesn’t have to be a challenge—with the right prep and protection, your plants can thrive even when temperatures drop. 🌹❄️ Remember, mulching, pruning, and sheltering are your best tools to keep them strong until spring blooms return.
Now that you’re equipped with the knowledge, take action: assess your roses, gather supplies, and give them the cozy winter care they deserve.
Your next step? Start small—check your plants this weekend! A little effort now means stunning, healthy roses ready to greet you with color and fragrance come spring. Happy gardening! 🌱