
Propagation
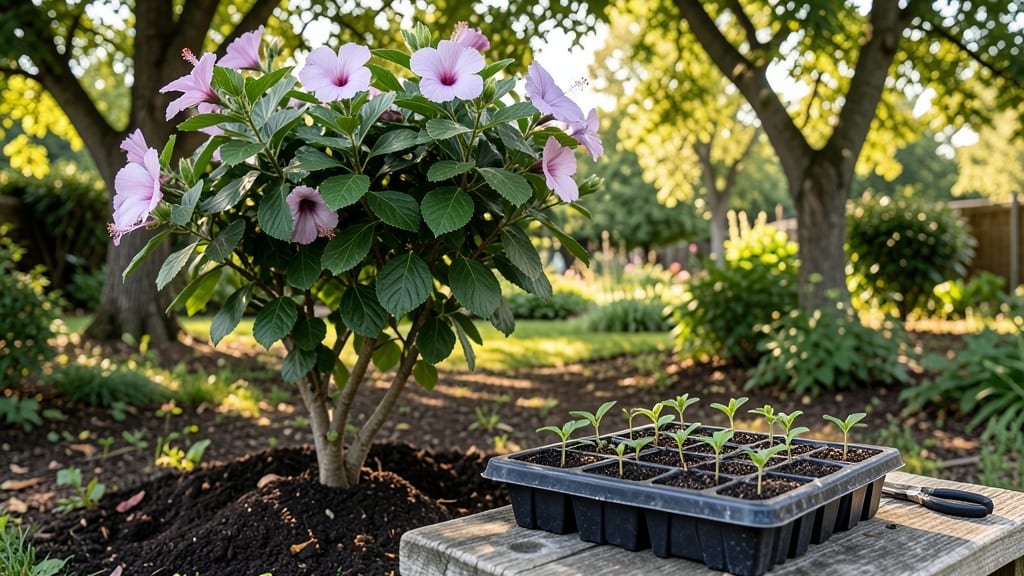
Propagating Rose of Sharon from seed is like coaxing a stubborn friend to try something new—it takes warmth, moisture, and a little help breaking dormancy before those seeds even think about sprouting. 🌱 about sprouting.
My first batch took 12 weeks of waiting before a single green shoot appeared, but now I know the exact tricks to speed things up.
The secret lies in pre-treatment: soaking seeds in warm water for 24 hours mimics natural rain cycles, while a quick cold stratification (just 30 days in the fridge) mimics winter.
You’ll need a seed-starting mix that drains well but holds moisture—think equal parts peat and perlite—and a heat mat set to 75°F to keep them cozy. Without these steps, seeds often rot before they even germinate.
Once they break through, you’ll see tiny seedlings with two round cotyledons that look nothing like the bushy parent plant. These babies grow slowly at first, but with consistent warmth and bright light, they’ll develop into sturdy young shrubs ready for transplanting in 6-8 months.
The foliage will eventually resemble the parent, though colors may vary slightly. Here’s the thing—seed-grown Roses of Sharon won’t be identical to the parent, but they’ll still produce those signature trumpet-shaped blooms in shades of purple, pink, or white.
This method works best for gardeners in zones 5-9 who want to experiment with new varieties without breaking the bank. Ready to give it a try?
📚 In This Guide
- What you need
- Instructions
- Tips and common mistakes
- Wrapping up and next steps
What you need
- ● Rose of Sharon seeds: Fresh, viable seeds (preferably from a trusted source or your own plant). Tip: If harvesting from your garden, ensure they’re fully mature and dried!
- ● Seed-starting mix: A well-draining, sterile medium like coco coir or a 50/50 blend of peat moss and perlite (10–15 quarts, depending on your setup).
- ● Seed trays or small pots: 2–4 inch pots (6–12 total, depending on seed quantity) or a seed tray with cell inserts.
- ● Clear plastic domes or plastic wrap: To create a humid, greenhouse-like environment (or a humidity tent kit for larger setups).
- ● Spray bottle: With room-temperature water for gentle misting.
- ● Grow lights or sunny windowsill: A full-spectrum LED grow light (12–16 hours/day) or a south-facing window with indirect light.
- ○ Heat mat (optional but helpful): A seedling heat mat (70–80°F range) to speed up germination.
- ● Fertilizer: A balanced, water-soluble fertilizer (5-10-5 or 10-10-10) diluted to half-strength for young seedlings.
- ● Seed scarification tools: Sandpaper (220-grit) or a knife for nicking hard seed coats.
- ● Stratification supplies: A refrigerator (for cold stratification) or peat moss (for moisture stratification).
- ● pH meter or test kit: To ensure your soil is in the 6.0–6.8 range (ideal for Hibiscus syriacus).
- ● Labels & markers: To track seed varieties and planting dates.
- ● Pruning shears: For future transplanting or trimming (once seedlings sprout!).
Step-by-Step instructions for propagating Rose of Sharon from seed
Here's how I break down the stubborn germination process—Rose of Sharon seeds need patience and the right tricks.
🌱 Step 1: Harvest and Prepare the Seeds
Collect seeds from fully ripe Rose of Sharon berries (they turn deep purple-black when ready). I like to scoop them out with a spoon and rinse off any pulp in a fine mesh strainer. Let them dry on a paper towel for 24 hours—this prevents mold during storage.
Here's the trick: Rose of Sharon seeds require stratification to break dormancy. Place them in a sealed plastic bag with slightly damp sand (or a mix of sand and peat moss). Store the bag in your refrigerator's crisper drawer for 6-8 weeks. Check weekly to ensure the mix stays barely moist—never soggy.
💧 Step 2: Sow Stratified Seeds in Moisture-Controlled Soil
After stratification, fill 4-inch pots with a mix of 50% potting soil and 50% perlite (this prevents compaction). Moisten the mix until it feels like a wrung-out sponge—damp but not dripping. Press the soil down lightly to create a firm planting surface.
Plant seeds ½ inch deep—too shallow and they may dry out before germinating. Space them 1 inch apart in the pot. Cover the pot with a clear plastic dome or wrap it in plastic wrap to trap humidity. Place the pot in a warm spot (70-75°F) like on top of your fridge.
☀️ Step 3: Provide Indirect Light and Monitor Germination
Rose of Sharon seeds need bright, indirect light during germination—never direct sun, which can overheat the soil. A north-facing window or a grow light set 6 inches above works best. Keep the soil consistently moist by misting daily or using a humidity tray filled with pebbles and water.
Germination can take 3-6 weeks, so don’t give up if nothing appears by week 3. You’ll know it’s working when you see the first tiny green shoots poking through the soil. Once they emerge, remove the plastic cover immediately to prevent fungal growth.
🌿 Step 4: Transplant and Harden Off Seedlings
When seedlings reach 2-3 inches tall and have developed their first true leaves (not the initial seed leaves), it’s time to transplant. Gently remove them from the pot, being careful not to damage the delicate roots. Plant them individually in 4-inch pots with fresh potting mix, burying them to the same depth they were growing before.
Harden off seedlings by placing them outdoors in a shaded spot for 1 hour the first day, gradually increasing exposure over 7-10 days. Watch for signs of stress like wilting or yellowing leaves—this means they’re not ready for full sun yet. Once they’re acclimated, move them to a sunny location with 6+ hours of light daily.
⏰ Step 5: Maintain Growth Through the First Year
Keep soil evenly moist but never waterlogged—Rose of Sharon seedlings hate soggy roots. Fertilize lightly with a balanced 10-10-10 fertilizer diluted to half strength every 4-6 weeks during the growing season. Prune leggy growth to encourage bushier development, pinching back the tips just above a set of leaves.
By the end of the first year, your seedlings should be sturdy enough to transplant into the ground or larger containers. Rose of Sharon grows fast, but it takes time—patience pays off with vibrant blooms in just a few seasons.
Tips & tricks for perfect Rose of Sharon germination
These practical insights will help you navigate the tricky germination process with confidence—because Rose of Sharon seeds don't play by the rules.
Stratification Success: The 6-8 week cold treatment in Step 1 is non-negotiable for breaking dormancy, but here's the secret: use a mix of sand and peat moss that stays "barely moist" like a wrung-out sponge. Too wet and you risk mold; too dry and the seeds won't wake up. I like to place a paper towel at the bottom of the bag to catch any excess moisture that might condense during the cold treatment. This keeps everything balanced without the soggy conditions that cause rot.
Lighting Strategy: In Step 3, when setting up that grow light 6 inches above, position it so it casts a soft shadow on a piece of paper beneath. If you can't see the shadow clearly, you're too close—this direct proximity can scorch delicate seedlings. Rose of Sharon seeds need bright but indirect light, so rotate the pots daily to ensure even growth. I've seen seedlings stretch toward one side when light sources are uneven.
Transplanting Timing: The 2-3 inch height guideline in Step 4 is perfect, but watch for the first true leaves (the second set that appear after the initial seed leaves). These true leaves are your signal that the seedling has established enough energy reserves to handle transplanting. If you move them too soon, you risk shocking the young plant. I've found that seedlings with just one true leaf can sometimes handle transplanting if they're sturdy, but it's safer to wait for the second set.
Harden Off Gradually: That 1 hour to 10 days progression in Step 4 is critical, but here's what nobody tells you: start the hardening process on a cloudy day if possible. Direct sunlight during those first few hours can stress seedlings even more than the temperature change. Begin with just 30 minutes in partial shade on day one, then gradually increase exposure. I've seen seedlings with sunburnt leaves after just a few hours of direct sun during this sensitive phase.
Pro Tips for Propagating Rose Of Sharon From Seed
- These practical insights will help you navigate the tricky germination process with confidence—because Rose of Sharon seeds don't play by the rules.
- Stratification Success: The 6-8 week cold treatment in Step 1 is non-negotiable for breaking dormancy, but here's the secret: use a mix of sand and peat moss that stays "barely moist" like a wrung-out sponge.
- Lighting Strategy: In Step 3, when setting up that grow light 6 inches above, position it so it casts a soft shadow on a piece of paper beneath.
Frequently asked questions
Got questions about growing Hibiscus syriacus from seed? Here are some common concerns—and their solutions—to help you succeed!
How long does it take for Rose of Sharon seeds to germinate?
Patience is key! Rose of Sharon seeds can take anywhere from 2 weeks to 6 months to sprout. Cold stratification (mimicking winter) speeds this up—keep seeds moist and chilled for 30–90 days before planting. If they haven’t sprouted after 6 months, they may need fresh treatment or could be non-viable.
Do I really need cold stratification for these seeds?
Yes! Rose of Sharon seeds have a hard seed coat that resists water absorption. Cold stratification (placing seeds in a damp paper towel in the fridge for 1–3 months) breaks dormancy and mimics natural winter conditions. Without it, germination rates drop dramatically—often to near-zero.
Can I grow Rose of Sharon from seed indoors, or should I start outside?
Indoor starts are perfect for beginners! Sow seeds in pots with well-draining soil, keep them under grow lights (or in a sunny window), and maintain warmth (70–75°F). Transplant seedlings outdoors after the last frost and harden them off for 2 weeks to avoid shock.
What if my seeds won’t germinate—are they bad?
Don’t toss them yet! Try these fixes:
- Scarify the seeds: Lightly nick the seed coat with sandpaper or a knife to help water penetrate.
- Soak overnight: Place seeds in warm water for 24 hours before planting.
- Check moisture: Seeds need consistent dampness (not soggy) to sprout.
Will seedlings grown from seed look like the parent plant?
Probably not! Rose of Sharon seeds produce wild-type plants with unpredictable colors, sizes, or growth habits. For exact clones, use cuttings instead. If you love a specific cultivar, ask a local nursery for grafted plants or cuttings—seeds are a gamble for consistency!
Wrapping up and next steps
Growing a Rose of Sharon from seed is a rewarding journey that blends patience with the joy of nurturing life from scratch.
While the process demands attention—especially with those stubborn stems—remember that every gardener starts somewhere! 🌱 With the right techniques, a warm environment, and a little persistence, you’ll soon be watching those delicate seedlings transform into vibrant, fragrant shrubs.
Now that you’re armed with germination tricks and troubleshooting tips, why not take the next step? Try experimenting with different seed-starting methods or even share your progress with fellow plant enthusiasts. Happy growing—your future blooms are waiting! 🌸