
Propagation
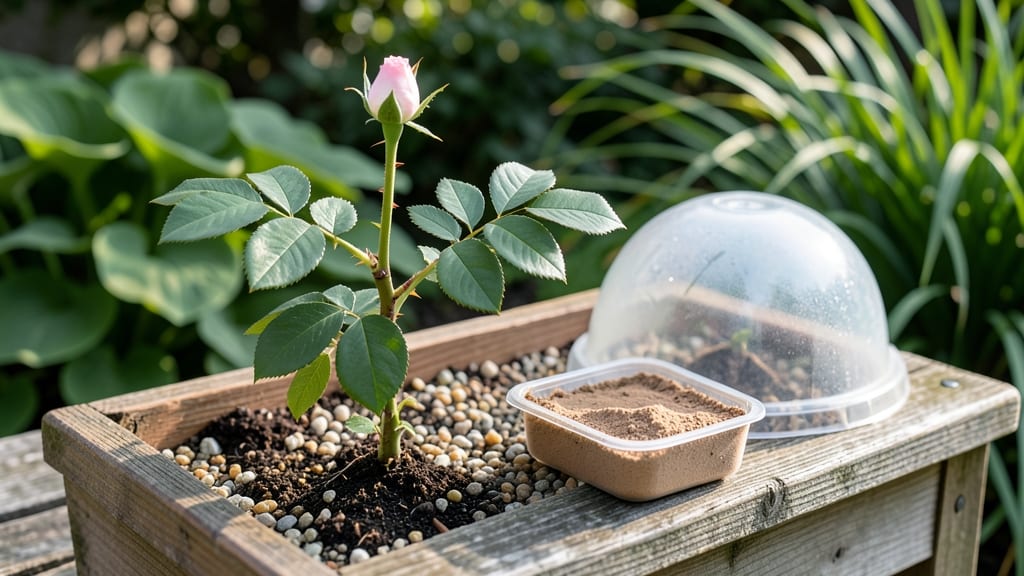
Starting a rose bush from a single clipping feels like magic—especially when you see those first green shoots after just a few weeks. ✨ I’ve turned free cuttings from neighbors’ bushes into thriving plants that now bloom like they’ve been there for years, and you can too with the right timing and care.
The secret isn’t complicated: 3-4 inch cuttings with at least two leaf nodes, taken in late spring or early summer when new growth is firm but still flexible.
Dip the cut end in rooting hormone (optional but helpful), then place it in water or moist soil—both work, but soil keeps cuttings sturdier and reduces rot risk.
By the time roots form (usually 4-6 weeks), you’ll have a tiny but sturdy plant ready to transplant. Keep it shaded and watered lightly until it’s strong enough to handle full sun, and soon you’ll have a rose bush that started from nothing but a spare cutting.
Works for hybrid teas, floribundas, and even climbing roses—just avoid diseased or sprayed plants. Here’s how to avoid the mistakes that kill most cuttings and get results every time.
📚 In This Guide
- What you need
- Instructions
- Tips and common mistakes
- Wrapping up and next steps
What you need
- ● Healthy rose clipping: 4–6 inches long (about the size of a pencil)
- ● With 3–5 leaf nodes (buds where leaves grow)
- ● Freshly cut from a non-flowering stem (spring or early summer is ideal)
- ○ Rooting hormone: 1 small bottle or packet (optional but highly recommended for success)
- ● Small pots or containers: 3–4 (4–6 inches wide) with drainage holes
- ● Well-draining potting mix: 1 bag (focus on a 50/50 blend of perlite and peat moss or coconut coir)
- ● Plastic wrap or clear plastic bag: To create a humid environment
- ● Spray bottle: With water (for misting)
- ● Scissors or pruning shears: Clean and sharp (sterilized with rubbing alcohol)
- ● Watering can or spray bottle: For gentle hydration
- ● Heat mat ($10–$20) – Speeds up rooting in cooler climates
- ● Grow lights ($20–$50) – If natural light is limited
- ● Hydrogen peroxide (3%) – 1 tsp per cup of water to prevent rot
- ● Label markers – To track your rose varieties
- ● Fertilizer (low-nitrogen, like 5-10-5) – For later growth stages
Step-by-step instructions for propagating a rose bush from a clipping
Here's my foolproof method for turning a single cutting into a thriving rose bush—no fancy tools required.
🌱 Step 1: Select and Prepare the Right Clipping
Choose a healthy stem from this season's growth, about 4-6 inches long with at least 3-4 leaf nodes (those little bumps where leaves attach). Use clean, sharp scissors or pruners to cut just below a node at a 45-degree angle—this increases surface area for root growth. Remove all but the top 2-3 sets of leaves to reduce moisture loss.
Strip the lower leaves completely, leaving just a small stem stub. The more leaves you leave below the soil line, the more rot you'll risk. Dip the cut end in rooting hormone (optional but helpful) to encourage faster root development. I like to do this step right after cutting while the stem is still fresh.
💧 Step 2: Plant in Moist, Well-Draining Medium
Fill a small pot with a mix of 50% perlite and 50% potting soil—this prevents soggy roots while holding enough moisture. Moisten the mix until it feels like a damp sponge, not dripping wet. Make a hole about 2 inches deep with your finger and insert the cutting, pressing gently around the stem to remove air pockets.
Place the pot in a clear plastic bag or cover it with plastic wrap to create a humid environment. This mimics the greenhouse effect and speeds up rooting. Set it in bright, indirect light—no direct sun yet. You'll know it's working when tiny roots appear at the cut end in about 4-6 weeks. Don't water again until the top inch of soil feels dry to the touch.
⏰ Step 3: Transition to Independent Growth
Once new leaves appear (6-8 weeks), your cutting has rooted successfully. Gradually remove the plastic covering over 5-7 days to harden off the plant. After a week, transplant to a slightly larger pot with regular potting soil or plant directly in the garden after the last frost date.
Keep the soil consistently moist but not soggy for the first month. You'll see stronger growth when the plant starts putting out new shoots—this means it's established roots. Roses are tough once they get going, but the first few weeks are critical. I always mark the planting date so I can track progress.
Tips & tricks for perfect rose bush propagation
Here's what I've learned after rooting dozens of rose cuttings—these simple tricks make all the difference.
Selection is Everything: Look for stems that are pencil-thick with vibrant green leaves—thicker stems root more reliably. Avoid woody cuttings or those with yellowing leaves, as they won't establish well. I always check for fresh growth in late spring or early summer when the plant is actively growing. The 4-6 inch length gives you enough stem for root development while keeping the cutting manageable.
Cutting Technique Matters: That 45-degree angle isn't just decorative—it creates more surface area for roots to form. Use clean tools to prevent disease, and make the cut just below a node where roots will emerge. I've found that cutting while the stem is still fresh (within 30 minutes) gives the best results when dipped in rooting hormone. If you can't use hormone, just make sure the cut end stays moist until planting.
Humidity is Key: The plastic bag or wrap creates a greenhouse effect that speeds up rooting. Check the soil every few days—it should stay moist like a damp sponge. If condensation forms inside the plastic, that's a good sign your cutting is happy. I like to prop up the plastic slightly to prevent water from pooling on the leaves, which can cause rot.
Patience Pays Off: Those 6-8 weeks might seem long, but rushing the process leads to weak roots. I've seen cuttings fail when people peek too often or move them before they're ready. Mark your planting date and resist the urge to check until you see new leaves—this means roots have formed and your cutting has successfully established itself.
Pro Tips for Start A Rose Bush From A Clipping
- Here's what I've learned after rooting dozens of rose cuttings—these simple tricks make all the difference.
- Selection is Everything: Look for stems that are pencil-thick with vibrant green leaves—thicker stems root more reliably.
- Cutting Technique Matters: That 45-degree angle isn't just decorative—it creates more surface area for roots to form.
Frequently asked questions
Got questions about propagating roses from clippings? You’re not alone! Here are answers to the most common concerns—so you can root your new bush with confidence.
When is the best time of year to take rose cuttings?
The ideal window is late spring to early summer (May–June) when roses are actively growing. Avoid winter dormancy or extreme heat—both stress the plant and reduce rooting success. Pro tip: Early morning is the best time to cut, as stems are hydrated and full of energy!
How do I know if my clipping is healthy enough to root?
Look for green, disease-free stems (about pencil-thick) with 3–5 leaf nodes. Avoid woody or dried-out cuttings—they won’t root. Healthy cuttings should snap (not bend) when broken, signaling freshness. Bonus: Skip flowers or buds—they drain energy from root growth.
Why aren’t my rose cuttings rooting? Troubleshooting tips
Common culprits include:
- Overwatering: Soggy soil suffocates roots. Keep soil moist (not wet).
- Low humidity: Roses love humidity! Cover cuttings with a plastic bag or use a propagator.
- Poor light: Bright, indirect light is key. Avoid harsh sun.
- Old cuttings: Stems older than 24 hours lose viability. Root them ASAP!
If all else fails, try hormone rooting gel—it boosts success rates by 30–50%!
Can I root rose cuttings in water instead of soil?
Yes, but with lower success rates (20–40% vs. 60–80% in soil). Use clean water changed every 2–3 days, and place cuttings in indirect light. Once roots hit 2–3 inches, transplant to soil. Warning: Water-rooted roses often develop weak stems—soil rooting builds stronger plants.
How long does it take for rose cuttings to root?
Patience is key! Most cuttings root in 4–8 weeks, but some take up to 12 weeks. Check for roots by gently tugging—they’re ready when you feel resistance. Speed tip: Keep soil warm (70–75°F) with a heating mat for faster growth.
What should I avoid when propagating roses from clippings?
Avoid these rookie mistakes:
- Using spray paint on cut ends—it’s outdated and ineffective.
- Planting cuttings too deep—only 2–3 nodes should be buried.
- Skipping sterilization—clean tools prevent fungal infections.
- Ignoring leaf pruning—trim leaves on the lower half to reduce moisture loss.
Steer clear, and your roses will thrive!
Wrapping up and next steps
Starting a rose bush from a clipping is a rewarding way to grow your favorite blooms—and you’ve got all the tools to succeed! With patience, the right care, and these simple steps, your cutting will root and flourish into a thriving plant. Now’s the time to take action! Grab that healthy stem, follow the process, and soon you’ll be enjoying roses that carry your personal touch. Next, plant your rooted cutting in well-draining soil, give it love, and watch your garden grow! 🌱✨