
Propagation
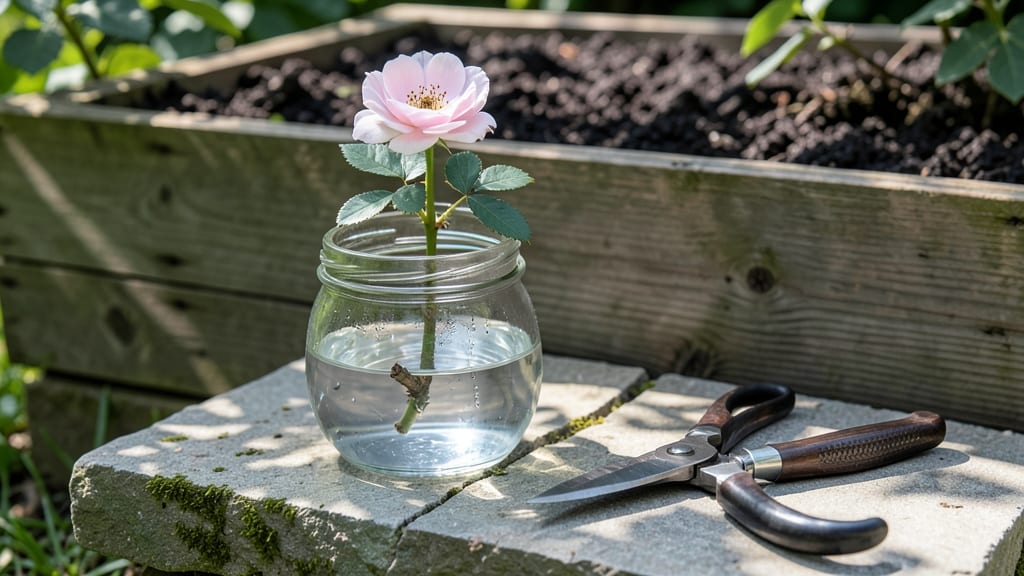
Growing a rose plant from a single flower feels like magic—except it’s science you can do with a vase, sharp scissors, and patience. ✨ I’ve rooted roses this way twice, and both times, that first green shoot popping through the water (or soil) felt like a miracle.
The trick? Timing, clean cuts, and keeping the cutting happy until roots form.
You’ll need just a few things: a healthy rose stem with at least three buds, rooting hormone (optional but helpful), a clean jar or pot, and water or soil.
The process takes about 4-8 weeks for roots to form, but the real payoff comes when you transplant—imagine blooms next summer from a cutting you took today. It’s cheaper than buying plants and way more rewarding.
Start by snipping a stem just below a leaf node while the rose is still in bloom, then strip the lower leaves and place it in water or moist soil. Keep it out of direct sun and change the water every few days.
Within weeks, you’ll spot tiny roots forming—proof your cutting is alive and thriving. The first blooms might take a year, but the journey is half the fun.
Works for hybrid teas, climbers, or even those free roses from your neighbor’s yard. Just avoid sprayed flowers (the chemicals can stunt growth) and be patient—some cuttings root faster than others. Here’s how to turn that one bloom into a whole bush.
📚 In This Guide
- What you need
- Instructions
- Tips and common mistakes
- Wrapping up and next steps
What you need
- ● Healthy rose flower: Choose a non-hybrid rose (e.g., climbers, shrubs, or old garden roses) with 3-5 leaf nodes (the small bumps where leaves grow). Avoid hybrid teas or spray roses.
- ● Clean, sharp scissors or pruning shears: Sterilize with rubbing alcohol to prevent disease. (1 pair)
- ○ Rooting hormone (optional but recommended): A powder or gel (e.g., Clonex or Dip ‘N Grow) to boost root growth. (Small jar)
- ● Jar or glass container: A clean, clear vessel (e.g., mason jar, vase, or plastic cup) with a mouth wide enough for the stem.
- ● Water: Room-temperature, filtered, or rainwater (tap water may contain chlorine; let it sit out for 24 hours if using tap).
- ● Small pot or tray (for soil method): A 4-6 inch pot with drainage holes if propagating directly in soil. (1 pot)
- ● Well-draining potting mix: A blend of 50% perlite or sand + 50% peat or coco coir to prevent rot. (1 small bag)
- ● Plastic bag or humidity dome: A clear plastic bag with a twist tie or a propagator to create a greenhouse effect. (1 bag)
- ● Activated charcoal: Adds to water (1 tsp per quart) to keep it fresh and prevent bacteria. (Small bag)
- ● Hairpin or clothespin: To secure the stem in place if it’s wobbly. (1-2)
- ● Grow lights or sunny windowsill: A south-facing window or LED grow light (12-16 hours/day) for optimal growth.
- ● Fertilizer (after rooting): A balanced liquid fertilizer (10-10-10) diluted to half-strength once roots appear.
Step-by-Step instructions for growing roses from a flower cutting
Here’s how to turn a single rose bloom into a thriving plant—no fancy tools needed.
🌱 Step 1: Select and Prepare the Stem
Choose a healthy rose stem with at least 3-4 buds and 4-6 inches of length. Snip just below a leaf node (where leaves grow) with clean, sharp scissors. Remove all but the top 2-3 leaves—this focuses the plant’s energy on rooting instead of supporting foliage. Strip the lower leaves entirely; they’ll rot in water or soil.
Here’s the thing—you want a stem that’s wooden but still green, not fully hardened. If it snaps instead of bends, it’s too mature. Dip the cut end in room-temperature water for 10-15 seconds to seal any exposed tissue and prevent drying.
💧 Step 2: Root in Water (Easiest Method)
Fill a clean 8-ounce glass with 2-3 inches of filtered or rainwater. Add 1 crushed aspirin (this boosts root growth) and place the stem so only the bottom 2-3 inches are submerged. Use a rubber band to secure the stem if it floats—you want those nodes underwater.
Change the water every 3-4 days to prevent bacteria. Set the glass in bright, indirect light (no harsh sun). In 4-6 weeks, you’ll see tiny roots forming at the nodes. Once they reach 1-2 inches, it’s time to plant.
🌿 Step 3: Plant in Soil (For Faster Establishment)
Fill a 6-inch pot with well-draining potting mix (avoid garden soil—it’s too dense). Mix in 1 tablespoon of perlite to improve aeration. Dig a hole 2 inches deep and dip the rooted cutting in rooting hormone (optional but helpful). Plant so the lowest node is just below soil level.
Water gently until moisture seeps from the bottom. Cover the pot with a clear plastic bag to trap humidity (remove it daily for 10 minutes to prevent mold). Keep the soil evenly moist—not soggy. In 2-3 weeks, new leaves will appear, signaling the plant is settling in.
☀️ Step 4: Acclimate and Transplant
After 4-6 weeks in soil, your rose is ready for outdoor life. Harden it off by moving it outside for 1-2 hours daily, gradually increasing time. Watch for wilted leaves—this means it’s not ready yet. Once it handles full sun without stress, transplant to a permanent spot with 6+ hours of sunlight. Mulch around the base to retain moisture.
Real talk: Your first rose might not bloom right away—focus on strong stems and leaves first. Prune any leggy growth to encourage bushiness. With patience, you’ll have a homegrown rose bush in a season.
Tips & tricks for perfect rose plant propagation
Here's what nobody tells you about turning a single rose bloom into a thriving plant—these tricks save time and frustration.
Stem Selection Secret: Look for stems that bend slightly rather than snap—this means they're young enough to root. I've tried mature stems that looked perfect, only to have them fail completely. Also, avoid stems with thorns pointing outward; they often indicate a stressed plant that won't root well. In Step 1, when you're stripping leaves, don't forget to remove any small leaves near the bottom nodes—they'll rot before they can photosynthesize.
Water Root Boost: That crushed aspirin in Step 2 isn't just a trick—it actually works! The salicylic acid stimulates root growth. For even better results, add a drop of liquid seaweed fertilizer to the water when you change it every 3-4 days. I've seen root formation double with this simple addition. Just make sure to use filtered or rainwater—chlorine in tap water can inhibit root growth.
Lighting Strategy: Bright indirect light is crucial in Step 2, but too much direct sun can scorch the leaves. I place my propagation glass near an east-facing window where it gets morning sun but stays shaded in the afternoon. If you notice leaves turning yellow, move it to a slightly shadier spot. The goal is to keep the stem healthy while it develops roots—stressed plants root more slowly or not at all.
Soil Preparation Tip: When you're mixing perlite into your potting soil in Step 3, don't skimp—use about 20% perlite by volume. This improves drainage and prevents root rot, which is the #1 killer of newly planted cuttings. I also recommend using a small hand trowel to make the planting hole—it creates a clean, precise hole that's exactly 2 inches deep, just as specified. This consistency makes all the difference in successful root establishment.
Pro Tips for Grow A Rose Plant From A Rose Flower
- Here's what nobody tells you about turning a single rose bloom into a thriving plant—these tricks save time and frustration.
- Stem Selection Secret: Look for stems that bend slightly rather than snap—this means they're young enough to root.
- Water Root Boost: That crushed aspirin in Step 2 isn't just a trick—it actually works!
Frequently asked questions
Got questions about turning that beautiful rose into a thriving plant? You’re not alone! Here are some of the most common queries—and their straightforward answers—to help you succeed.
Can I grow any rose from a cut flower?
Not all roses will root successfully. Hybrid teas, floribundas, and some climbers are your best bets—they root easily in water or soil. Avoid spray roses or heavily sprayed blooms (pesticides can hinder growth). Look for healthy stems with at least 3-5 buds and no signs of disease.
How long does it take for roots to grow in water?
Patience is key! Roots typically appear in 2-4 weeks, but some may take up to 8 weeks. Change the water every 2-3 days to prevent bacteria, and place the cutting in bright, indirect light. If no roots form after 6 weeks, try soil propagation instead.
What if my cutting rots before rooting?
Rotting is a common issue, but it’s fixable! If the stem turns mushy or smells bad, trim the affected part and replant in fresh water or sterile soil. To prevent rot:
- Use clean, room-temperature water (chlorine-free if possible).
- Avoid overcrowding—only 1-2 cuttings per jar.
- Skip the lower leaves (they’ll rot in water).
Can I plant the rooted cutting directly in the garden?
Yes, but wait until roots are 2-3 inches long (or at least 1 inch for soil-grown cuttings). Harden off your cutting first by placing it outside for 1-2 hours daily over a week. Plant in well-draining soil, water deeply, and mulch to retain moisture. Avoid full sun for the first week to reduce stress.
What if my rose cutting blooms while rooting?
Don’t panic—it’s normal! If your cutting blooms in water or soil, remove the flower to redirect energy to root growth. The plant will focus on establishing roots first. Once transplanted, it’ll reward you with new blooms next season (though the first year may be sparse).
Pro Tip: Need a faster method?
For soil propagation, dip the cut end in rooting hormone and plant directly in a mix of perlite and peat moss. Keep the soil moist (not soggy) and cover with a plastic bag to trap humidity. Roots often form in 3-4 weeks—check by gently tugging the stem!
Wrapping up and next steps
Growing a rose plant from a single flower is a rewarding journey that blends patience, care, and a touch of magic! 🌸 With the right techniques—whether rooting in water or soil—you’ve unlocked the power to propagate your favorite blooms into thriving plants.
Remember, consistency is key, and even small efforts can yield beautiful results over time.
Now that you’re armed with knowledge, pick a healthy stem today and start your green thumb adventure! Share your progress with fellow gardeners or experiment with different rose varieties—your garden will thank you. Happy growing! 🌱