
Pruning
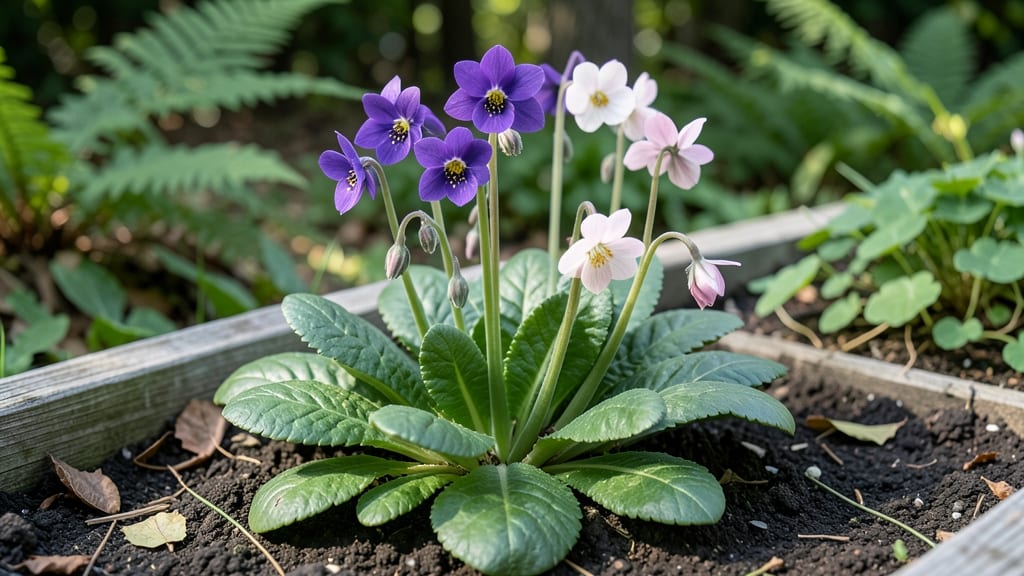
Deadheading primroses turns one season of blooms into three—with just three simple cuts and a little timing. ✂️ I’ve turned my spring primroses into summer-long stars by snipping spent flowers at the right moment, and the difference is night-and-day: thicker foliage, more buds, and blooms that last until frost.
The secret? Cutting right above the first set of leaves (not into the stem!) right after the flower fades. You’ll need sharp scissors or clean pruners—dull tools crush stems and stress the plant.
Do this every 7-10 days during bloom season, and your primroses will reward you with reblooming waves instead of a single spring show. What you’ll end up with is a primrose that looks like it’s in its prime all summer—fuller, bushier, and packed with fresh buds.
The key is patience: some varieties (like Primula denticulata) rebloom eagerly, while others (Primula vulgaris) appreciate a lighter touch. Either way, your garden will stay vibrant longer than your neighbors’.
Avoid the rookie mistake of cutting too aggressively—never remove more than one-third of the plant’s height at once. And here’s a pro tip: deadhead early in the morning when stems are firm, not after rain when they’re slippery. Your primroses will thank you!
📚 In This Guide
- What you need
- Instructions
- Tips and common mistakes
- Wrapping up and next steps
What you need
- ● Pruning shears or sharp garden scissors – Choose a pair with clean, sharp blades (bypass pruners work best for precision). Size: Small to medium (4–6 inches) for easy handling.
- ○ Gloves (optional but recommended) – Lightweight gardening gloves protect your hands from thorns or rough stems. Tip: Wear them if your primroses have prickly foliage!
- ● Disinfectant (rubbing alcohol or 10% bleach solution) – A small spray bottle or wipe to sterilize tools between cuts and prevent disease spread.
- ● Trash bag or bucket – For collecting spent blooms and debris. Pro tip: A 5-gallon bucket with a lid keeps things tidy!
- ○ Water spray bottle (optional) – A light mist helps settle dust and refreshes plants after pruning.
- ● Dry, calm weather – Avoid pruning after rain or in windy conditions to prevent stressing the plants.
- ● Morning sunlight – Deadhead in the early morning when plants are hydrated and temperatures are mild.
- ● Freshly bloomed primroses – Wait until at least 1-2 blooms per stem have fully opened before deadheading.
Step-by-Step instructions for deadheading primroses
Here's how to keep your primroses flowering beautifully with just three precise cuts.
✂️ Step 1: Identify and Prepare for Deadheading
Start by selecting spent blooms—the ones with wilted petals that have fallen or are drooping noticeably. Primroses often produce clusters, so you'll need to work through each stem carefully. I like to do this in the morning when dew is present, as the stems are more pliable and less likely to snap unexpectedly. Grab a pair of clean, sharp pruners or even your fingers (for small stems) to begin.
Look for the small brown or green seed pods forming at the base of each spent bloom—that's your visual cue. If you see these, the flower is ready for removal. Never cut into healthy buds or leaves, as this weakens the plant. Focus only on stems where the bloom has fully faded and the foliage below remains vibrant.
✂️ Step 2: Make the First Cut at the Right Angle
Position your pruners just above the first set of healthy leaves or the first leaf node below the spent bloom. This is typically where the stem meets the foliage, about ½ to ¾ inch below the faded flower head. Angle your cut slightly upward, creating a sloped surface that allows water to run off and prevents rot. A clean cut also encourages new growth from the leaf node below.
I always make a small test cut first to ensure I'm not cutting into any hidden buds or leaves. Primroses are forgiving, but a misplaced cut can stunt future blooms. If you accidentally cut too low, don't worry—just monitor the plant for new growth and adjust future cuts accordingly.
✂️ Step 3: Remove Seed Pods to Encourage More Blooms
After cutting the spent bloom, check the base of the stem for any developing seed pods. These pods divert energy away from producing new flowers, so removing them is key to prolonging the blooming season. Use your fingers or the same pruners to gently pinch or snip off any pods you find. Be thorough but gentle—primrose stems are delicate and can break easily.
Here's the thing—if you leave even one pod, the plant will focus its energy on seed production instead of creating new blooms. I like to do a quick scan of the entire plant after deadheading to ensure no pods were missed. This extra step makes a noticeable difference in how long your primroses continue to flower.
🌿 Step 4: Clean Up and Monitor for New Growth
Once all spent blooms and seed pods are removed, take a step back to admire your work. You should now see a clearer view of the plant's structure and any emerging buds. Primroses often respond quickly to deadheading, with new blooms appearing within 1-2 weeks if conditions are right. Keep an eye out for fresh buds forming at the base of the stems where you made your cuts.
After deadheading, give your primroses a light watering to help them recover. Avoid heavy watering immediately after pruning, as wet foliage can invite fungal issues. If you notice any yellowing leaves or wilting, it could be a sign of overwatering or stress—adjust your care routine accordingly. With proper deadheading, your primroses should reward you with continuous blooms for weeks.
Tips & tricks for perfect primrose deadheading
A few simple techniques will transform your primrose care routine and keep those blooms coming all season long.
The Timing Secret: Early morning is ideal for deadheading because the dew makes the stems more flexible and less likely to snap. I've found that primroses respond best when you work with them at their natural peak—right after dew evaporates but before the midday heat sets in. This timing also gives your plants the entire day to recover and prepare for new growth.
Precision Cutting: In Step 2, when making your cut about ½ to ¾ inch below the spent bloom, I recommend using a small mirror or magnifying glass to verify you're not cutting into hidden buds. Primrose stems are deceptively complex, and what looks like a clear stem from above might hide a tiny bud from below. A quick visual check prevents accidental damage that could delay future blooms.
Seed Pod Inspection: After removing spent blooms, I can't stress enough how important it is to thoroughly check for seed pods in Step 3. These sneaky little pods can hide behind leaves or even form after you've made your initial cuts. I've seen primroses go from continuous blooming to complete dormancy in just weeks because of missed seed pods. Take your time—it's worth the extra attention.
Post-Deadheading Care: The 1-2 week window mentioned in Step 4 for new blooms to appear assumes your primroses are in optimal conditions. If you notice buds forming but not opening, check your watering routine—primroses need consistently moist (not soggy) soil. I've found that a light misting in the evening helps maintain humidity without promoting fungal growth, which is especially important after pruning.
Pro Tips for Deadhead Primroses
- A few simple techniques will transform your primrose care routine and keep those blooms coming all season long.
- The Timing Secret: Early morning is ideal for deadheading because the dew makes the stems more flexible and less likely to snap.
- Precision Cutting: In Step 2, when making your cut about ½ to ¾ inch below the spent bloom, I recommend using a small mirror or magnifying glass to verify you're not cutting into hidden buds.
Frequently asked questions
Got questions about deadheading primroses? You’re not alone—this simple task can feel tricky at first! Below, we’ve rounded up the most common queries to help you keep your primroses blooming beautifully.
When is the best time to deadhead primroses?
Deadhead primroses after the flowers fade but before the seed pods form. This usually means snipping them in late spring or early summer, depending on your climate. Wait until the petals drop slightly—they’ll look wilted or slightly crumpled. Pro tip: Morning is ideal since flowers are often freshest then!
Do I need special tools to deadhead primroses?
Nope! You can use clean, sharp anything—fingers (gently!), small pruning shears, or even kitchen scissors. Just ensure your tools are sanitized to avoid spreading disease. Bonus: A pair of bypass pruners makes the job faster and cleaner for larger clumps.
What if I skip deadheading? Will my primroses still bloom?
Yes, but you’ll likely see fewer flowers—and they may bloom later. Deadheading redirects energy from seed production back to your plant, encouraging more vibrant, long-lasting blooms. Skipping it won’t kill your primroses, but you’ll miss out on their full potential!
Can I deadhead primroses too much? Is there such a thing?
Over-deadheading is rare, but if you cut too aggressively (e.g., removing more than 1/3 of the foliage), you might stress the plant. Focus on spent blooms only—leave the healthy leaves and stems intact. Rule of thumb: Never trim more than the flower stem!
Should I deadhead primroses in rain or after heavy watering?
Avoid deadheading right after rain or watering—the stems may be slippery or soggy, making cuts messy. Wait until the soil is slightly dry and the plant is stable. Exception: If a storm damaged blooms, trim them ASAP to prevent mold.
What if my primroses keep reblooming but look leggy?
Leggy growth often means the plant needs more light or nutrients. After deadheading, fertilize lightly with a balanced 10-10-10 mix and move to a sunnier spot (if possible). Extra tip: Divide overcrowded clumps every 3–4 years to revive vigor!
Wrapping up and next steps
Deadheading primroses is a simple yet powerful way to keep your garden vibrant and encourage more blooms! 🌸 With just a few cuts and a little attention, you’ll enjoy lush, long-lasting flowers all season. Now that you’re armed with the know-how, grab your shears and get pruning—your primroses (and future garden projects) will thank you!
Ready for more? Try your hand at pruning other spring bloomers like pansies or violets—your garden’s next transformation is just a cut away! ✂️