
Pruning
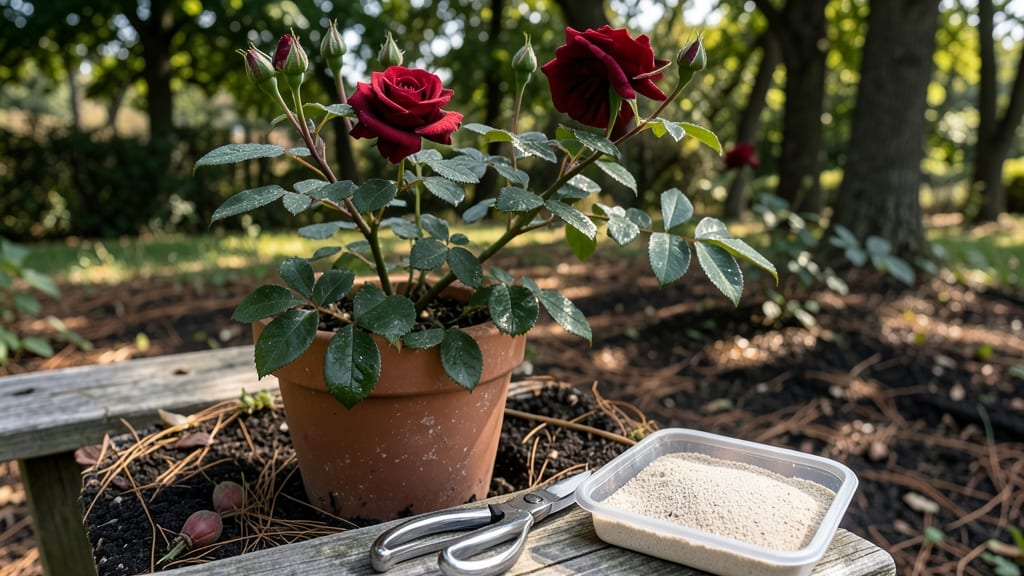
Cloning a rose bush through layering gives you free, identical plants—and it’s easier than you think. 🌹 I’ve propagated dozens of roses this way, and the secret lies in patience, the right timing, and a few simple tools.
Unlike cuttings, layering works even with stubborn varieties that refuse to root from stems alone.
The magic happens in late spring or early summer when new growth is vigorous but not yet woody. You’ll need sharp pruners, rooting hormone (optional but helpful), and a small pot for the new plant.
The process takes about 8-12 weeks, but the best part? You’re essentially making a rose bush clone itself—no nursery costs, no guesswork.
By the time your layered stem develops roots, you’ll have a self-sufficient plant ready to transplant. The original bush stays healthy, and you gain a genetically identical copy—perfect for sharing with neighbors or filling gaps in your garden. No green thumb required, just steady hands and a watchful eye.
This method works for hybrid teas, floribundas, and even some shrub roses. The key is choosing the right stem and keeping the soil moist without drowning it. Let’s get those roots growing!
📚 In This Guide
- What you need
- Instructions
- Tips and common mistakes
- Wrapping up and next steps
What you need
- ● Healthy rose bush: Choose a mature, disease-free rose bush with flexible, non-woody stems (about pencil-thick).
- ● Sharp pruning shears or bypass pruners: Clean, sterilized tools to make precise cuts (avoid dull blades that crush stems).
- ○ Rooting hormone (optional but recommended): A powder or gel to boost root growth (e.g., Clonex or Rootone).
- ● Moisture-retentive medium: Sphagnum moss: 1 small bag (for humidity retention).
- ● Potting mix: 1 bag of well-draining soil (e.g., 50% peat moss + 50% perlite).
- ● Plastic wrap or clear plastic bag: To create a mini greenhouse effect (1–2 feet long, depending on stem length).
- ● Twist ties or zip ties: 2–3 pieces to secure the plastic wrap.
- ● Small pots or containers: 2–3 (4–6 inches deep) for transplanting rooted cuttings.
- ● Watering can or spray bottle: For gentle hydration (avoid soaking the soil).
- ● Hormone-free alternative: Cinnamon powder or willow water (natural rooting aids).
- ● Garden gloves: To protect your hands from thorns and dirt.
- ● Label markers: To track your clones (e.g., rose variety and date).
- ● Fertilizer (low-nitrogen): A balanced 10-10-10 or seaweed extract for post-rooting growth.
How to clone a rose bush using layering
This method works every time—no fancy tools or greenhouses required.
🌿 Step 1: Choose and Prepare the Parent Rose Bush
Pick a healthy, mature rose bush with strong canes that are at least ½ inch thick. Look for flexible stems—they bend easily without snapping. I always choose canes that are 2-3 years old because they’ve got the energy to support new growth.
Clean the cane with a damp cloth to remove dirt and debris. This keeps bacteria from invading your cut later. If the bush has thorns, wear gloves—you’ll be working close to the stem. The best time to clone is in late spring or early summer when the bush is actively growing.
✂️ Step 2: Create the Cut and Bend the Cane
Select a healthy section of cane about 12-18 inches long. Using clean, sharp pruners, make a 1-inch diagonal cut about 6 inches from the tip. This cut will be your new rooting point. Next, bend the cane downward until it touches the soil.
Here’s the trick—I use a small U-shaped piece of wire or a bent nail to hold the cane in place. Secure it so the cut section is buried 2-3 inches deep in moist soil. The bend should be gentle but firm, like a natural arch. If the cane snaps, pick another one.
💧 Step 3: Bury and Water the Cane
Dig a shallow trench beside the parent bush and carefully tuck the bent cane into it. Cover the cut section with soil, leaving the top 3-4 inches exposed. Press the soil lightly around the cane to remove air pockets—this helps roots form faster.
Water the area thoroughly until the soil is damp but not soggy. You’ll see moisture bead up on the soil surface, but it shouldn’t pool. Check daily and water again if the soil feels dry to the touch. Roots typically form in 4-8 weeks, but keep the soil consistently moist until then.
🌱 Step 4: Separate the New Clone
Once you see new leaves sprouting from the buried section, roots are likely forming. Wait until the new growth reaches 4-6 inches tall before separating. This usually takes 2-3 months, depending on your climate.
Use pruners to cut the clone just below the new roots. Gently lift it from the soil and transplant it to its permanent spot. Water deeply after planting to help it establish. The first year, your clone might not bloom, but it’ll grow stronger each season.
Tips & tricks for perfect rose bush layering
Between us, these little details make all the difference when cloning roses—trust me, I've seen too many well-intentioned gardeners skip them. Here's what nobody tells you about getting it right the first time.
Cane Selection is Everything: In Step 1, when choosing your ½-inch thick canes, look for ones that are slightly thicker than the minimum—about ⅝ inch. Thicker canes have more stored energy for rooting, and you'll see faster success. Also, avoid canes with any signs of disease or discoloration, even if they look otherwise healthy. The best canes are those with a slight sheen, indicating good moisture content.
The Diagonal Cut Technique: That 1-inch diagonal cut in Step 2 isn't just about length—it's about maximizing surface area for root formation. Make the cut at a 45-degree angle using clean, sharp pruners. The larger surface area exposed to soil means more potential root development. After cutting, immediately bend the cane to prevent the cut from drying out while you prepare the burial site.
Moisture Management Matters: In Step 3, when burying your cane, focus on creating the perfect moisture environment. After watering, stick your finger about 1 inch into the soil—it should feel like a damp sponge, not a wet sponge or dry sandpaper. If your soil drains too quickly, mix in some compost to help retain moisture. I've found that covering the buried section with a small plastic bag (secured loosely) for the first week can create a mini greenhouse effect that speeds up root formation.
Timing Your Separation: In Step 4, when checking for new growth, pay attention to the color of the new leaves. Healthy new growth should be a vibrant green, not yellow or purple. Also, gently tug on the cane after you see new leaves—if it resists slightly but doesn't pull out completely, roots are forming. This simple test saves you from prematurely separating clones that aren't ready.
Pro Tips for How Do You Clone A Rose Bush
- Between us, these little details make all the difference when cloning roses—trust me, I've seen too many well-intentioned gardeners skip them.
- Cane Selection is Everything: In Step 1, when choosing your ½-inch thick canes, look for ones that are slightly thicker than the minimum—about ⅝ inch.
- The Diagonal Cut Technique: That 1-inch diagonal cut in Step 2 isn't just about length—it's about maximizing surface area for root formation.
Frequently asked questions
Got questions about cloning your rose bush? You’re not alone!
Here are the most common concerns—plus clear, no-fuss answers to help you succeed.
What’s the best time of year to layer a rose bush?
The ideal window is late spring to early summer (May–June in most climates). This gives roots enough time to establish before winter. Avoid layering in extreme heat or frost—your cutting needs moderate warmth and moisture to thrive. Pro tip: If you miss this window, try early fall (September) for a second chance!
How long does it take for a rose layer to root?
Patience is key! Most rose layers take 4–8 weeks to root, depending on conditions. Check for success by gently tugging the new shoot—if it resists, roots are forming. If no roots appear after 2 months, try adjusting moisture or light exposure.
Can I use this method for all types of roses?
Layering works best for hardy, non-grafted roses (like hybrid teas, floribundas, or climbers). Grafted roses (common in nurseries) may not produce true-to-type clones. For tricky varieties, ask your local nursery or extension office for tailored tips!
What if my layer rots or dies before rooting?
Don’t panic! Rot usually means too much moisture or poor airflow. Fix it by:
- Reducing water (keep soil damp, not soggy).
- Ensuring the stem stays partially exposed to air.
- Using a rooting hormone to boost success.
Do I need rooting hormone for rose layering?
Not required, but it doubles your chances! Dip the stem’s wound (where you nicked it) in hormone powder before burying. Skip it if you’re in a humid climate—natural rooting may still work. For beginners, a cheap, store-bought hormone is a smart investment.
Wrapping up and next steps
Cloning a rose bush through layering is a rewarding way to expand your garden without breaking the bank! With just a few simple steps—selecting healthy stems, bending and securing them, encouraging root growth, and separating new plants—you’ll soon have thriving duplicates of your favorite roses. 🌹
Now that you’re ready to propagate, grab your tools and get started—your garden (and future rose lovers!) will thank you. For extra success, experiment with different rose varieties or share your new plants with fellow gardening enthusiasts. Happy growing! 🌱