
How To
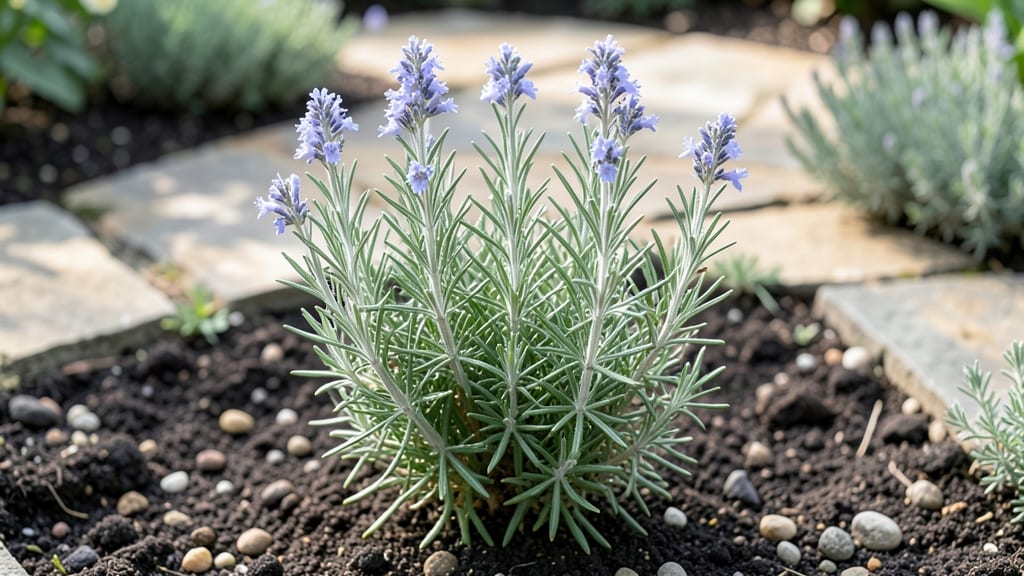
Harvesting the dry rosemary herb at its peak—just before flowering—gives you the most aromatic stems for drying, though I’ve learned the hard way that waiting too long means bitter, woody flavor instead of that bright, piney scent we all love.
The right timing and method turn your kitchen herbs into long-lasting seasoning that outshines store-bought any day.
You'll need just three things: fresh rosemary sprigs, a clean drying space (or oven/dehydrator), and a little patience.
The air-drying method takes about 2-3 weeks but preserves the most flavor, while oven-drying speeds things up to 1-2 hours at 200°F. Either way, the goal is to remove moisture without cooking the delicate oils that carry the aroma.
Once dried, you'll have stems that keep their fragrance for up to a year when stored properly in an airtight container away from light. The flavor stays vibrant for cooking, teas, or even homemade potpourri.
The key is avoiding mold—we'll cover that in the troubleshooting section—and knowing when your rosemary is truly ready.
This method works for both garden-grown and container rosemary, so whether you have a sunny windowsill or a backyard plot, you can create your own pantry staples. Let's get those stems prepped for drying!
📚 In This Guide
- What you need
- Instructions
- Tips and common mistakes
- Wrapping up and next steps
What you need
- ● Fresh rosemary plants: 3–5 healthy, mature plants (preferably organic, pesticide-free). Look for woody stems with vibrant green, needle-like leaves.
- ● Pruning shears or sharp scissors: 1 pair (sterilized to prevent disease). Avoid dull blades—they crush stems and reduce drying quality.
- ● Paper towels or clean kitchen towels: 2–3 sheets (for blotting excess moisture).
- ● Drying method of choice (pick one): Air-drying: A well-ventilated space (e.g., a dark, dry pantry or closet with a temperature between 60–70°F (15–21°C)).
- ● Oven-drying: A conventional oven (set to low heat: 170–190°F (77–88°C)).
- ● Dehydrator: A food dehydrator (set to 95–115°F (35–46°C)).
- ○ Air-tight storage containers: 1–2 glass jars, ceramic crocks, or resealable bags (with silica gel packets optional).
- ● Hanging bundles: Rubber bands or twine (for air-drying).
- ● Food-grade mesh bags: Breathable bags for bulk drying (great for large harvests!).
- ● Desiccant packets: 1–2 (to absorb moisture in storage).
- ● Labeling supplies: Masking tape + marker (to track harvest dates!).
Step-by-Step guide to harvesting and drying rosemary for maximum flavor
Here's how to transform your rosemary into fragrant, long-lasting culinary treasure—no special tools required.
Identify and Harvest Mature Stems
Wait until your rosemary plant has grown at least 6-8 inches tall and shows 3-4 sets of needle-like leaves along the stems. The best time to harvest is early morning when essential oils are at their peak concentration. Use clean, sharp pruning shears to cut stems at a 45-degree angle, just above a leaf node where new growth will emerge.
Focus on harvesting non-flowering stems—once rosemary blooms, the flavor becomes bitter. I like to harvest 1-2 inches from the tips of the stems, leaving the lower portion to continue growing. This encourages bushier, more productive plants. Avoid harvesting more than one-third of the plant at a time, or you'll stress the rosemary and reduce future harvests.
Prepare Stems for Drying
Remove any yellow or damaged leaves from the stems before drying. Bundle 4-5 stems together at the base and secure them with a rubber band or twine. Hang the bundles upside down in a dry, dark, well-ventilated area with temperatures between 65-75°F. A pantry, closet, or even a kitchen cabinet works perfectly—just avoid humid spaces like bathrooms.
Drying takes 2-3 weeks, depending on your climate. You'll know the rosemary is ready when the leaves crisp easily between your fingers and break off the stems with minimal resistance. If mold appears or the stems feel damp after three weeks, try a different drying location with better airflow.
Store Dried Rosemary Properly
Once fully dried, strip the leaves from the stems and store them in airtight containers like glass jars or resealable bags. I prefer small, labeled jars to preserve freshness—label with the harvest date since flavor peaks within 6 months and gradually declines over the next year. Keep the containers in a cool, dark place (not the fridge) to prevent moisture buildup.
For whole sprigs, store them whole in the same containers. Ground rosemary loses flavor faster, so grind only what you need when ready to use. If you notice the leaves turning brown or losing aroma after 3-4 months, it's time to replenish your supply—properly dried rosemary should retain its piney fragrance for months.
Maintain Your Rosemary Plant for Future Harvests
After harvesting, water your rosemary deeply but infrequently—it thrives on neglect. Allow the top inch of soil to dry out completely between waterings, as overwatering causes root rot. Apply a balanced, water-soluble fertilizer every 4-6 weeks during the growing season (spring and summer) to encourage robust, flavorful new growth.
Prune lightly throughout the year to maintain shape and encourage branching. Pinch back the tips of new growth to promote bushier plants. With proper care, a single rosemary plant can provide multiple harvests per year, ensuring you always have fresh or dried rosemary on hand for cooking.
Tips & tricks for perfectly dried rosemary
These little details make all the difference when preserving rosemary's vibrant flavor and aroma.
Timing is Everything: Harvesting in the early morning captures the highest concentration of essential oils, which is why Step 1 emphasizes this timing. If morning isn't possible, opt for late afternoon when the oils are still potent. The 6-8 inch height requirement ensures stems have developed enough leaves for maximum yield—shorter stems simply won't produce enough leaves for worthwhile drying.
Drying Environment Secrets: While the instructions mention 65-75°F as ideal, I've found that adding a small fan near the drying location (without direct airflow) speeds up the process by 30-40% while preventing mold. The key is maintaining that dry, dark environment—humidity is the silent enemy of proper drying. If your kitchen feels damp, consider using a dehumidifier or moving the bundles to a basement closet with better air circulation.
Storage Optimization: The 6-month flavor peak mentioned in Step 3 is why I recommend vacuum-sealing dried rosemary in addition to airtight containers. This extends the flavorful window to nearly a year while preventing oxidation. For whole sprigs, store them in the freezer for up to 6 months if you want to preserve maximum flavor—freezing halts the drying process completely, keeping the leaves fresher longer than air drying alone.
Pro Tips for Dry Rosemary Herb
- These little details make all the difference when preserving rosemary's vibrant flavor and aroma.
- Timing is Everything: Harvesting in the early morning captures the highest concentration of essential oils, which is why Step 1 emphasizes this timing.
- Drying Environment Secrets: While the instructions mention 65-75°F as ideal, I've found that adding a small fan near the drying location (without direct airflow) speeds up the process by 30-40% while preventing mold.
Frequently asked questions
Got questions about working with dry rosemary herb? You’re not alone—this versatile herb has its quirks! Below, we’ve answered the most common questions to help you get the most out of your dried rosemary, whether you’re harvesting, storing, or cooking with it.
How do I know when fresh rosemary is ready to dry?
Harvest rosemary just before it flowers for the best flavor. Look for woody stems with small, fragrant needles—they should snap easily when bent (not bend like a twig). Avoid harvesting after the first flush of flowers, as the flavor becomes bitter. Pro tip: Morning harvests yield the most aromatic oils!
How long does dried rosemary last, and how should I store it?
Properly dried rosemary keeps for 6–12 months if stored in an airtight container (glass jars or vacuum-sealed bags work best). Store it in a cool, dark place—like a pantry or cupboard—to preserve its flavor and potency. Freeze it for up to 2 years if you want to extend shelf life even further!
Can I substitute dried rosemary for fresh in recipes?
Yes! Use 1 teaspoon of dried rosemary for every 1 tablespoon of fresh. Since drying concentrates the flavor, start with less and adjust to taste. For dishes like roasted meats or bread, dried rosemary works beautifully—just crush the stems gently to release the oils before adding it to recipes.
Why does my dried rosemary smell weak or lose flavor?
Weak-smelling dried rosemary usually means poor drying conditions (too much humidity or light exposure) or old age. To revive it, crush the stems lightly or toast them in a dry pan for 1–2 minutes to reactivate the essential oils. If it’s past its prime, it’s time to harvest a fresh batch—rosemary’s flavor peaks when dried correctly!
Can I dry rosemary in the microwave or oven?
While both methods work, air-drying is best for preserving flavor. If you’re short on time, the oven method is a quick alternative: Spread stems on a baking sheet at 200°F (95°C) for 1–2 hours until crisp. Avoid microwaving—it can steam the herbs, dulling their aroma. For optimal results, stick to traditional hanging or bundle drying!
Wrapping up and next steps
Harvesting and drying rosemary herb doesn’t have to be complicated—with the right techniques, you’ll enjoy bold, aromatic stems that elevate your dishes for months! Whether you’re a seasoned gardener or a curious beginner, fresh rosemary transforms into a kitchen staple with patience and care.
Start small, experiment with storage methods, and soon you’ll be savoring homemade seasonings in every meal.
Ready to take your herb game to the next level? Plant a few more rosemary bushes this season—your future self (and taste buds) will thank you! 🌿