
Shrubs
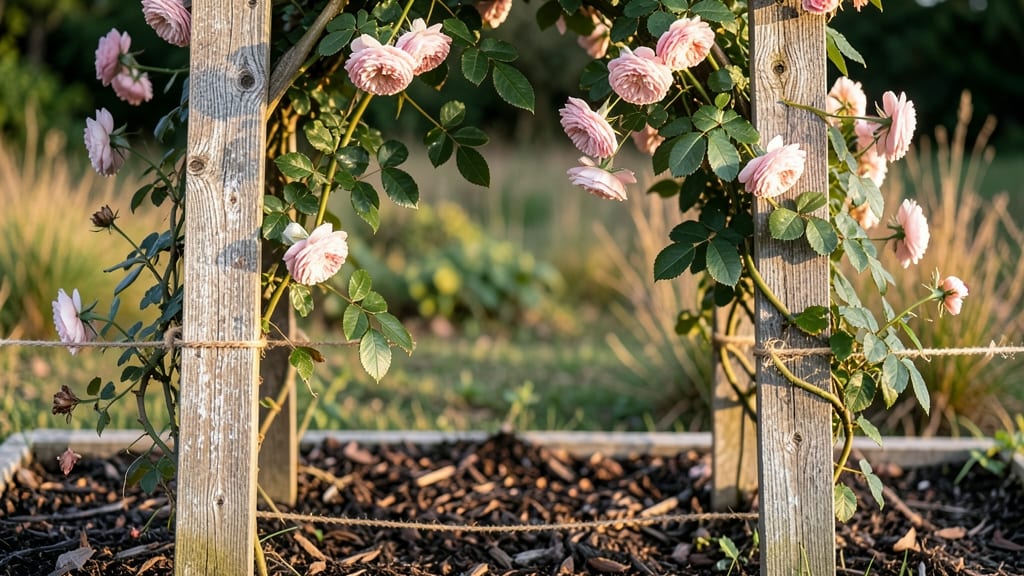
A romantic garden entrance in just 3 hours? ✨ This DIY rose archway transforms any yard into a fairytale gateway—no green thumb required.
I built mine last spring using simple materials and a few climbing roses, and now it's the centerpiece of our front yard, covered in fragrant blooms by summer.
The secret lies in sturdy supports (I used galvanized metal pipes) and the right rose variety—disease-resistant climbers like 'New Dawn' or 'Blaze' thrive with minimal fuss.
You'll need basic tools, a few hours on a clear day, and a spot where you can sink posts deep enough to handle winter winds. The payoff? A fragrant, living arch that grows more beautiful every year.
By the time your roses take hold, you'll have a lush, fragrant tunnel that frames your garden perfectly. Add string lights for evening magic, or plant sweet peas at the base for extra color. The best part? It only gets prettier with time.
Works for small patios, large backyards, or even as a garden room divider. Let's get building—your garden entrance deserves this kind of romance!
📚 In This Guide
- What you need
- Instructions
- Tips and common mistakes
- Wrapping up and next steps
What you need
- ● Rose bushes: 6–12 healthy, thornless rose plants (choose climbing or rambling varieties like ‘New Dawn,’ ‘Blaze,’ or ‘Zephirine Drouhin’—3–4 feet tall).
- ● Arch frame: Wooden arch kit (pre-cut, 4–6 feet wide, or DIY with 2x4 lumber and ½” plywood for structure).
- ● Galvanized metal wire (16-gauge, 100+ feet) for securing roses.
- ● Soil & amendments: 2–3 bags garden soil (or potting mix for containers).
- ● 1 bag compost or rose-specific fertilizer (10-10-10 or 5-10-5 NPK ratio).
- ● Mulch (wood chips or straw, 1 cubic yard).
- ○ Decorative touches (optional): Fairy lights (solar-powered or battery-operated).
- ● Wood stain or paint (for a rustic or modern look).
- ● Small potted flowers (e.g., petunias or ivy) for filler gaps.
- ● Measuring tape and level.
- ● Circular saw or miter saw (if building the arch from scratch).
- ● Drill with screws (deck screws, 2–3 inches long).
- ● Wire cutters and pruning shears.
- ● Garden gloves (thorn-proof!) and knee pads.
- ● Shovel or trowel for planting.
- ● Hose with spray nozzle.
- ● Sunlight: Choose a spot with 6+ hours of direct sun daily—roses thrive on light!
- ● Location prep: Clear the area of weeds/grass and mark the arch’s footprint with stakes.
- ● Timing: Plant roses in early spring or fall (avoid extreme heat or frost).
- ● Water source: Ensure easy access to water for the first 2–3 weeks.
Step-by-Step instructions for building a DIY rose archway
Here's how to create a stunning, functional archway that frames your garden entrance beautifully.
🪴 Step 1: Gather Materials and Prepare the Base
Start by selecting a sturdy base for your archway. I like using two 4-foot wooden posts (4x4 lumber works perfectly) for stability. Dig two holes about 12 inches deep and 6 inches wide where you want the posts to stand. The distance between them should be roughly 4 feet to accommodate a standard 4-foot arch.
Mix 1 part concrete with 3 parts sand and add water until it reaches a thick, peanut butter-like consistency. Pour this mixture into the holes, then set the posts upright, ensuring they're perfectly vertical. Use a level to check and adjust as needed. Let the concrete set for 24 hours before proceeding—this ensures your archway won't wobble when you start building.
✂️ Step 2: Construct the Arch Frame
For the arch frame, you'll need two 4-foot lengths of 2x4 lumber and two 4-foot lengths of 1x4 lumber. Cut the 2x4s in half diagonally to create two curved pieces—these will form the top of your arch. The curves should meet at the center, creating a graceful arc. Use a jigsaw for clean, smooth cuts, and sand any rough edges.
Attach the curved 2x4 pieces to the top of your posts using 3-inch deck screws. Pre-drill holes to prevent wood splitting, and use a level to ensure both sides are even. Then, attach the straight 1x4 pieces horizontally between the posts at 12-inch intervals to create a lattice structure. This will support your climbing roses and give them something to grip as they grow. Step back and admire your framework—it's already taking shape!
🌱 Step 3: Add Trellis and Support for Roses
To give your roses plenty of support, wrap 12-gauge wire horizontally across the lattice at 6-inch intervals. Bend the wire into gentle curves to create a natural climbing path for the roses. Secure the wire with small staples or zip ties, ensuring it's taut but not too tight—you want it flexible enough to guide the vines as they grow.
Next, plant your roses at the base of the archway. Dig holes 12 inches deep and 12 inches wide for each rose bush, spacing them about 18 inches apart. Mix 1 cup of bone meal into the soil at the bottom of each hole to provide phosphorus for strong root development. Place the rose bush in the hole, backfill with soil, and water deeply to settle everything. Mulch around the base with 2 inches of organic mulch to retain moisture and suppress weeds.
☀️ Step 4: Train the Roses and Maintain Growth
Once your roses start to grow, gently tie the main stems to the bottom wires of the trellis using soft plant ties. As the vines grow, guide them upward and weave them through the lattice. Prune any side shoots that form at the base to encourage the plant to focus its energy on climbing. You'll want to prune again in early spring to shape the plant and remove any dead or weak growth.
Water your roses deeply once a week, or more often during hot, dry spells. Aim for 1 inch of water per week, delivered at the base of the plant to keep the foliage dry and prevent disease. Fertilize every 4-6 weeks during the growing season with a balanced rose fertilizer to keep your plants blooming beautifully. With consistent care, your archway will become a stunning focal point in your garden.
🌿 Step 5: Add Finishing Touches and Enjoy
After a few months, your roses will begin to climb and fill out the archway, creating a romantic entrance to your garden. To enhance the look, consider adding ivy or other trailing plants to fill in any gaps. You can also incorporate string lights or solar-powered garden lights to illuminate the archway in the evening, adding to the ambiance.
Regular maintenance is key—prune your roses after each blooming cycle to encourage continuous flowering, and keep an eye out for pests like aphids. A quick spray of water or a gentle application of neem oil usually does the trick. Step back and enjoy your hard work—a DIY rose archway is a labor of love that pays off in beauty and charm for years to come.
Tips & tricks for building your perfect DIY rose archway
Between us, these little details make all the difference between a sturdy, show-stopping archway and one that might lean dangerously or fail to support your roses properly.
Foundation First: Don't rush the concrete setting time in Step 1. That full 24 hours isn't just a suggestion—it's the difference between a wobbly archway and one that stands strong for years. I've seen people skip this and end up with posts that shift when they start attaching the frame. Pro tip: If you're in a hurry, use quick-setting concrete mix, but still let it cure for at least 12 hours before proceeding.
Cutting the Curves: When cutting those diagonal pieces for your arch in Step 2, mark your cuts carefully before making them. I like to use a pencil and a flexible curve template to ensure both sides match perfectly. Remember, the curves should meet at the center—this creates that graceful, symmetrical look. A jigsaw works great, but if you don't have one, a handsaw will work if you're patient and take your time. Sanding those edges smooth is non-negotiable; rough edges will snag your roses as they grow.
Wire Placement: For the trellis wires in Step 3, I recommend spacing them slightly closer together at the bottom—about 4 inches apart for the first few wires—since that's where the most growth will start. This gives your roses more support where they need it most. When bending the wire, think of gentle waves rather than sharp curves; this mimics how vines naturally climb and gives them something to grip comfortably. Use zip ties instead of staples if you want to make future adjustments easier.
Planting Strategy: In Step 3, consider planting your roses slightly closer to the posts—about 12 inches from each—rather than the full 18 inches apart. This creates a more dramatic, lush look as the roses fill in the archway. Just be sure to give them enough space so they don't compete for nutrients. And here's a secret: if you're using multiple rose bushes, plant them at slightly different heights. This creates a natural, layered effect as they grow.
Pro Tips for Diy Rose Archway
- Between us, these little details make all the difference between a sturdy, show-stopping archway and one that might lean dangerously or fail to support your roses properly.
- Foundation First: Don't rush the concrete setting time in Step 1.
- Cutting the Curves: When cutting those diagonal pieces for your arch in Step 2, mark your cuts carefully before making them.
Frequently asked questions
Got questions about creating your dream DIY rose archway? You’re not alone! Here are answers to the most common concerns to help you plan like a pro.
How long does it take to build a rose archway?
With the right prep, you can complete a basic rose archway in 3–6 hours, depending on the size and complexity. Smaller arches (3–4 feet wide) take less time, while larger or multi-tiered designs may require extra hours for wiring, pruning, and securing roses. Break it into stages (like building the frame first) to save time!
Can I use other flowers besides roses?
While roses are classic, try clematis, jasmine, or climbing hydrangeas for lush greenery. For year-round color, mix in ivy, bougainvillea, or wisteria. Just ensure your chosen plants thrive in your climate and have flexible stems for training. Pro tip: Check bloom times to avoid gaps in color!
What’s the best way to keep roses alive in an archway?
Healthy roses need 6+ hours of sunlight, well-draining soil, and regular watering (deep but infrequent). Prune dead blooms and trim overgrowth in spring to encourage new growth. Use mulch to retain moisture and protect roots. If your roses wilt, check for pests (like aphids) or root rot—adjust watering or add fertilizer if needed.
Do I need special tools for this project?
Mostly basic tools! You’ll need pruning shears, wire cutters, a drill, and a measuring tape. Optional but helpful: a staple gun (for securing wire), gloves (to protect from thorns), and a level for straight arches. Rent or borrow tools if you’re unsure—many hardware stores offer kits for DIY garden projects.
Will the archway survive winter?
Yes, but with care! In cold climates, wrap the arch in burlap or use frost cloth to protect roses. Prune back dead wood in late winter, and mulch heavily around the base. Choose hardy rose varieties (like ‘Knock Out’ or ‘Dr. Huey’) if you live in Zone 5 or colder. Water sparingly in winter unless the ground is frozen.
Wrapping up and next steps
Creating your own DIY rose archway is a rewarding project that adds charm and romance to any garden entrance! With the right materials, a little patience, and this step-by-step guide, you’ve got everything you need to craft a stunning focal point that will impress for years to come. 🌹✨
Now that you’re armed with tips and answers to common questions, it’s time to roll up your sleeves and bring your vision to life. Start by gathering your supplies, then follow the steps with confidence—your garden (and future guests) will thank you!
For extra flair, consider adding twinkling lights or a small plaque to personalize your masterpiece. Happy building!