
Pruning
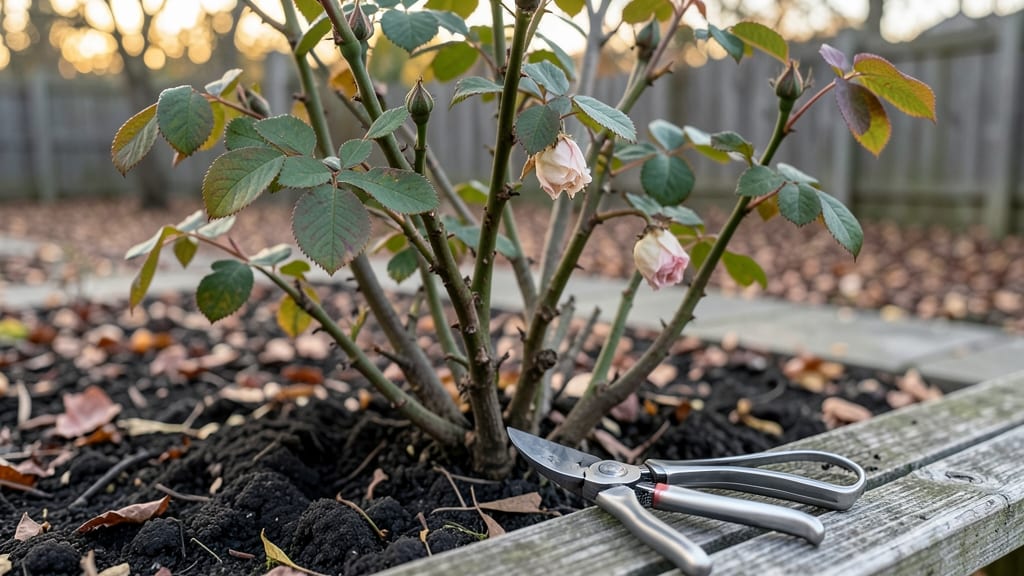
Cutting back roses in autumn isn’t just about tidying up—it’s the secret to next spring’s showstopper blooms. 🌹 I’ve learned that skipping this step means weaker stems, fewer flowers, and plants that struggle to bounce back from winter.
The right timing and technique make all the difference, and I’ll show you exactly how to do it without stress. Start after your first hard frost when roses have entered dormancy—this is when they’re tough enough to handle pruning.
Grab sharp bypass pruners, disinfect them with rubbing alcohol, and wear gloves (trust me, thorns don’t care about your manicure). The goal is to remove about ⅓ of the plant’s height, cutting just above an outward-facing bud or branch.
What you’ll end up with is a rose bush that’s disease-resistant, well-ventilated, and primed for explosive spring growth. Those thick canes you’re cutting now will pack energy for hundreds of blooms—plus, you’ll avoid the heartbreak of leggy, sparse plants.
For regions with mild winters, wait until late winter to prune. Here’s the kicker: Never prune in fall if your roses are still blooming. That’s a surefire way to shock the plant.
And if you’re unsure about a cut, remember—you can always prune more later, but you can’t uncut what’s gone. Ready to transform your roses?
📚 In This Guide
- What you need
- Instructions
- Tips and common mistakes
- Wrapping up and next steps
What you need
- ● Pruning shears or loppers: Sharp, bypass-style shears (for clean cuts) or loppers (for thicker stems). Sanitize with rubbing alcohol or bleach solution (1 part bleach to 9 parts water) to prevent disease spread.
- ● Gloves: Heavy-duty, cut-resistant gloves (thorns are no joke!). Opt for gardening-specific gloves with reinforced palms.
- ● Disinfectant spray or solution: 10% bleach-water mix (as above) or a commercial pruning sealant to protect open cuts.
- ● Rake or leaf blower: For clearing fallen leaves/debris from the rose bed (1–2 feet around the base).
- ● Compost or mulch: 2–3 inches of aged compost or rose-specific mulch (e.g., pine bark) to enrich soil.
- ○ Markers or flags: Optional but helpful—use biodegradable plant ties or stakes to mark stems you’re unsure about.
- ● Hand pruners for small stems: For precision cuts on 1/4-inch diameter or smaller branches.
- ● Knee pad or stool: Because comfort matters when you’re on your hands and knees for hours!
- ● Fertilizer: Slow-release rose fertilizer (apply post-pruning, if desired).
- ● Trash bags or bin: For hauling away pruned stems (wear gloves—thorns are sneaky!).
- ● Notebook & pen: To jot down notes on variety-specific pruning tips or next year’s goals.
Step-by-Step guide to cutting back roses in autumn
Here's how I transform my roses each fall—it takes less than an hour and sets up next year's showstopping blooms.
✂️ Step 1: Time Your Pruning Perfectly
Wait until after your first hard frost but before winter's deepest freeze. This timing—typically late November to early December in most climates—lets the plant rest while removing dead growth that could harbor pests. You'll know it's time when the foliage has browned and fallen naturally, but before the ground freezes solid.
I always prune on a dry, sunny day when temperatures are above 40°F. Cold, wet conditions make cuts heal poorly and invite disease. If you're unsure about frost dates, check your local cooperative extension service—they provide precise seasonal timelines for your region.
✂️ Step 2: Gather Your Tools and Safety Gear
You'll need clean, sharp pruning shears (I use bypass pruners for clean cuts), gardening gloves (roses have thorns that draw blood), and a bucket of soapy water for sterilizing tools between cuts. Disinfecting your shears prevents spreading fungal diseases like black spot from plant to plant.
Wear long sleeves and closed-toe shoes—roses can be vicious when you're working close. I keep a small first-aid kit handy too. The goal is to work efficiently without getting distracted by thorns or sore fingers. A sharp tool makes quick work of stems and reduces stress on the plant.
✂ Step 3: Remove All Dead and Diseased Wood
Start by cutting out any black, mushy, or hollow stems—these are dead and will never recover. Look for dark brown or blackened canes that feel soft when touched. These are prime targets for removal. Healthy wood should be firm and greenish-brown underneath the bark.
Next, locate any canes showing signs of disease like black spots, powdery mildew, or oozing sap. Cut these back to healthy green wood, making your cuts just above an outward-facing bud (about ¼ inch above). This encourages new growth in the right direction next spring.
✂ Step 4: Trim Back Healthy Canes to the Right Height
For most rose varieties, cut healthy canes back by about one-third—this prevents them from growing too tall and flopping over in spring. Look for the strongest canes (thickest stems with the most buds) and leave these longer. You'll see these as the largest, most vigorous stems in the center of the bush.
Make your cuts at a 45-degree angle, about ¼ inch above an outward-facing bud. This angled cut helps rainwater run off instead of pooling on the stem. Avoid leaving stubs—these can rot or attract pests. If you're unsure which buds face outward, imagine drawing a line from the bud outward from the center of the plant.
🪴 Step 5: Clean Up and Prepare for Winter
After pruning, remove all plant debris from the base of the rose bush and your garden area. This prevents pests and diseases from overwintering. I rake up all fallen leaves and dispose of them in the trash—not the compost pile—since they may harbor fungal spores.
Apply a 2-3 inch layer of mulch around the base of the plant (but not touching the stems) to insulate roots. I use straw or shredded leaves because they break down slowly and provide consistent protection. Water the base thoroughly before winter sets in to help roots establish through the cold months.
Tips & tricks for perfect autumn rose pruning
Here's what nobody tells you about giving your roses the best possible winter prep.
Timing is Everything: The late November to early December window is ideal, but don't stress if you miss it. In warmer climates, you can extend this to early January as long as you've had a hard frost. I've pruned successfully in mid-December when temperatures stayed above freezing during the day. The key is avoiding frozen ground—roots need to be workable, not rock-hard. Check your local frost dates if you're unsure.
The 45-Degree Cut Secret: When making those angled cuts in Step 4, think of the "rainwater rule"—water should run away from the bud, not pool on it. I hold my pruners at a 45-degree angle and make the cut just above the bud, then gently pull the stem away to check the angle. This simple technique prevents rot that can kill next year's blooms. For stubborn stems, I use my thumb to guide the angle while cutting.
Tool Maintenance Matters: That bucket of soapy water in Step 2 isn't just for sterilization—it's your insurance policy. I keep a separate bucket for each rose bush I prune, changing the water every 10 minutes. For extra protection, I add a few drops of rubbing alcohol to the soapy water. Sharp tools are non-negotiable too; dull shears crush stems instead of cutting cleanly, causing more damage than the cut itself.
Mulch Layer Precision: That 2-3 inch mulch layer in Step 5 is your rose's winter blanket, but placement matters. Pile mulch around the base (like a donut) but keep it 2-3 inches away from the stems. Too close and it can rot the base. I use straw because it breaks down slowly and insulates better than leaves, which can mat down when wet. For extra protection in cold climates, I add a layer of burlap around the bush before mulching.
Pro Tips for Cut Back Roses In Autumn
- Here's what nobody tells you about giving your roses the best possible winter prep.
- Timing is Everything: The late November to early December window is ideal, but don't stress if you miss it.
- The 45-Degree Cut Secret: When making those angled cuts in Step 4, think of the "rainwater rule"—water should run away from the bud, not pool on it.
Frequently asked questions
Got questions about trimming your roses in autumn? You’re not alone! Here are some of the most common concerns—and their straightforward answers—to help you prune with confidence.
When is the exact best time to cut back roses in autumn?
The ideal window is after your first hard frost (when temps dip below 25°F) but before winter’s worst chill sets in. This timing balances disease prevention and stem protection. Pro tip: If you’re in a mild climate (Zones 8-10), wait until late November or December to avoid encouraging new growth that could freeze.
Do I need to cut roses all the way down to the ground?
Not necessarily! For hardy varieties (like Knock Out roses), trim back by ⅓ to ½ their height. For tender climbers or hybrid teas, reduce stems to 12–18 inches tall. Leave 3–5 strong canes (or buds) per plant to ensure spring regrowth. Never remove more than ⅓ of the plant in one go!
Will cutting roses in autumn attract pests or diseases?
Pruning in autumn can invite issues if tools or cuts aren’t sanitized. Prevent problems by:
- Disinfecting shears with rubbing alcohol or bleach water (1:9 ratio).
- Avoiding pruning during wet weather (wait for dry, sunny days).
- Removing all debris from the base to deter fungal spores.
If your roses have black spot or powdery mildew, prune only dead/diseased wood first, then sterilize tools again.
What if I forget to prune before winter? Can I still do it in early spring?
Spring pruning (just before new growth starts) is better than no pruning. Focus on:
- Removing dead, crossing, or weak stems first.
- Cutting back by ⅓ to open airflow and reduce disease.
- Shaping the plant for the season ahead.
Just be patient—spring-pruned roses may bloom 4–6 weeks later than those trimmed in autumn.
How do I protect roses from winter damage after pruning?
After trimming, mulch heavily (4–6 inches of straw or shredded leaves) around the base to insulate roots. For tender varieties, wrap canes loosely with burlap or rose cones, securing with twine. Pro tip: Avoid heavy mulch touching stems—it traps moisture and rot. In Zone 5 or colder, add a 12-inch layer of leaves over mulch for extra insulation.
Wrapping up and next steps
Cutting back your roses in autumn isn’t just about tidying up—it’s a powerful step to ensure vibrant, healthy blooms next spring! 🌸 With the right tools, timing, and technique, you’ll set your garden up for success.
Now that you’re armed with the know-how, take action—grab those pruners and give your roses the care they deserve.
Ready to transform your garden? Start today! Check your local frost dates, gather your supplies, and roll up your sleeves. Your future roses will thank you with bold, beautiful blooms come spring!